Welcome back to Cnuteneering, where the possible is made more difficult by bone headed ignorance, overenthusiasm and pointy metal things being brought together.
You may want to refresh your memory on the project in:
Design goals:
Fast as possible on offroad; too big to have on roads. I will set a target speed of 50mph.
4 WD.
Must be able to reverse, and brake.
Unbreakable, or as close to.
Must be able to mount GoPro or similar camera on it.
Cheap as possible.
We left the last episode of Cnuteneering putting the roll cage together. There was some mathematical unpleasantness and a brain / calculator / finger fail on calculating the length of things.
We are over that now.
I used the wet cloth over the box section trick to hold the heat back from the first joint but it was still hot enough to begin melting the first braze above where I was working. This does not bode well for brazing the two cross section pieces that will make up the roof / TelePi mount; the brazes are much closer together.
I will have to use the JB Weld epoxy for that I think. But still, brazed, Dremeled and sanded and we are good to go.
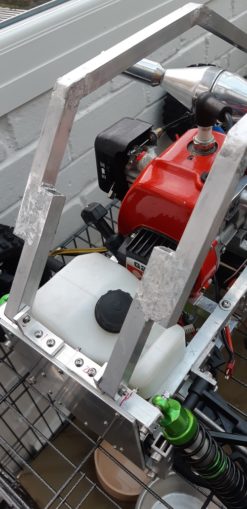
In the meantime, I still have to finish the canopy to rectify my mistake and put the cross pieces in, work out how I am going to sort out the extender for the transmission to the front wheels and Loctite the central differential gears in place. I have another idea for the extender but I need a piece of aluminium pipe to be delivered.
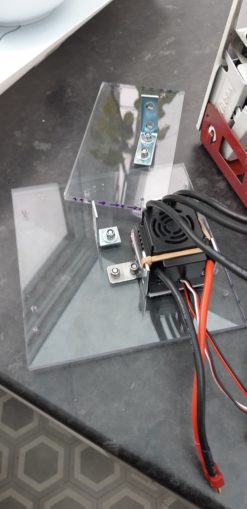
Next up is to make some kind of housing to protect the ESC for the electric motor. The Electronic Speed Controller is the gubbins that drives the brushless motor and will give me my brakes and reverse gear.
A few bits of steel 90 degree angle brackets and the bit of plastic off an old battery case and it is done.
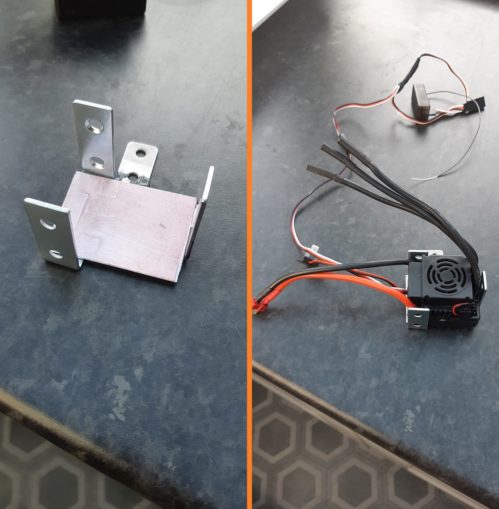
A rubber band over the top to stop it from popping out and it is ready to fit. I glued a little tag along the side which will bolt the housing to the bottom tray.
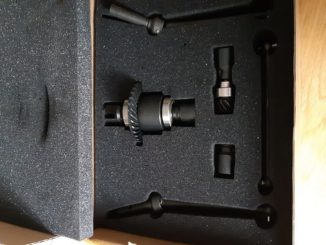
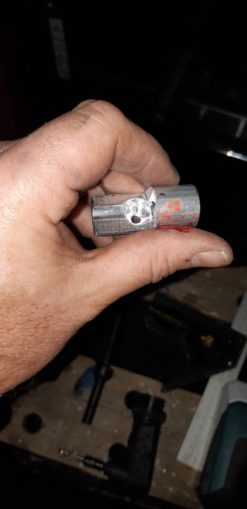
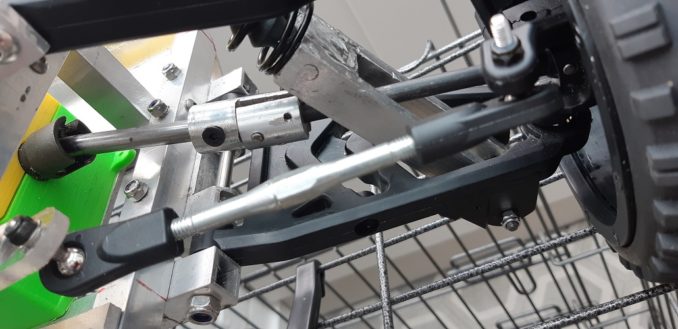
The aluminium tube arrives and it is time to get the driveshaft extenders made. I did have a go at making these out of plate aluminium but they’d shake themselves apart in seconds I reckon.
I cut a section from the pipe, and then use progressively smaller drills to try to give me a spherical cross section for the ball end of the driveshaft to fit into. Instead of cutting a channel in the pipe for the lugs to go through, I just drill a hole to accept the lug on each side.
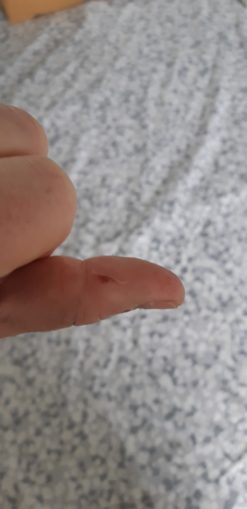
But the Gods of Cnuteneering are angry!
Blood sacrifice must be made! When trying to drill the sphere out, I was being cheeky by not clamping the piece in the vice and was rewarded with a vicious slash across my thumb. I was very brave, which is just as well because MBWKaren had little sympathy for my injury.
Now that the ball end of the driveshaft is fitted, I need to drill and tap some holes in the two sides to pull them tightly together and clamp the ball tightly (filth).

I cut a short piece of steel bar to fit in the other end of the pipe, drill all the way through it and tap the far side of the aluminium pipe.
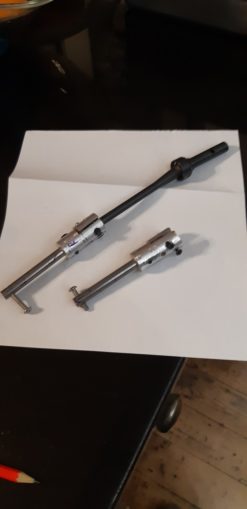
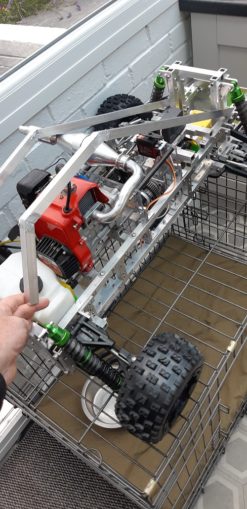
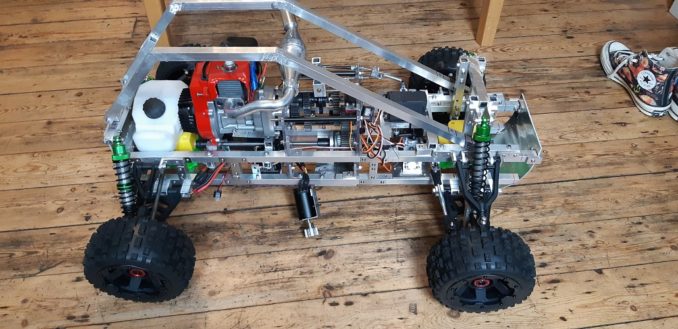
Not the prettiest of looks, but the important thing is that now I have a complete drive train from engine and motor, all the way through to the wheels. This is actually quite exciting as it’s the first time I’ve had this.
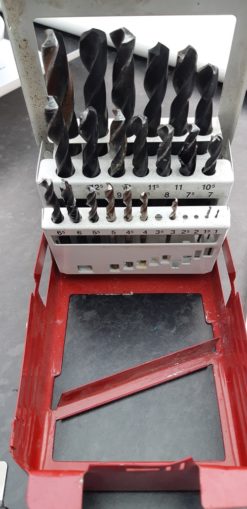
Unfortunately during the process of building these, I broke my last 2mm, 2.5mm and 3.5mm drillbits.
My drill box looks like the product of a sugar intensive diet or a bout with a drunk dentist.
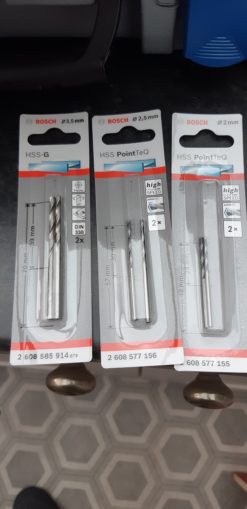
Luckily my Forward Planning Committee had been working on time and I had but one night before I the drillbits arrived.
Luckily the thoughts and prayers of the Puffinati helped greatly and the light of thousands of tealights worked to heal my wounds:
I can now fit the driveshafts and the drivetrain is complete!
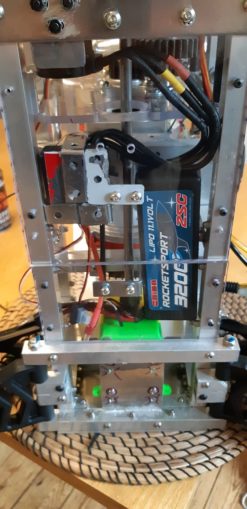
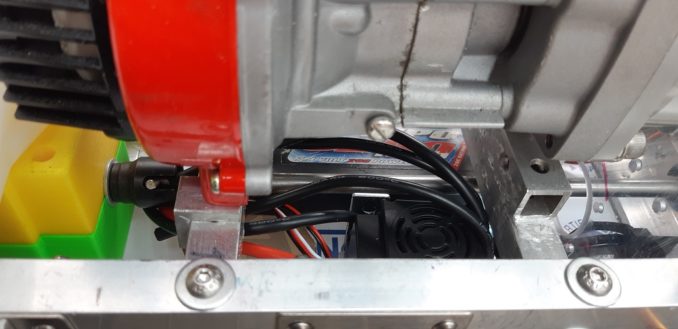
With that all sorted out I need to get the electrics into the car, the ESC, the battery and the radio control receiver.
The extra plate has the steel bracket on it to push the battery into the lower rectangle chassis.
For once the pieces fit together nicely with no further fettling required:
This is now quite exciting as I am so very, very near seeing if everything works or not. Unfortunately this is the day that London floods, and it is pissing it down with rain all afternoon when I need to be outside and preferably with the hot engine and electrics not getting soaking wet. Despite the blood sacrifice, the Gods of Cnuteneering are quite obviously still angry.
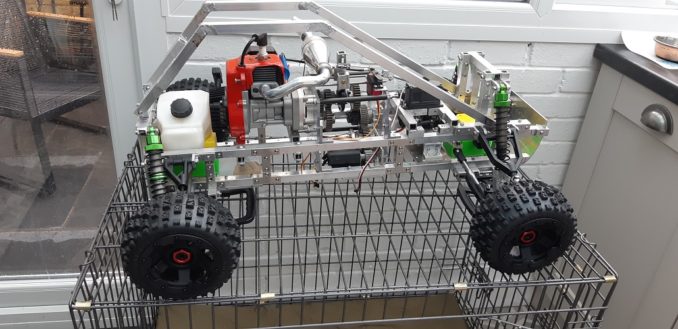
Testing is limited to what I can do indoors, so I prop the Cnutmobile up on a few tins of soup, leave the petrol motor off, check the wiring and nervously switch everything on.
The gearbox is too tight for the electric motor to turn. Bugger, bugger and thrice bugger. Undeterred, I unhook the motor from the drive train and just try to push the car along the floor.
I expect a little bit of friction, and if I have done my sums right there should be a real mechanical disadvantage in pushing the car along (because there should be a big mechanical advantage when the wheels themselves are trying to move the car forwards).
It skids and binds even with no linkage to either the motor or the engine.
The rain has lessened a little as evening draws closer and I think – perhaps the vibration of the engine will move stuff about into more favourable positions.
Full of nervoucitement, I step into my luxury fully appointed test garage and workshop, and fire up the engine.
And here we have it – the first ever drive of the Cnutmobile! (adjust your volume before hitting play, this is loud!)
Now, I just need to work out what is binding in the gearbox; far from 50mph the car is lucky to crawl along at 90% throttle.
/shakes fist at sky
Still waiting for:
Still left to do / think about
End point adjustment for servos and control mechanisms Dumbo RC setup
Siting of RPM counters
Siting of battery and control gear
Loctite gears in place
Finish rollcage with picam mounting
Body shell
Pics, vids, words and music © El Cnutador 2021
The Goodnight Vienna Audio file