Welcome back to Cnuteneering, where the possible is made more difficult by bone headed ignorance, overenthusiasm and pointy metal things being brought together.
You may want to refresh your memory on the project in:
Design goals:
Fast as possible on offroad; too big to have on roads. I will set a target speed of 50mph.
4 WD.
Must be able to reverse, and brake.
Unbreakable, or as close to.
Must be able to mount GoPro or similar camera on it.
Cheap as possible.
We left the last episode of Cnuteneering with some delightful forward motion. This was definitely a big step forwards in the build, but it did expose a few design and build flaws. I need to put about 90% throttle on in order to just about get moving, so clearly there is too much resistance in the drive train. This is going to wear the clutch out and no mistaking.
Foolishly doing a little guerrilla Cnuteneering over lunch (mostly to step away from the keyboard) I revved the engine up only for it to choke off and sputter into silence, stalled. The pull start was jammed.
Something had clearly gone wrong and I did worry that it is the connecting rod (or conrod as us Cnuteneer pro’s call it, /buffs nails on lapel) had shattered. Replacing that would be both tedious and expensive I believe. Either that or a piston ring might have overheated and welded itself to the combustion chamber.
Not having had any experience in rebuilding petrol engines, this was a cause of some worry. After some good advice from the puffinati on here, I resolved to take the drive train apart and see what had broken.
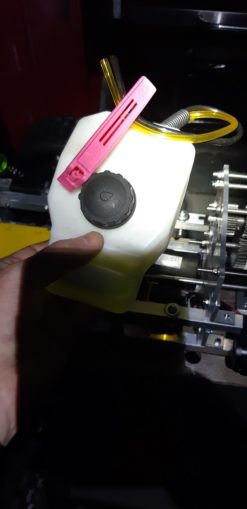
Firstly I removed the petrol tank, clipping the tubes so that petrol would not spray everywhere.
The engine was surprisingly easy to remove – four bolts to hold it to the gearbox, four bolts to hold it to the chassis.
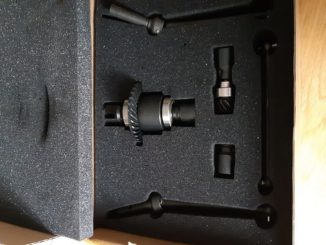
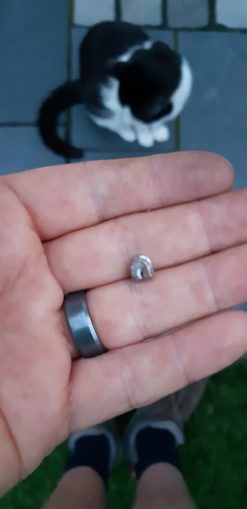
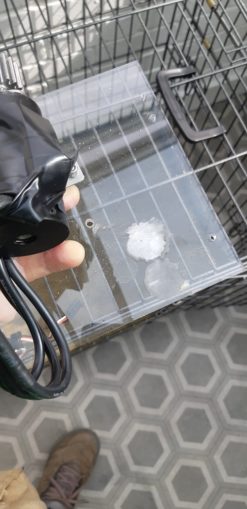
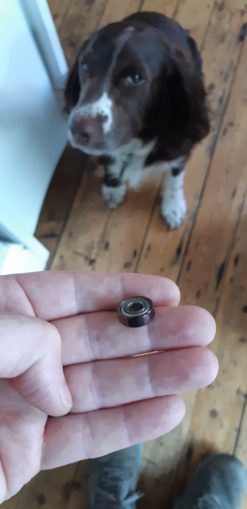
On disassembling the clutch, I found the culprit.
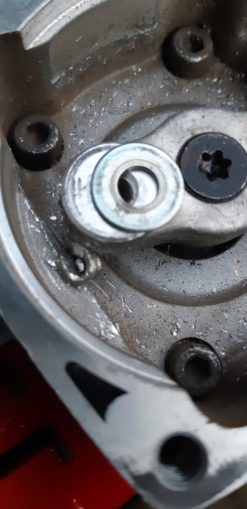
It seems as if a washer had somehow gotten into the clutch, and gotten mangled by the spinning clutch shoe holder. It must have gotten _very_ hot indeed as that was a steel washer, bent and folded over as if it is paper.
I just hope that it did not bend any of the crankshaft that goes into the engine, but at least the engine turns over now when I pull the starter cord. Cautiously optimistic, but in Cnuteneering anything can and will happen. At this point I have no idea if the engine will fire or not, but I’m going to leave it be until I have sorted out the gearbox and drive train properly.
One other thing that completely fails is the steering. The saddle that I am using is pulling one side in too much of a circle and the outer wheel on any turn is just not moving anywhere near as much. I am sure OldTrout can explain it with tangents to the locus and all that but really at the heart of it, the problem is that the servo should be connected to the turnbuckles much closer.
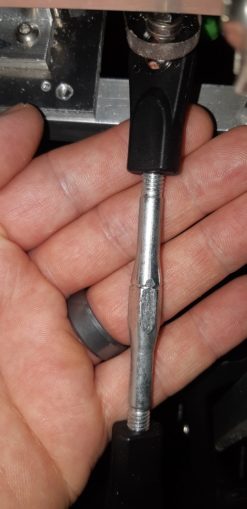
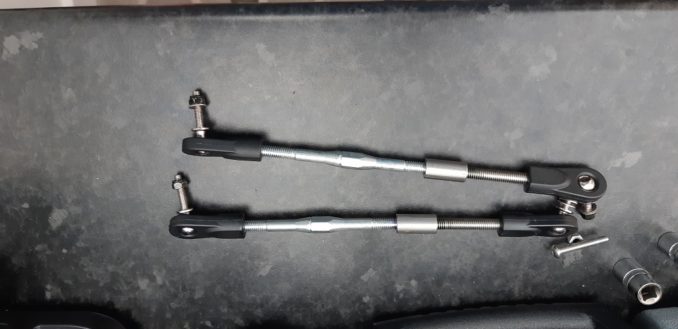
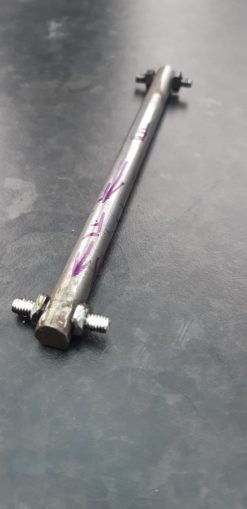
This is the turnbuckle, you can see where it attaches to the steering saddle. The idea is that the ends of the turnbuckle have a “normal” thread, ie one that gets tighter if you turn it clockwise, and another “reverse” thread that tightens if you turn it anticlockwise. So because the turnbuckle is threaded into two parts (the black plastic bits), turning it one way pulls the plastic bits closer together, turning it the other pushes them apart.
This is how you trim the steering so that the wheels are natural straight, or ideally with just a little toe-in.
I clearly had a brainfart the day I built the steering saddle though:
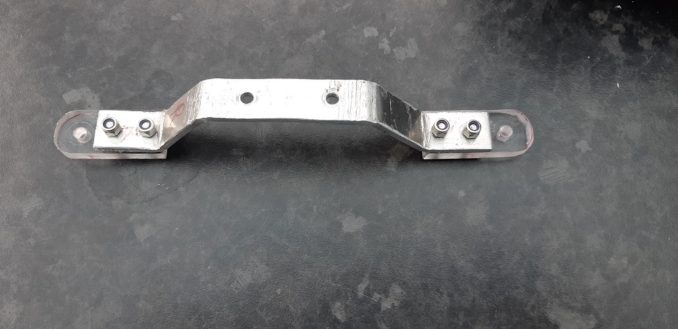
The holes in the middle are where the servo horn attaches.
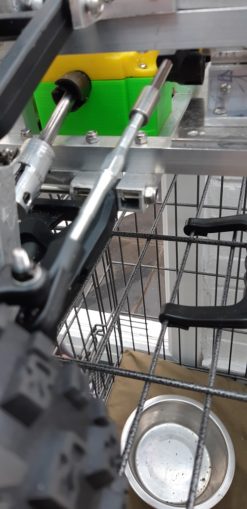
What I actually should have done is to extend the turnbuckles with a bit of threaded sleeve and some M6 threaded bar. A short wait and eBay comes up trumps.
And they seem to fit OK with plenty of clearance around the chassis, and also the central driveshaft. This is quite important as the front of the car has a lot of spinning, moving around parts in the way of things.
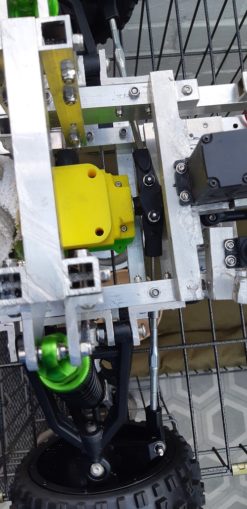
And now we can see that the steering mechanism looks a good deal clearer than it did before.
Of course, all of this jiggering is really avoiding the real issue, that of the gearbox and drivetrain not being up to the job.
Looking at it I can see several sources of friction in the gearbox, and my Braheelian Actual Engineer In Real Life comes over to mark my homework it seems. Together we identify several points of concern.
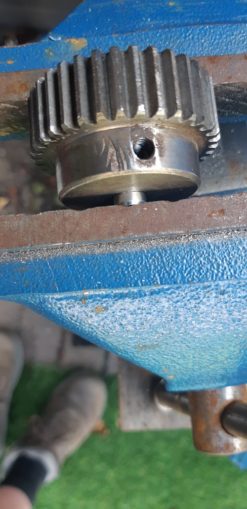
In the pic above, the collar is pushing the washer into the bolt heads that hold the washers that hold the bearing in place inside the polycarbonate, which is causing friction which is not my intention. I think if I put a 6mm Inside Diameter, 8mm Outside Diameter bush in there, it will press against the internal roller of the bearing and so should not cause any friction anymore. This’d be great if I had any of these left, so it is off to Bearing Boys” to order a job lot. Good bunch of lads there, they have been very helpful in the past in sourcing some of my more outré gear requirements.
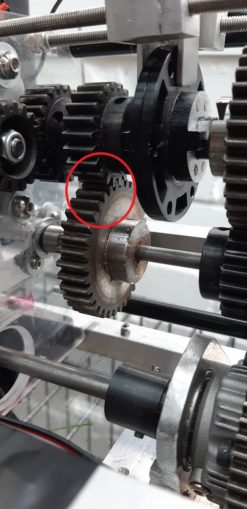
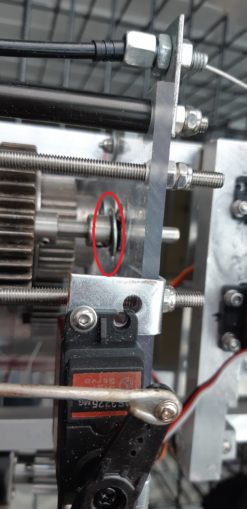
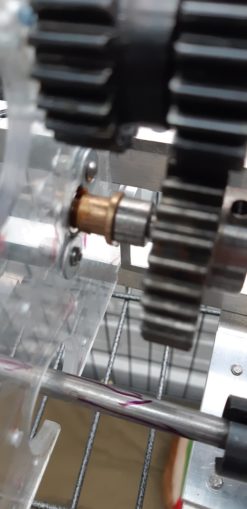
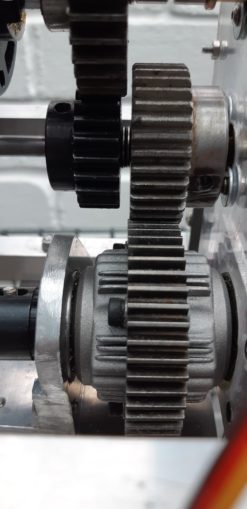
The next area of concern is this gear pairing that is circled. These gears are just too close together, which is causing all sorts of resistance in the drivetrain. I am going to have to sand and epoxy fill the bearing mount I think, to give them some space, man.
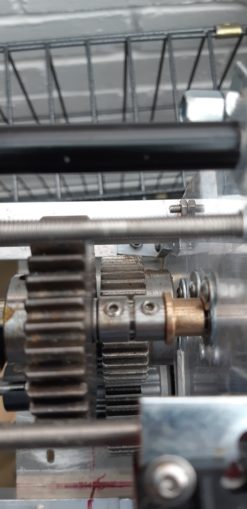
The last area of concern is twofold though.
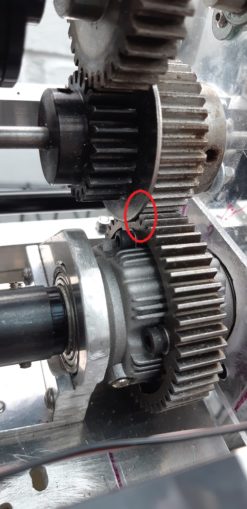
The Lammywasher keeps binding on the bottom differential gear, and more worryingly I don’t think the silver gear at the top right of the red circle is properly bushed on to the spindle that holds it. Turning the spindle, the gear is nor rotating perfectly around the axis of the shaft, which is causing big wobbles.
This is quite bad and I will need to make sure I have properly bushed it from each end.
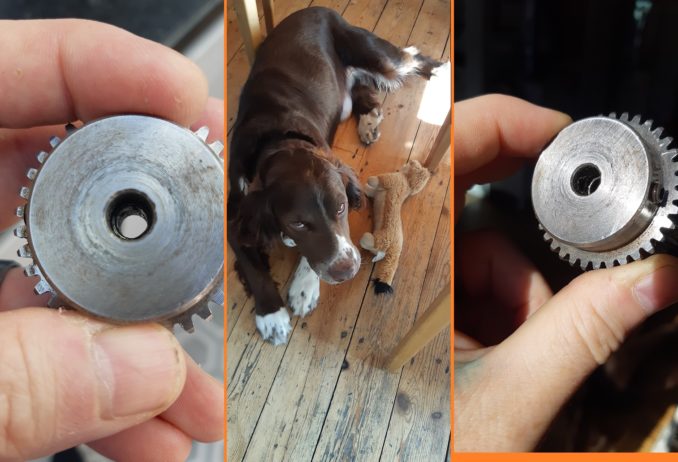
Here you can see where I have put bushes to bring the borehole down to 6mm, from the 8mm. I simply could not get a gear that MOD size with that many teeth with a 6mm bore. The problem comes as I need a hole through the bush to get the grub screw through; this is going to be a headache to fix as I do not want to damage the thread inside the gear with a 5mm drill bit.
So I will have to bite the bullet and disconnect the gears from the spindles, which means taking the entire gearbox apart.
Assiduous readers will recall that I thought I had the gearbox donedone, and all the gears were in their ForeverPlace. Accordingly, I had used threadlock quite liberally on the grubscrews that hold the gears and collars to the spindles.
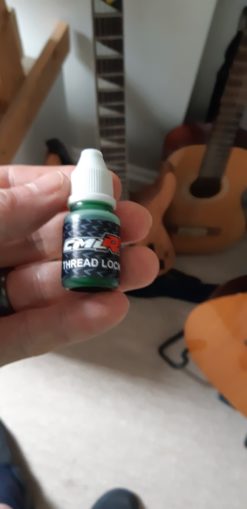
This is obviously not the case, which is a problem. No matter, I have a large jug of acetone which should dissolve the threadlock neatly and I should be able to undo the grubscrews easily.
I dosed the whole lot, and then again. Nope, no movement. And then I spilled some on the polycarbonate sheeting, which was bad as it seems acetone eats polycarbonate. Every day of Cnuteneering is truly a day of learning!
Nothing for it but to bring out the big guns. Pulling the spindle assembly from the gearbox and nicking the Crème Brulee torch from the kitchen, I began heat treatment:
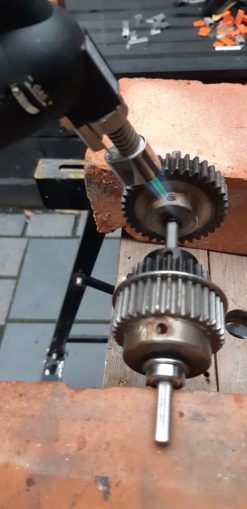
This, sadly did not have the desired effect so I had to dig out the paint stripper heat ray gun and keep it on the gear for about 7 minutes or so. Eventually the grub screws relented.
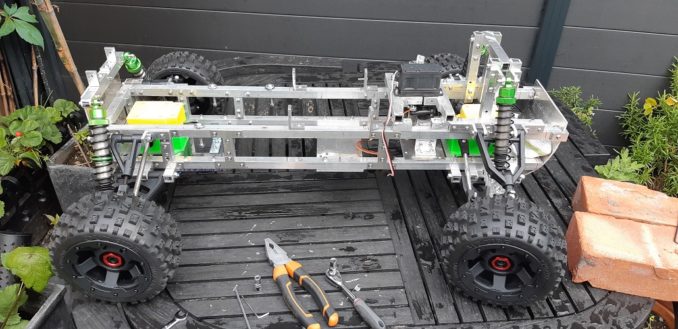
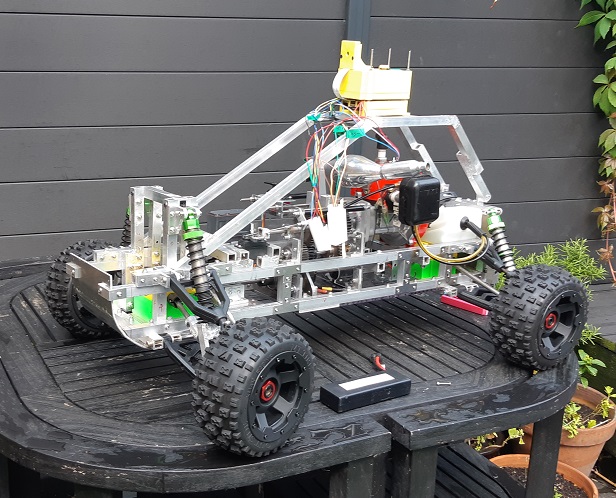
By now, the Cnutmobile is looking pretty forlorn in my eyes; it looks more like a kids toy than the off road monster I had in mind.
What this total disassembly has done though, is to give me a chance to fit some more spacer nuts on the central driveshaft lugs. On one end, the drive cup is pretty big so some gentle filing and it fits just right. For the smaller cups on the front and rear differentials though, I have to get a bit medieval and remove a lot more material, which is a lot easier with the DREMEL OF DREAMS. I also strip off the threads on the lugs which are not of use to man nor beast anymore.
As I took apart the gearbox though, I noted that the top spindle had bowed. I am hoping that this was due to the poor placing of the gear mesh but I suspect it is a systematic issue and I will likely see it again.
I had been somewhat incautious in my application of the threadlock and it had glued one of the bearings to the spindle. It did not take kindly to the heat ray. Luckily I overordered bearings last year so I have plenty spare.
I sand back one of the bearing holes, fill it with Araldite and the gear train is now much happier.
The bushes arrive swiftly and I clean the wobbling gear out of threadlock and press it into the space in the vice.
I carefully drill the hole through the bush, being very careful not to damage the thread on the gear itself. I still need to re-tap the holes though but this passes without incident and I can get the grub screw all the way in.
For the other 2 friction points, I use a Oilite bush instead of a washer. These will press up against the bearing centre itself which is not too good as a crash will pop the inner ring from the bearing. But I have no other choice at the minute I think.
There may have been some disassembly as someone forgot to put the extra collar on when doing this part.
I removed the Lammywasher which I am still unsure of, here you can see it replaced with a small washer instead.
With the petrol motor out, the car is much easier to work on. I manage to fit the electric motor nicely, with no friction in any of the gearbox.
The cooling fan will not mount to the motor properly, unless I rotate the motor so that the cables are not in the way. This would mean undoing all the bolts to remove the motor and given it is in place just so at the minute I will probably just take 5mm off the edge of the mount instead.

I am pretty excited now as the electric geartrain is now complete. I fire up the Tx and Rx.
A bit of stuttering at the start to overcome inertia and we are away! The brakes and reverse seem to work OK too. I even put it on the floor and it will move forwards unaided! Now, this is without the petrol engine adding inertial mass but I am pretty happy so far.
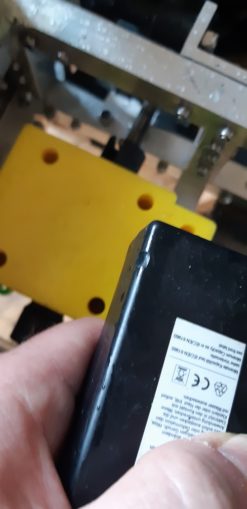
There is a bit of a problem with the rear driveshaft nicking the battery though, going to have to look at this I think.
And I am definitely going to have to do something about these driveshaft extenders
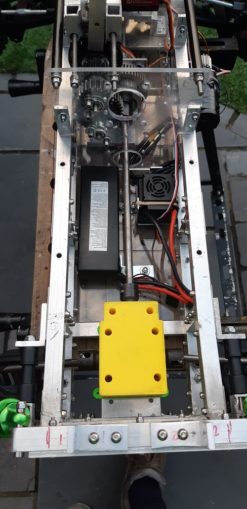
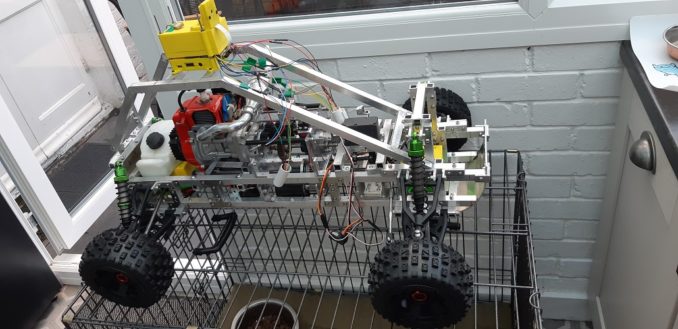
For now though I just fit the motor back on, the rollcage and then finally the TelePi device is mounted for the first time ever.
The cabling is all over the place and mostly too short so I will need to extend the leads somewhat so that there is #order. I already have some cable pre-ordered for just this very day.
And here we have it.
I am now on staycation holiday and MDBKaren and the kids will (rightly) hang me by my thumbs if I Cnuteneer instead of holidaying.
Still waiting for:
Nothing!
Still left to do / think about
Box for RX unit
Extend and tidy sensor cables
Fit auto cutout switch
End point adjustment for servos and control mechanisms Dumbo RC setup
Siting of RPM counters
Loctite gears in place
Body shell
Pics, vids, words and music © El Cnutador 2021
The Goodnight Vienna Audio file