Before I started to make beer from scratch as I mentioned in my previous article in the series, I used some of the more modern kits that were available which were remarkably different from the old Boots kits. For instance, the baking yeast had been replaced by the actual beer yeast they use in the commercial offering, so you won’t get that quintessential cloudy-looking, insipid bread taste that is so ubiquitous in homebrewed beer.
The wort concentrate had improved remarkably too. In the older kits, they took the wort and boiled it for many hours to reduce it to a single tin of a black morass of sticky, sugary gloop. Unfortunately, while boiling it for just over 100°C, they boiled away a lot of the lovely aromatics that make up the characteristic flavour of the beer. In the new kits, the process is the same: they boil the 23 litres of wort down to about 3 kg of concentrate but do so using a vacuum boiler so that it boils at a much lower temperature, thus avoiding boiling off or cracking some of the essential lighter aromatic flavours, resulting in a much more flavoursome beer.
I experimented with a few of the newer kits but found the Woodfordes Wherry Real Ale Kit to be very good indeed – 50p a pint and quite simple to use. Unlike all the gear you need to make beer from scratch, you just need a fermenting bin with an airlock and a few basics and a pressure barrel or beer bottles to store. As a litmus test, I served this to my old man, and only after the third pint did I tell him this was homebrew. He was suitably impressed.
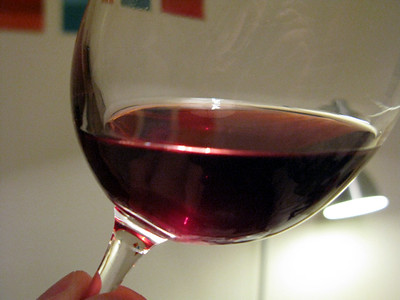
Anyway, back to wine. Now, the reason I mentioned the above kit is that, quelle horreur, Geeks does not make wine from scratch, unlike his beer. The reasons? I don’t have a vineyard. Well, I’m sure you can buy 25 litres of proper grape juice for making wine online but I never got around to moving on from the wine kits. This is because I’ve found the wine kits to be of such a good quality that if I needed any better wines for a special occasion, I would simply buy them. In a blind test while serving wines, I’ve interspersed the commercial ones with my homebrew wines and every single time, people have asked for more of homebrew.
After trying several kits, the one I use is the California Connoisseur kit. As it says on the box:
“California Connoisseur is a celebration of sunshine. Made from the finest grape concentrates California has to offer, California Connoisseur™ has become synonymous with outstanding wines of distinctive character, worthy of being served to all who appreciate the proud heritage of the vintner’s art. In as little as 28 days you can create wines of impressive bouquet, flavour and structure.”
The kits cost about £40 and make around 30 bottles of wine. So what equipment do you need? Here’s a short list:
- Fermenting bucket with airlock
- Second bucket with a tap and airlock
- Syphon (to easily transfer the wine from bucket to bucket)
- Plastic stirrer
- Hydrometer (to measure the sugar content in the mixture – useful to predict final alcohol content and for when the wine is ready)
- About 30 wine bottles you have collected over the last few weeks – make sure they are cork ones and not screw tops (screw tops are not as airtight once opened)
- 30 corks (waxed or unwaxed – sterilise before use)
- A corker tool (don’t try and hammer in the cork into the bottle!!!)
First, you sterilise all your equipment (including the stirrer) with VWP sterilising solution and add the grape concentrate to the fermenting bucket. You add some water (if you have a carbon filter on your water supply to remove the chlorine, even better) and some boiled water to get the 23 litres to around 23°C and stir. Then add the yeast and bentonite (all included in the kit), replace the lid and airlock and leave for around 7 days until the airlock has stopped bubbling.
In the case of Chardonnay wines, you may be asked to add some oak chips to the mix to give your homebrew wine a genuine oaky flavour to it!
After a week, here’s where the fun begins – you need to syphon the slightly cloudy wine liquid into another sterilised bucket and leave all the yeast gunk in the first bucket – you want a clean wine, not a cloudy one. Make sure the syphon is sterilised too. Stick the first bucket on a bench, and the second bucket below it (careful – you are lifting about 50 lbs weight!!). This takes some practice the first time around, but you’ll get used to it. A clip to secure the syphon pipe to the second bucket can help avoid splattering your wine around the floor. As always, to stop the missus from going mental, do this in the kitchen or somewhere that doesn’t have carpet or expensive wooden flooring, especially when making red wine!
Add your airlock to the second bucket and leave for 12 days or so. Don’t top up the wine and don’t leave outside in the garage in winter or the fermentation process will stop – you need to keep the bucket in a room of around 20-25°C.
After 12 days or so, the bubbling should have stopped. Place a sterilised hydrometer in the bucket and check the reading is 0.995 or less. If it’s not, give the fermentation a few more days and try again until the reading is reached.
Once it’s ready, syphon once again into a sterilised bucket so you leave all the yeast deposits behind. You are at the degassing stage – you need to remove the dissolved CO2 in the wine so add the sachet of Potassium Metabisulphate and stir vigorously. Replace the lid and airlock and stir the wine several times over the next 2 or 3 days.
Sterilise. Sterilise. Sterilise everything that comes into contact with the wine.
When the gas has been expelled from the wine, you are ready to clarify it. It should be relatively clear if you have followed the previous stages correctly. You add the fining agent to the wine and leave it undisturbed for up to 6 days or so.
When you are ready to bottle, syphon your wine into a sterilised second bucket that has the tap on it. Be careful not to syphon up any detritus at the bottom of your first bucket – you want your wine to be crystal clear. Sterilise all your wine bottles and start to pour the wine from the second bucket with the tap into your wine bottles. Try not to blast the wine into the bottle creating a foam head – take your time and take it easy. You don’t want unnecessary air in the wine. When complete, use a corker tool to cork your wine.
If you want a personalised finish to your creation, you can buy some labels to stick on your bottles. I keep the existing labels on mine and fool people at dinner parties and also giving “luxurious” Christmas presents:
“Oh my god Geeks, you shouldn’t have, a 1969 Chateau Margaux!” Heh heh.
You can put a shrink plastic capsule over the top of the wine to hide the cork – you simply place the capsule on the wine bottle neck and immerse in hot water for a few seconds to shrink the plastic capsule tightly onto it.
And that’s it. It takes longer than beer (30 days or so) and is more involved than a beer kit but does produce outstanding wines. It’s worth splashing out on a good kit (you pay for what you get) and I love the Pinot Grigio one from California Connoisseur. If you’ve carried out the stages correctly and not syphoned up any dead yeast into your bottles, there’s no need to use a filter kit to polish your wine – it should be crystal clear.
Once again, I get my kit and products from these guys:
The Home Brew Shop (Farnborough)
https://www.the-home-brew-shop.co.uk/
Next topic: The Geek’s Guide To Distilling Commercial Vodka For £2.50 A Litre Bottle.
Next topic after that: The Geek’s Guide To Distilling Commercial Gin For £2.50 A Litre Bottle.
© Beware of Geeks bearing GIFs 2018
Audio file