You know who you are. You can cook, possibly even turn out a decent meringué or even a soufflé, but the mere thought of baking a loaf of bread fills you with irrational fear. The PTSD you suffered from your last disastrous attempt is not easily forgotten. Yeast, proofing and bread-making sends your cortisol levels to a point on the BDSM curve that even Phil the Test Manager would envy, and you look on enviously at your peers who can knock out a passable sandwich loaf, baguette or Ciabatta.
All of this is about to change.
An American gentleman by the name of Jim Lahey took the US foodie scene by a storm when he advocated using the “No Knead” method for bread and pizza bases etc. While this method is not new, it has revolutionised the modern home baking scene, and was one of the most popular recipes ever published by the New York Times. It is so simple that even a 5 year old can execute it successfully, and to mess it it up you either need to be very unlucky (poor quality yeast) or so incapable you really shouldn’t be in any environment with sharp or hot objects.
The theory
Bread, or more accurately leavened bread, comprises of water, flour, salt and yeast. Pizza base, which is effectively just a savoury bread, has also sugar and olive added, but this can also be used in some bread recipes. Other additions such as egg, butter or indeed beer (I knew that would get your attention) can be added, as well as garlic, olives, herbs, dried tomatoes etc. For a successful loaf, all we need is the yeast and flour to interact and produce sufficient C02 for the bread to rise and also produce decent gluten strands to provide body. Once the yeast (which is a bacteria) eats the starch and sugar it has a damned good fart, which in turn forms we call the “crumb” or the bubbles in bread. Yes. That lovely light piece of bread is down to the gastric output of bacteria. Or to put in another way, Flour + Yeast + Water + Farting + Time = Bread dough. Climate activists who eat leavened bread are on seriously dodgy ground here.
While the theory is straightforward, the biggest issue for the home baker is getting the bread to rise properly, or prove. Many have attempted using a dough hook, a food processor, or even kneading dough by hand to get the correct dough consistency. While these methods have their place, the foolproof “No knead” method works by allowing the yeast to fully develop the gluten strands either by extending the initial proving time, or increasing the quantity of yeast used and the temperature of the water used in the mix. Mother nature does all the hard work for you. If you are willing to wait up to 18 hours for your dough you can use ¼ of a teaspoon of yeast and cold water. Want your bread in 180 minutes or so? Use up to 1¼ teaspoon of yeast and blood temperature water (37C / 100F). You can push this to 7g (a standard “Easy Bake” yeast sachet), but in the real world most of the yeast will not be utilised unless you have a very large quantity of flour.
The next challenge is the level of hydration, or the ratio of water to flour. This is where the wheel comes off for most home cooks, as the recipe will state X amount of water to Y amount of flour. Being diligent, most cooks will weigh and follow the recipe. Bad move. These ratios are almost always approximate, as the flour will absorb more or less water depending on the flour type (plain or the more protein rich bread variety), ambient temperature, relative humidity, the cosine of the angle of the risen sun in the sky and what you had for breakfast. Or to put it another way, what works one day will not work the next. The last batch I baked for instance, was a lot wetter than a previous one, despite using identical ingredients. The only reason I know that was that I broke my own rule and wrote down the measurements from my previous batch, and immediately brought a curse upon myself. It wasn’t the end of the world as I was aiming for a high hydration bread anyway (Ciabatta), but forming and proving a wet dough is difficult for the neophyte. Hydration levels generally are between 65-85% (65-85g of water to 100g of flour) depending on bread type and the size of crumb you want to develop. A drier loaf will be heavier with a smaller crumb, but will be easier to shape. A wetter loaf will be more difficult to shape, but will have a larger crumb. The method I will share has a low-medium hydration level, around 65-70%.
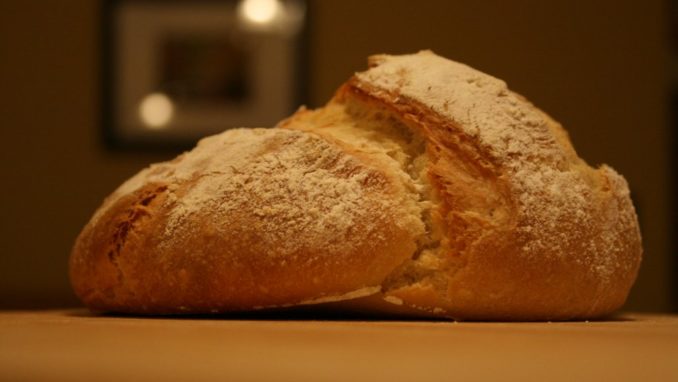
Once you have mixed your dough, you need to leave this to prove (or rise) for the prerequisite time. After that, you need to flatten and de-gas the dough, cut it into portions if you are making separate loaves or rolls, reform into balls and leave for 10-15 minutes before allowing the dough to be shaped. Once that has been done, the dough is transferred to either a pan, proving basket or baking tray and left to rise for a second time for 30-90 minutes before baking. The bread is then baked in an oven – covered in a Dutch oven or uncovered – depending on the type of crust and bread desired. Additionally, a pan of water can be placed in the oven to create steam and the loaf can be sprayed with water. I have tried both methods, and to be honest the steam / sprayer method makes a negligible difference to the final product. Home made bread doesn’t last long enough to get cold in our house, so I am not sure what difference this makes to the the final crust when cold. If you want your bread to last a day or so, it is recommended that you leave it for 2 hours to cool down on a rack before slicing, that way the dough will set correctly without any loss of moisture.
Gotcha’s
Yeast is a living organism, and high temperature or salt will kill it stone dead, so when you mix your ingredients the salt should be added to one side of the bowl and the yeast the other. If you are patient and are willing to wait up to 18 hours for your dough to initially prove, you can use a small amount of yeast (¼ teaspoon / 500g flour / cold water). If you are impatient, use 1¼ teaspoon (or a 7g packet) for up to 500g of flour with 37C water, no hotter. Your dough should double in size within 60-90 minutes.
Use either plain flour (generally found in a red bag) or white bread flour. Do not use cake flour or wholemeal. While these can be used in proportion with a no knead recipe, baking times, temperature, yeast quantities and fluid amounts will need to be adjusted accordingly.
You don’t need a set of scales, a small to medium baguette or loaf is roughly 125 – 250g of flour, which if you buy a small bag of flour will be a straightforward proportion thereof. Nor do you need a measuring jug, a kettle full of water will do as long as the temperature is right. You will need a largish mixing bowl, cling film or a plate to cover, as well as a wooden spoon / spatula to mix with, but not a whisk. Some measuring spoons would be useful, but at a push you can “guesstimate”. A floured baking tray, Dutch oven or loaf pan is essential. A wire cooling rack, useful. A decent serrated knife is also very useful if you plan on baking larger loaves.
The dough consistency is crucial. There are lots of videos online demonstrating the “No knead” technique, but pay particular attention to the final consistency. Like the bears’ porridge, it must be neither too dry nor too wet, and the best culinary description is a shaggy dough. Experience will be your ultimate guide, but the recipe is really quite forgiving with measurements so don’t get too hung up about the fact I don’t give exact quantities. As long as it isn’t too sloppy or dry to start with, you’ll be fine.
If you are starting out, I suggest you use plain flour and the individual “Easy bake” 7g yeast sachets. That way if it is a complete disaster (unlikely), nothing much more than a couple of quid has been wasted. If you are happy with the results, you can then move onto the more expensive bread flour and a can of easy bake yeast pellets which last forever if you are frugal. While you can add 7g at a time (250g +), you can get away with as little yeast as ¼ teaspoon.
What you will need (non-essentials marked with *)
- Measuring spoons *
- Kitchen scales *
- A silicon baking mat *
- A baking rack *
- Egg wash, pastry brush and sesame seeds for poshness *
- A Dutch oven with lid (Le Creuset style not glass or ceramic) and a frying pan, or a baking tray or a loaf tin
- A sharp knife (or preferably a dough cutter)
- Oven gloves
- Kettle or large jug of water
- Table salt (easier to distribute and mix)
- Easy bake yeast (I use Allinson but Tesco own brand is fine)
- Plain or bread flour (I use Allinson but Aldi plain flour is fine)
- Large bowl with lid, cling film or a large plate to cover
- Spatula or wooden spoon
- A large clean tea-towel or flour covered cling film
- An oven (Duh !)
Let’s do it
Step 1 – Decide on your proving method.
Either:
¼ Teaspoon of yeast + cold water and approximately 12-18 hours initial proofing time (e.g. mix dough 10.00pm ready 10:00am – 05:00pm next day)
Or:
1¼ Teaspoon of yeast + warm 37C water and approximately 2 hours initial proofing time (e.g. mix dough 11.00am ready 01:00pm same day)
If using the second method, put the kettle on just long enough to warm the water up to blood temperature, e.g. you can dip your finger in and it is warmish but not hot.
Step 2 – Mix dough, prove until at least doubled in size
In your bowl, add a minimum of 250g of flour (enough for a small loaf / baguette) up to 500g of flour (enough for 1 large “Dutch oven” loaf or 2 small loaves etc.) along with ½ to 1 heaped teaspoon of salt depending on the quantity of flour. Mix well. Add the desired quantity of yeast (See Step 1) and mix well.
Add just enough water a bit at a time to bring the flour together into a very rough, dry, shaggy dough ball using either a spatula, the handle of a wooden spoon, or your clean hands. The dough should not be sticky at this point, it should be malleable but more on the dry rather the wet side. There should not be any pools of water in the bowl, nor should the dough easily pick up the remaining loose flour on the side or bottom of the bowl. Once you have reached this point, add about a teaspoon of water, just enough to hydrate the dough enough so it can pick up the remaining flour on the side and bottom of the bowl. Repeat as required. This should leave you with an ever so slightly sticky dough, with a clean bowl with just a little bit of flour on the sides. Err on the side of dryness rather than wetness, the dough should be malleable and not so dry it crumbles, nor so wet that it is clearly sticky.
Cover and leave to double in size as per the timings in Step 1. A warm, sheltered location is best, but you generally don’t need to put it in an airing cupboard etc. unless your house is really cold and draughty.
Step 3 – De-gas and portion
On a clean worktop or a silicon baking mat, empty the dough onto a lightly floured surface and lightly flour your hands. The dough should be quite stringy, the stringier the better. Flatten out the air from the dough, fold it in half onto itself a couple of times, and shape into a ball. Depending on the quantity of bread you are making, portion out with a sharp knife or dough cutter (taking care not to cut through the silicon mat if using), and reshape into balls. Leave to rest, covered with a clean tea towel, for 10-15 minutes to relax.
Step 4 – Final shaping and proofing
Depending on what type of bread you are making (Baguette, Rolls, Sandwich loaf, Artisan “Dutch Oven” bread), shape your dough accordingly. For a Baguette or rolls, shape and place on a lightly floured baking tray, lightly dust with flour and leave covered with a tea towel or four dusted cling film for 60-90 minutes while you pre-heat your oven. For a sandwich loaf, add to to a loaf pan, dust with flour, and cover. For an Artisan loaf, lightly flour a frying pan, add the dough and cover. Warm the empty Dutch oven for at least at least 30 minutes so that it is scalding hot. Irrespective of the bread you are baking, preheat your oven to 230C (Fan) for at least 30 minutes before baking your bread. If you want to make your bread or rolls look posh, using a pastry brush, lightly cover the bread with a mix of beaten egg diluted with 1 Teaspoon of water and some sesame seeds.
Step 5 – Bake
If you are baking baguettes, make 3 or 4 diagonal slices into the dough with a sharp knife. If you are baking Artisan bread, remove your preheated Dutch oven from the oven, remove the lid, tip the dough from the frying pan into the pot, and ensuring you don’t burn yourself, score a X on the top of the loaf, and re-cover with the lid. Place bread in the centre of the oven until golden, approximately 30 minutes, removing the lid from the Dutch oven for an additional 5-15 minutes after it has baked to crisp up the crust. Bread and rolls will generally take between 15-30 minutes depending on their size and shape, but you will be alerted by the irresistible aroma of freshly baked bread that you are getting near to completion – baked until golden.
Remove bread from oven, and when tapped on the bottom it should sound hollow. Leave to rest on a rack for 2 hours before slicing – if you can wait that long.
You have now exorcised your inner bread demon.
Final notes
Once you start on the road to home baked bread, the world is your oyster. Different hydrations, flour mixes, baking vessels, baking stones, ingredients and oven temperatures abound. Once you get the basic “stringy” dough right, everything else will be a joyful adventure. On a final safety note, please do not be tempted to use Pyrex dishes etc. instead of a Dutch oven, some people have had these explode due to the high temperatures and stresses involved. A cast iron Le Creuset style casserole dish is fine.
Bon Appétit.
References
Note that all of the following have US measurements. Please adjust accordingly.
Original NYT recipe:
https://cooking.nytimes.com/recipes/11376-no-knead-bread
Original NYT video:
https://www.youtube.com/watch?v=13Ah9ES2yTU
French Baguettes:
https://www.youtube.com/watch?v=Q2rLPq8oYCc
Beer bread:
https://www.youtube.com/watch?v=ReR9wtJm2Rg
© Rookwood 2019
The Goodnight Vienna Audio file