Many, many years ago when I was impossibly more foolish than I am now, I bought one of those Boots homebrew kits to make my own beer. Can you imagine it? Making your own beer rather than paying 60p a pint? Absolutely awesome.
So, as engineering students, off we went and bought a Boots homebrew kit for about £15 which consisted of a tin of brown, sticky gloop, a sachet of baker’s yeast, a bucket, a stirrer, a plastic barrel and a disclaimer form.
We added boiling tap water to this brown gloop, waited for it to cool and then sprinkled the bread yeast over it and eagerly waited for our amber nectar.
Two weeks later we cracked open the tap and sampled the nectar.
“Fuck me, it tastes just like your piss, Geeks!”, a statement from my colleague that worried me on several levels. He was not wrong though, this was horrendous stuff, excreted from the anal glands of Beelzebub himself. So off we went, gagging and spitting, back to the pub to get ourselves thoroughly shitfaced on the commercial bland stuff.
However, on returning home to our digs, we sampled a little more of our homebrew, and wouldn’t you know it? It tasted better when you were shitfaced. Funny that.
Fast-forward 30 years and as an ex-process engineer and now reformed IT geek, I happened to have passed by a homebrew shop in Farnham. I love beer me. Plenty of experience. And so, I popped in, out of curiosity’s sake. 30 minutes of chinwag with the fellow alcoholics, I came out £300 lighter with enough kit to make my first, real homebrew.
So, how does it all work. Well, the first thing you need is a converted ice cooler with a tap and filter for £84:
You stick your 4kg ground grain/oats and 10 litres of hot water at 80°C in it and close the lid for 90 minutes to allow the sugars from the grain to leach into the water. They call this the mash tin. The temperature of the mix needs to be kept around 67°C, hence the insulated cool box.
Once that’s done, you can drain off the liquid. But the problem is, there’s so much sugar still floating around the grain, so you either use a watering can of 85°C water to sprinkle over, or like I do, use a fancy sparge arm which sprinkles about 23 litres of the hot water over the grain:
Once you’ve washed all those lovely sugars from the grain, you’ll have about 30 litres of brown, warm liquid which tastes really sweet and sugary. But Geeks, surely beer tastes bitter? Indeed, it does. What we need to do is not only turn the sugar into alcohol, but we need to add some hops to the brew to make it bitter.
Historically, this was done to preserve the beer in transit (on long voyages in ships) as hops are a natural preservative and anti-bacterial agent. But people realised it made the beer more complex in flavour too, with the abundance of various hop oil flavours.
Most people haven’t come across hops before. You may have done if you’ve been on a brewery tour. One memory of mine was when some friends and I went on the Hogs Back Brewery tour, the guide said, “and here are the hops, have a little taste” and my mate grabbed a handful and shoved them into his mouth, grimaced, and just in the nick of time, avoided projectile vomiting in front of the thirty other visitors, thank god. I mean, there wasn’t enough time to pretend you had nothing to do with this foolish man. They are VERY bitter but do add a wonderous, complex, balanced flavour to the beer.
So you stick your hops and your sweet brown liquid into a boiler and boil it. You can add more hops to the brown liquid to give greater bitterness and flavour. Boil this for about 90 minutes. It helps if you put your hops into a nylon mesh bag so they don’t block up your boiler tap when it’s time to release the liquid.
Fifteen minutes before the 90 minutes are up, stick a teaspoon of fish muck (Irish Moss) into the boiling brew to coagulate the proteins and make your promised beer a little clearer than cloudy.
The next step is to take your now slightly more bitter brown liquid and get it cooled as soon as possible. For two reasons:
- You can’t add yeast to a hot brew as it will kill the yeast
- Leaving a very sugary liquid exposed to the air for too long will encourage the growth of bacteria which will turn your beer into sour cat milk. Cool for catz, bad for you and me.
So, we need to get this stuff down to 23°C as soon as possible. This calls for a copper coil cooler connected to your kitchen tap.
Yup, £62 and it will get your hot brown wort down to 23°C in about 30 minutes, depending on your water pressure. There’s a bit of Heath Robinson-esque in all this, so be prepared to go to your local DIY shop to find the right connectors to your kitchen tap.
Once at 25°C or so, pour it into a sterilised bucket (very important, just add some sterilising powder with some water and swish around for 5 minutes) with a bubbler and sprinkle on the yeast.
Why a bubbler Geeks? Well, we want the yeast to go at the brown stuff and turn all those sugars into alcohol, but we don’t want it exposed to the air where bacteria and cats can get to it and turn the brew bad. So we keep the carbon dioxide atmosphere inside the bucket and allow the excess to bubble through a contraption that has water in it (to prevent bad air from getting inside) like a water relief valve.
Then we wait for a week until the bubbling stops and then we syphon the beer into sterilised bottles or a sterilised keg, if we want to drink it all in a short time, like if you have a lad’s weekend or your wife is away and you are determined to get shitfaced.
And that, fellow Puffins, is the art of making beer.
The good news is that technology has moved on from the dire Boots kits from yesteryear. We can now buy actual commercial beer yeasts, rather than Boots kit’s baker’s bread making yeasts which makes very insipid, yeasty tasting beer, we can extract proper sugar and starches from real grains, as they do commercially, and we have access to proper sterilisers like VWP.
And for about £300 in start-up kit, you too can produce commercial quality tasting craft beer for anywhere between 30-90p a pint.
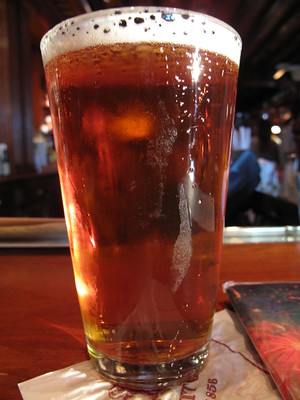
My favourite is an American IPA dry-hopped beer (it ferments with a sachet of dry hops dunked in it to give it a really bitter hoppy taste) called Sierra Nevada Torpedo. The one I make at 7.2% ABV tastes the same as the commercially bought one, if not better. But three pints in an evening? It’s like a bottle of wine! But oh so hoppy it makes me happy.
Cheers!
I’m in no way affiliated with them, but you can buy the equipment from these guys online:
https://www.the-home-brew-shop.co.uk/
For recipes, one cannot do better than amble down to Jim’s Beer Kit:
https://www.jimsbeerkit.co.uk/forum/viewtopic.php?p=2556
My next topic: How To Make Decent Wine For £1.50 A Bottle.
My next topic after that: How To Distil Commercial Vodka For £2.50 A Litre Bottle.
© Beware of Geeks bearing GIFs 2018
Audio file