
I’ve been using my 3d printer for 4 years now and initially it was the most awe-inspiring piece of tech I owned.
“I can print anything! Make anything! Wow!” has turned into “This tech is taking up a lot of room, where can I store it?”
That aside it’s a great thing to master with a lot of skills to pick up on the way so let’s jump in with a simple project.
Create a 3d keyring for “Going-Postal” … you will need …
- 3d Printer e.g. a FlashForge Finder 3
- PLA 1.75mm filament – the plastic that is heated up and dotted to create the object
- Computer with website access to use an easy to use design app (STL)
- Computer to run FlashPrint to turn the design (STL) into a 3d printer file (GX)
So let’s jump in rather than get too technical and produce the Key Ring to at least show the process and say how long it will take.
Design It
I log into tinkercad.com and sign up with google account, once in use the tutorials to learn how to navigate the system.
You can use the undo option to undo most mistakes so don’t worry too much.
Once in the basic concept is objects which can be solid or holes (cut away). When designing you have to always think about the structure and will it be stable – an upside down pyramid is an interesting exercise!
Though the software to create the printer file can add supports you always want to think as though you are building from the floor upwards, tolerances are different for different machines and the PLA plastic can span gaps – this you will find later on.
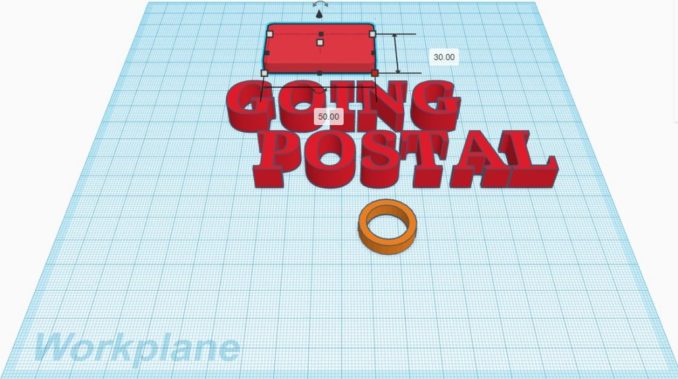
So we add a base and size it 50mm x 30mm, add a tube for the key ring connection and then add the text as a cut away.
Now we position it all – this is the most frustrating part as you have to switch views, ensure things line up and generally you will click on the wrong items and drag them and get annoyed.
Just do one item at a time and use the different views to ensure you are aligned – there are alignment tools as well – click on two items and centre them for instance.

So now we have to take care as to how we add and cut objects – here I want to remove the cut out from the base then GROUP these items, once done I can group them all together and then we have…

Spin around the design and check it out – does it touch the work plane? Think about the size – will it be easy to clip off small connections – already I can see the dot in the dotcom will fall off but let us carry on.
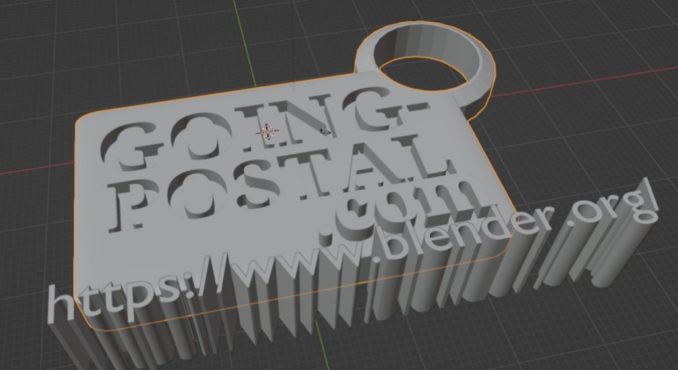
Save this design as an STL
“The name STL is an acronym that stands for stereolithography — a popular 3D printing technology. You might also hear it referred to as Standard Triangle Language or Standard Tessellation Language. Each file is made up of a series of linked triangles that describe the surface geometry of a 3D model or object.”
This file can be loaded into other design packages for extra tweaking ….
Slicing into GX file
Load the STL into the FlashPrint application with your printer settings set correctly – normally you can specify the printer type and continue.
Select “Start Slicing” and it will show you how the head of the printer will move and how long it will take – 40mins or 28 mins if you lower the build quality.
Options can be changed to make it a fast print and you can even slice it up if you want to print a section to see how it will look or fit.

You can open the GX file in NotePad or another text editor and view the raw contents.
Start 3d Printing
Final stages are transferring the GX file onto a USB stick, insert the USB into the printer – select to build the GX model and off you go, after remembering to add Prit Stick to the build plate.
Final Result
Careful when removing from the plate. And here it is – a personalised key ring made in about 30 minutes.

Help List
Here is a list of links to help you get started, the links to products are via an amazon affiliate links so thanks in advance.
https://chooseydo.turnshirts.co.uk/gigi/654ca7eba4723
Next:: How to 3d Print – printing an illustration (you can then print anything)
Thanks for reading and the keyring will be flying off to Swiss Bob soon!
(Ed. If you are interested in the .gx, or .stl files email me)
© Mark Heywood 2023
