As many of you know I have been hankering after a milling machine for some time. Not being able to justify the price of a shiny new one I have been religiously checking ebay and gumtree in the hopes to find a bargain, a garage clearance due to #rare or a broken down machine in need of some Cnuteneering love and care.
Sadly these machines come up rarely and are never in a “needs work so selling cheaply” state so for nearly two long years I was thwarted in my search. Thinking about it, there are unlikely going to be any salvageable goods for sale – the kind of people that have these in their sheds or garages are also the type of people who know how to fix them.
Given the amount of grifting scammer socially useful charitable enterprises out there I thought I would found the Cnuteneering Home For Wayward Lathes and Mills and get myself some of that charidee cash.
Initial approaches to the puffinati were not quite as successful as I would have liked:


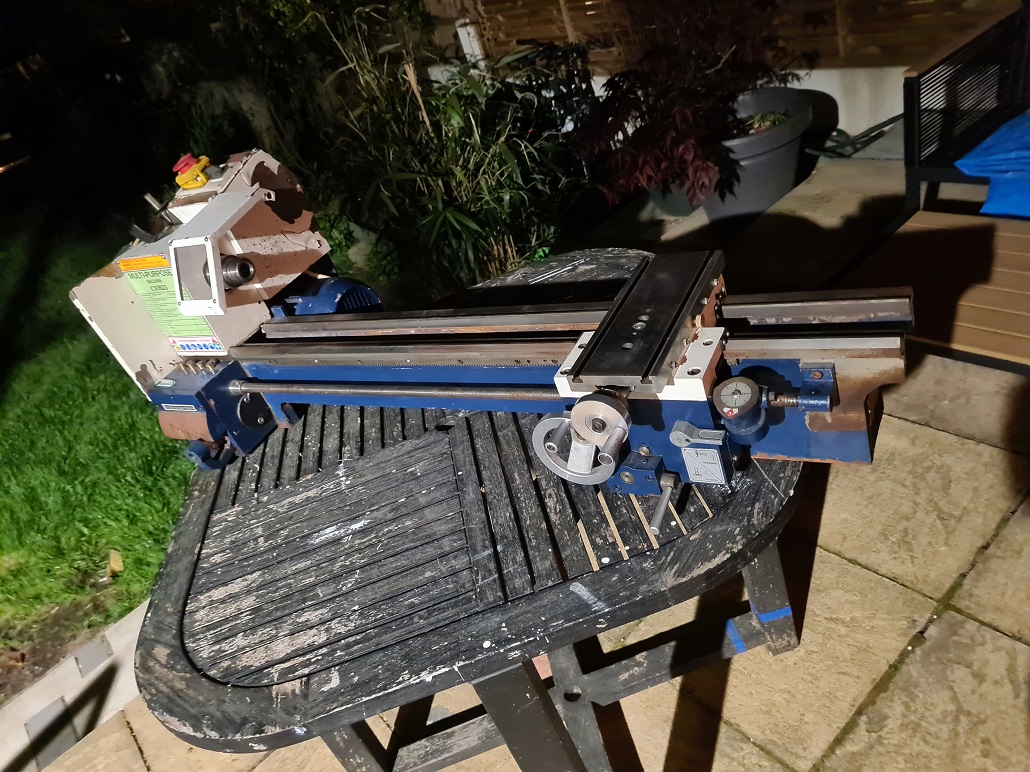
Then, just when I had given up all hope, a combo lathe/mill appeared and I managed to win the bid. Paying a transporter firm via Shiply to transport it from North to the grim regime of Sarfeest Lunnen, it eventually arrived:
This was a temporary arrangement for now and I was fretting as it was a time of intermittent showers and the tarpaulin I had spare was not quite large enough to cover it. More to the point, the shed is still full of stuff and there is nowhere to move it to.
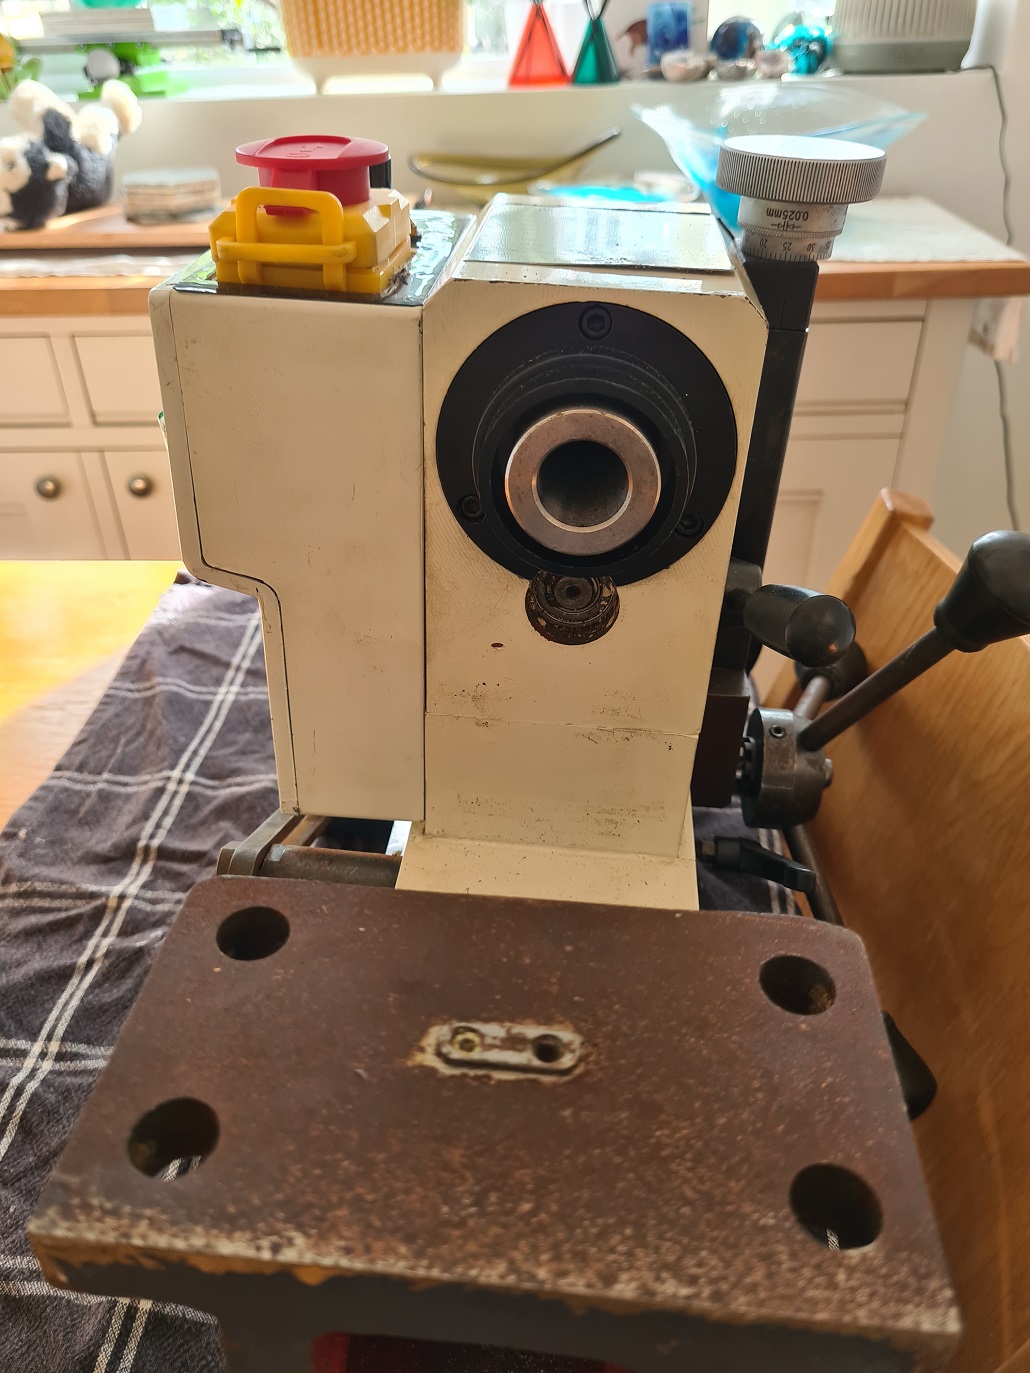
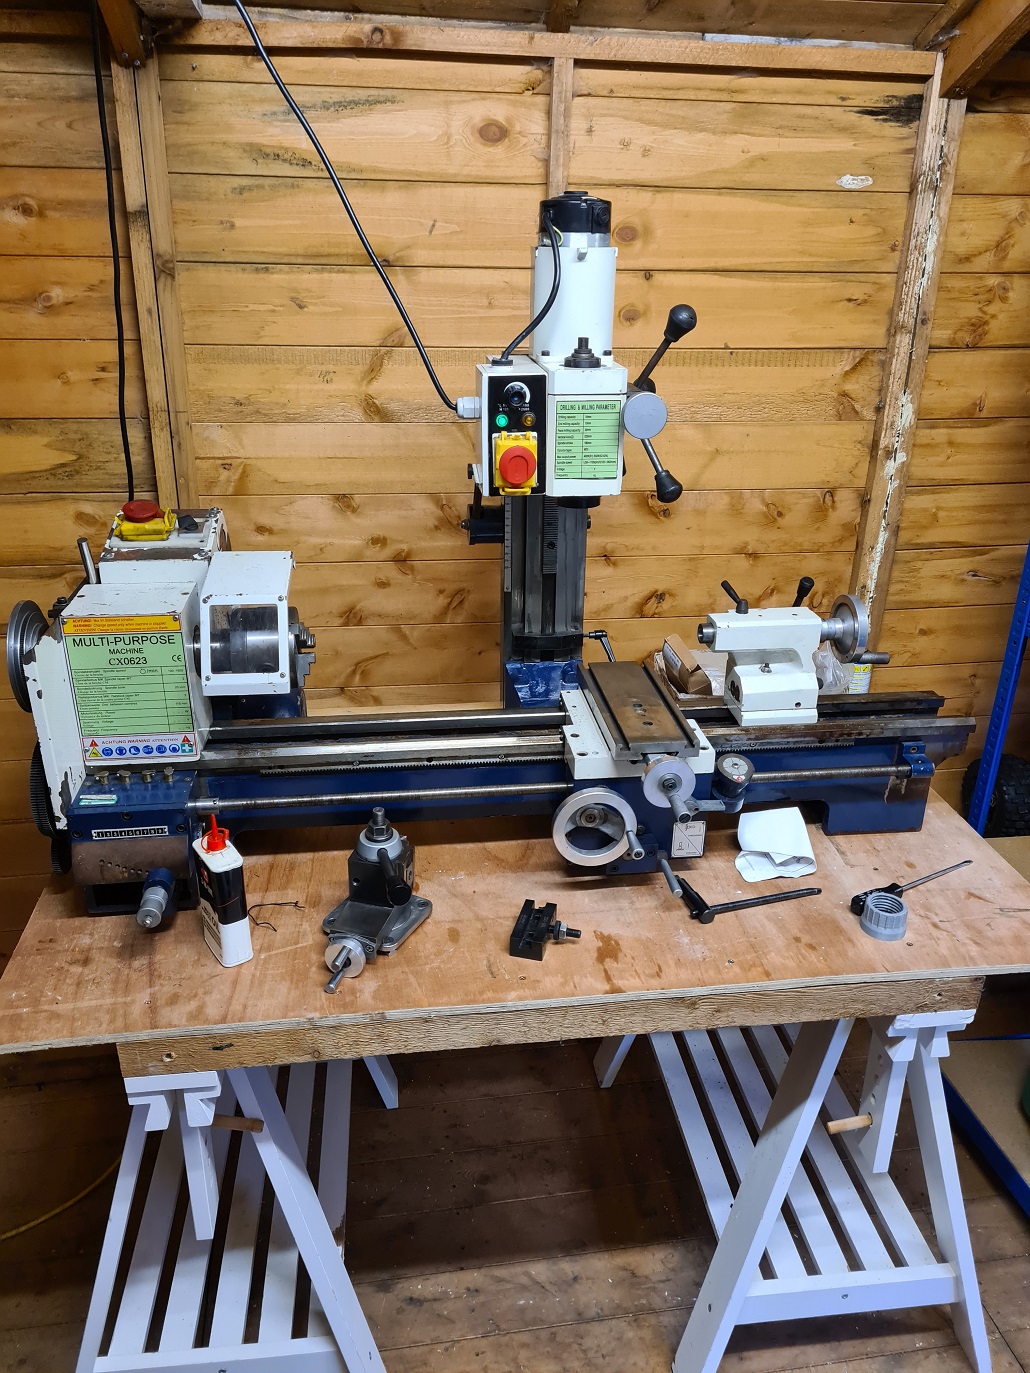
The machine came in 2 parts, the milling neck:
And the main transport with a “saddle”
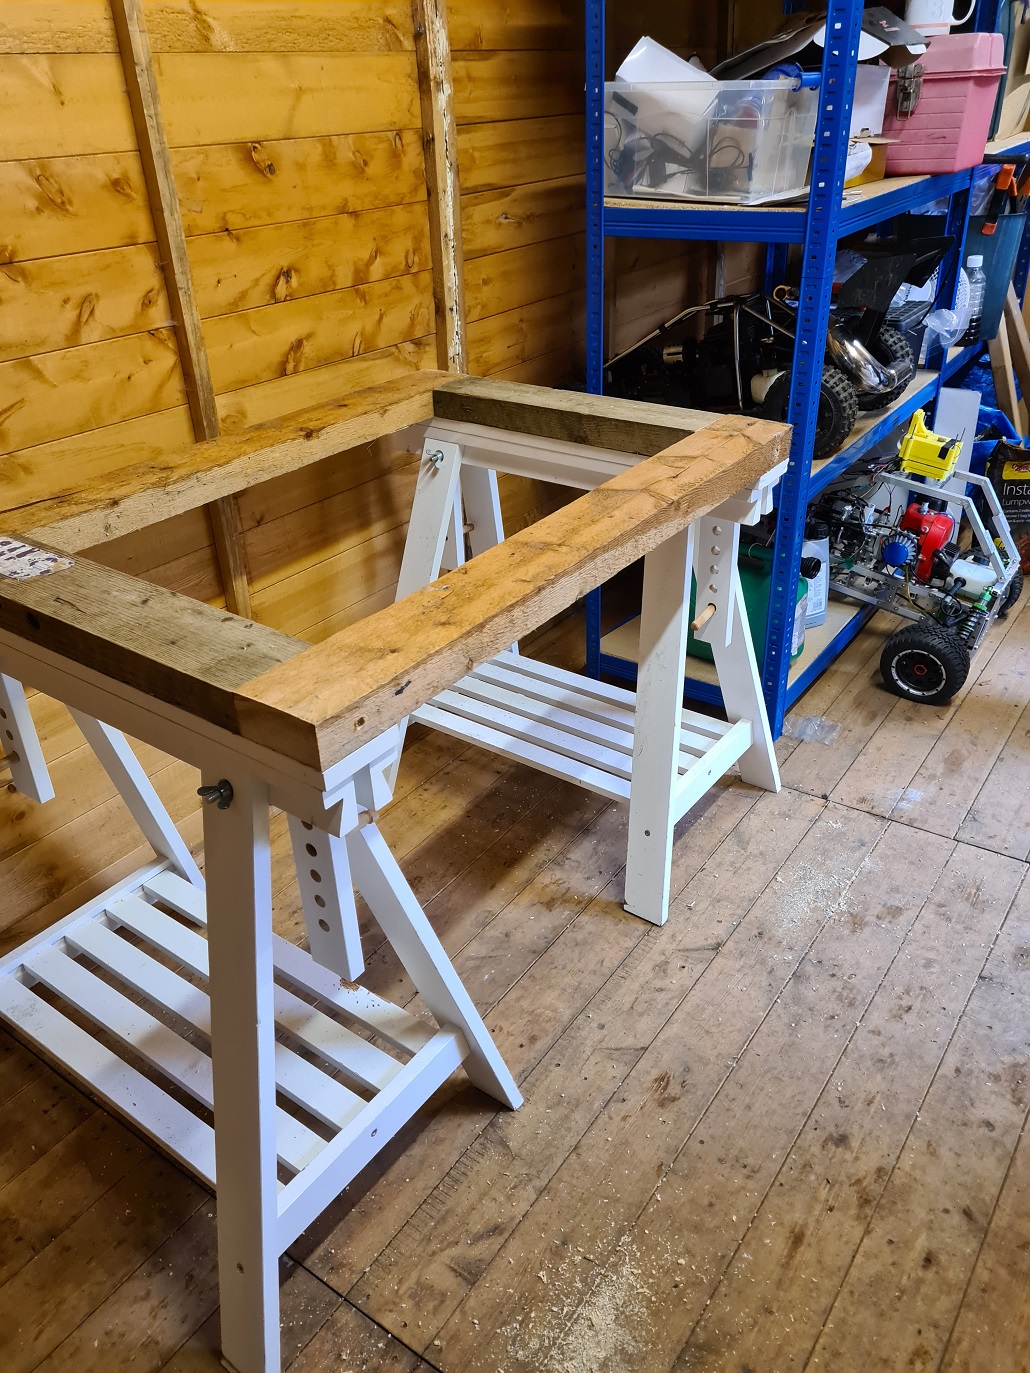
With the help of my Brazilian engineer friend (who is also a mill enthusiast) we set about turning my shed from a leaky eyesore into the Shed Of Charity and Hope. First we need to put the machine on a bench:
And here we have it installed and powered up. Mill and lathe motors take their own power feeds. Which will be tidied once I get a feel for where they are best routed, #ThereMustBeOrder
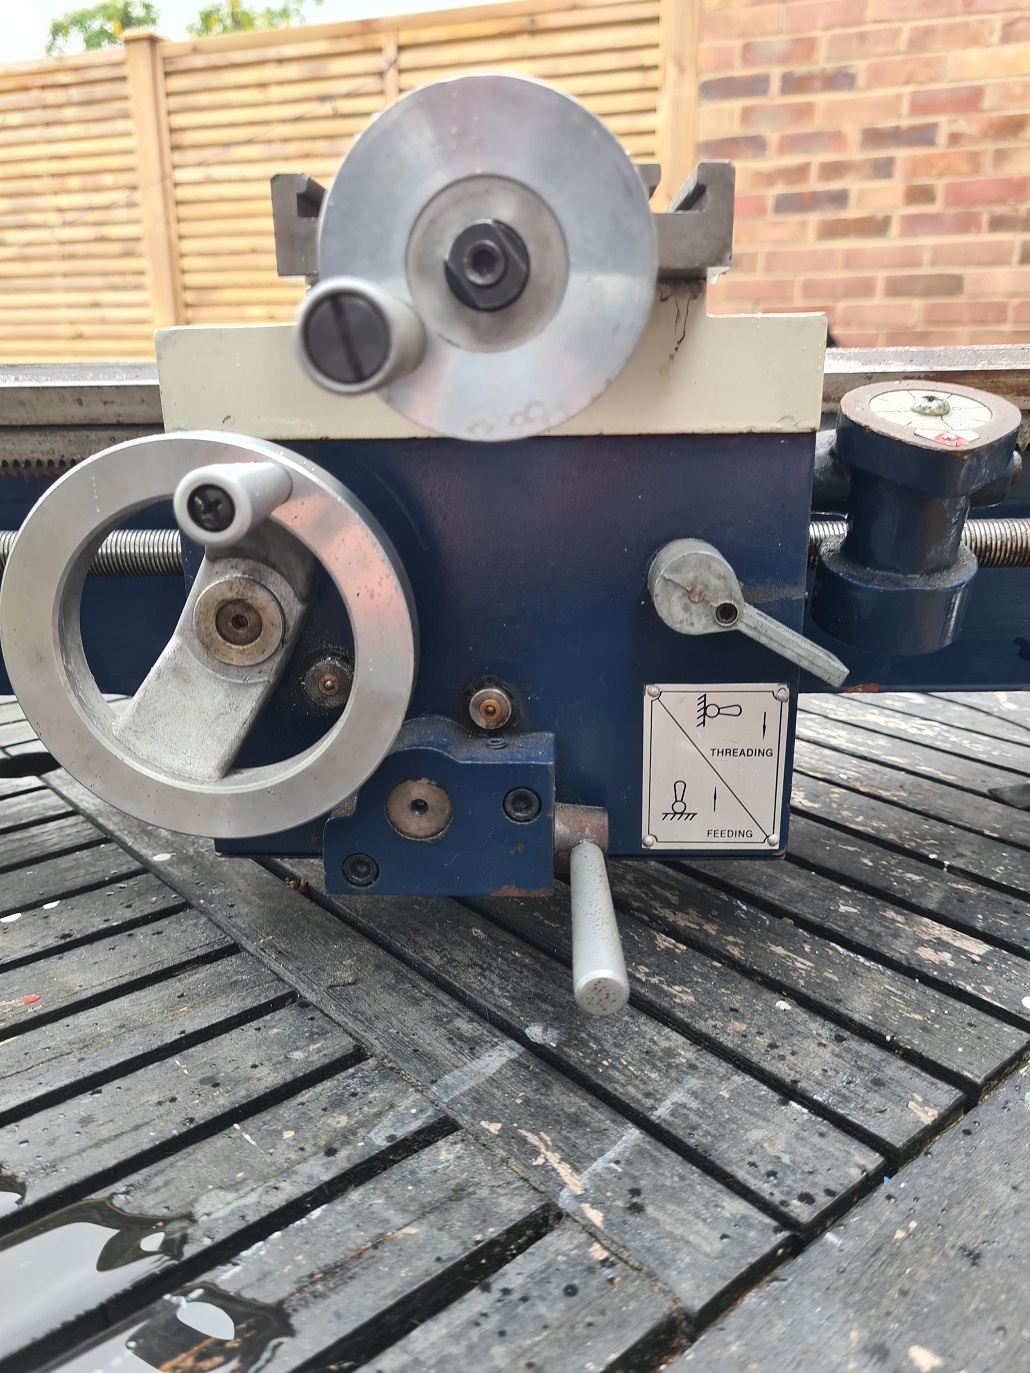
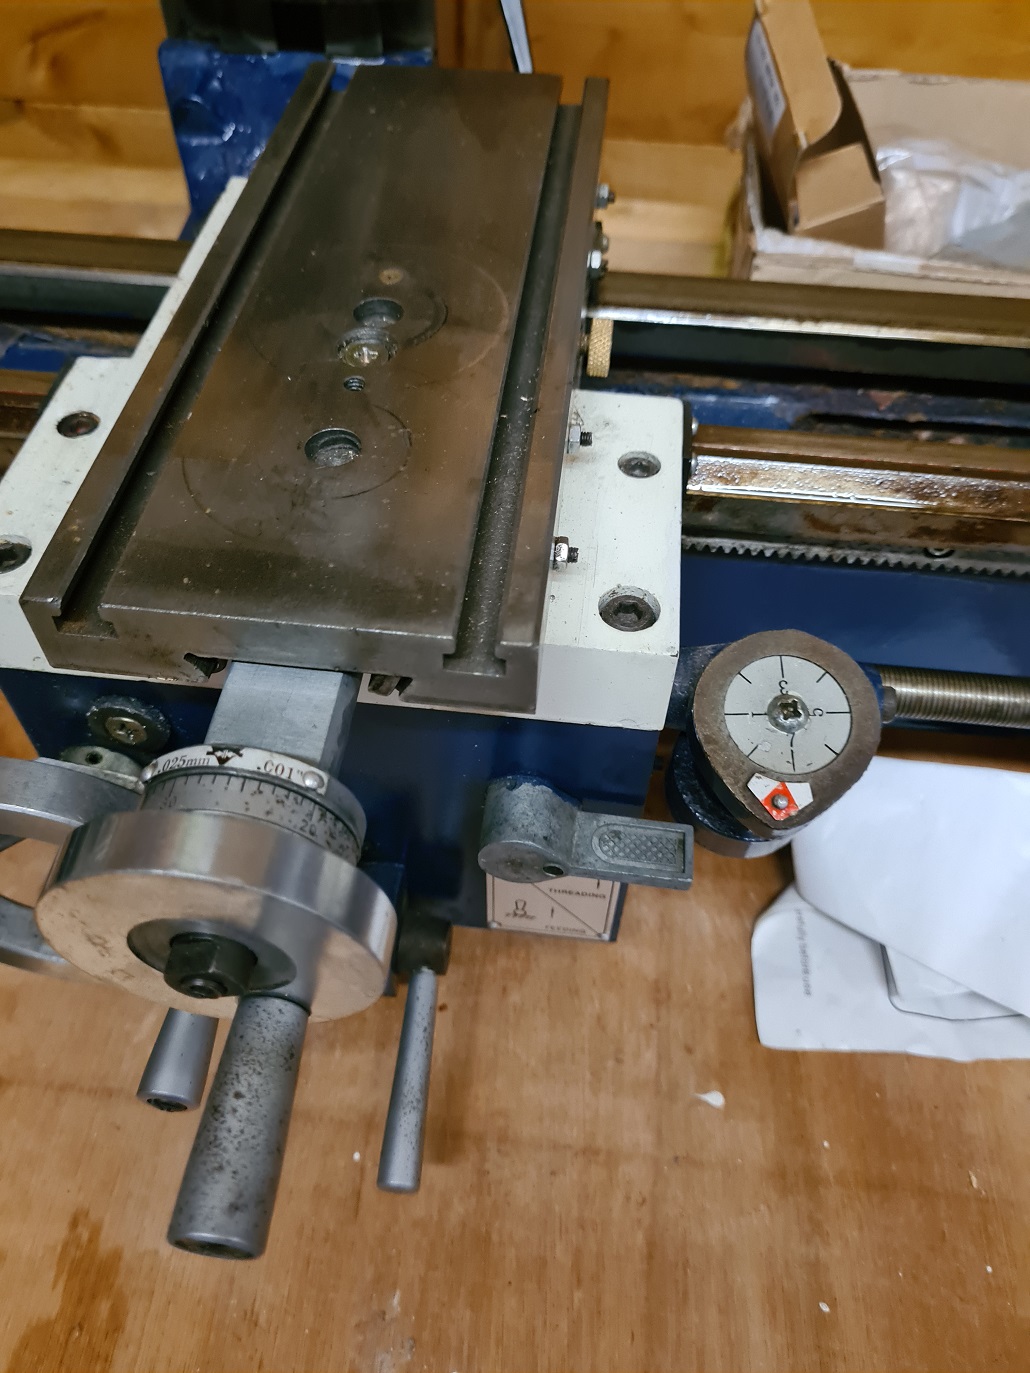
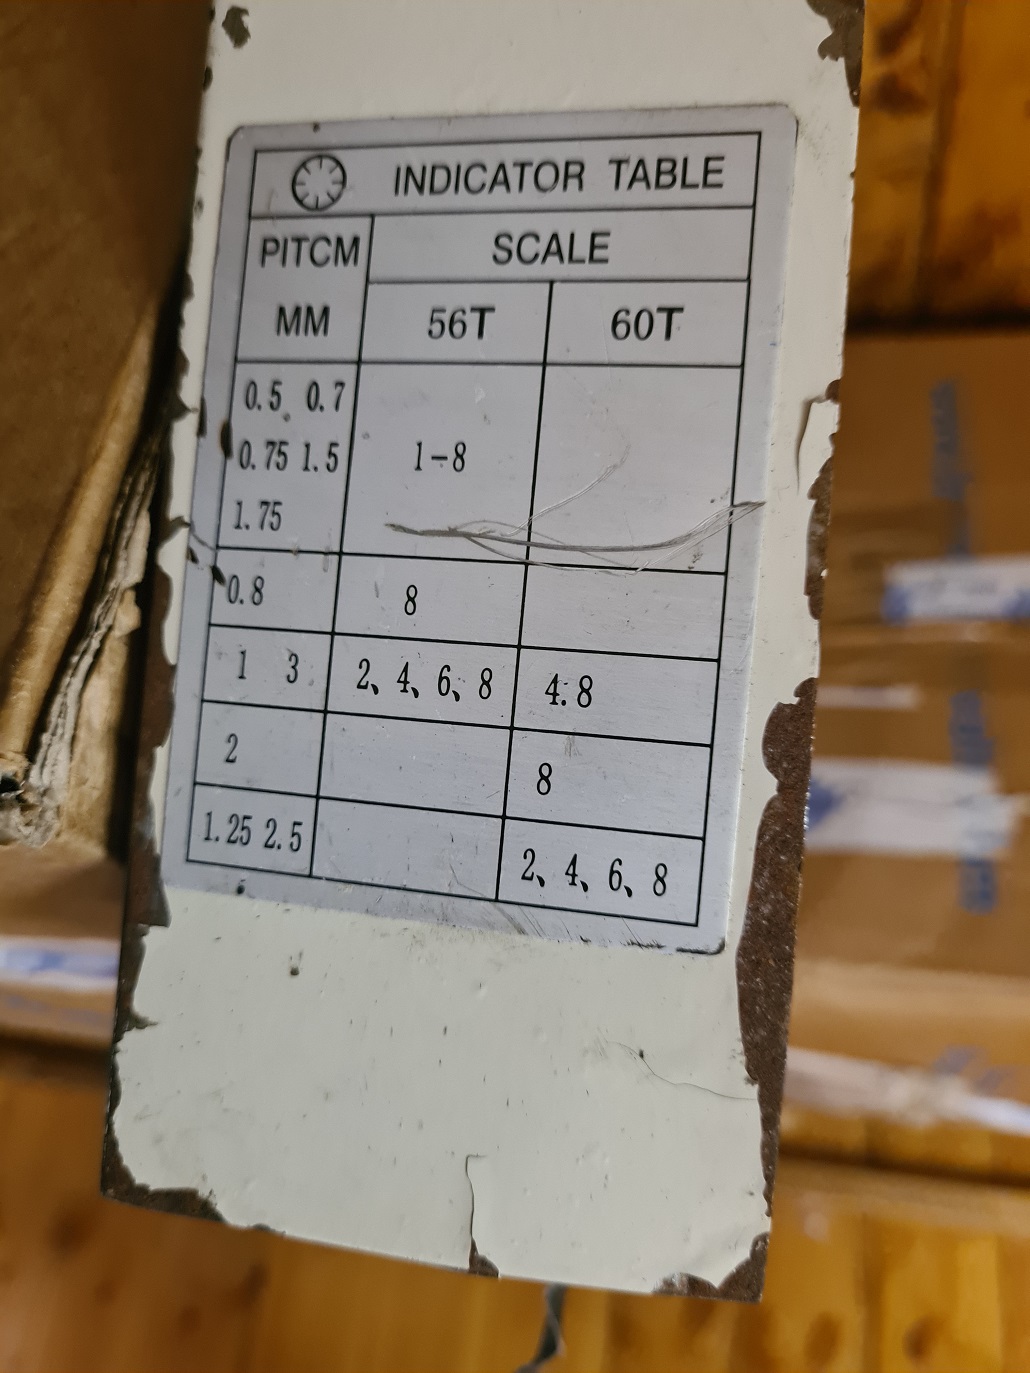
The crosstable has some bewildering dials and levers:
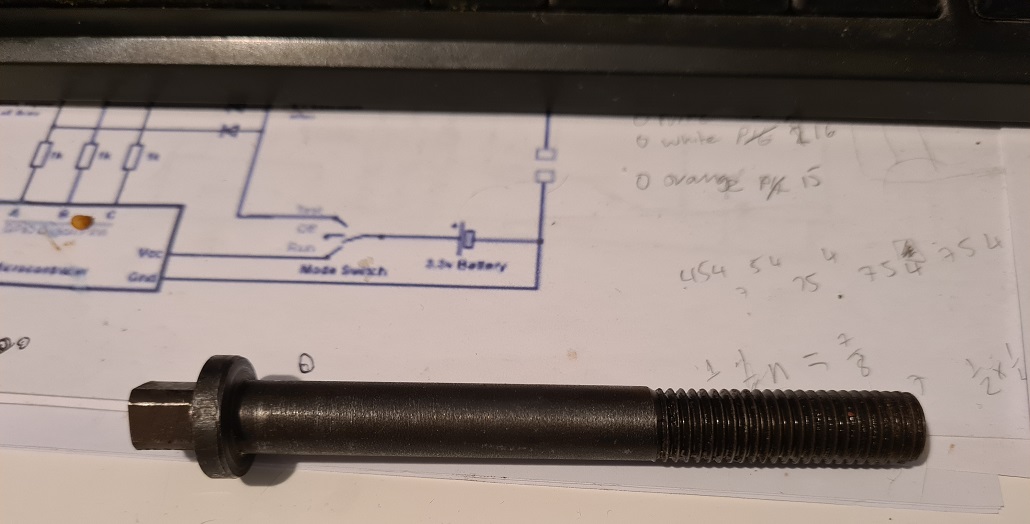
Before I can do anything though I needed to buy some tooling. First off is some arbors and a chuck. The arbor is the sluglike rod and has a threaded hole in one side to accept a retaining bolt.
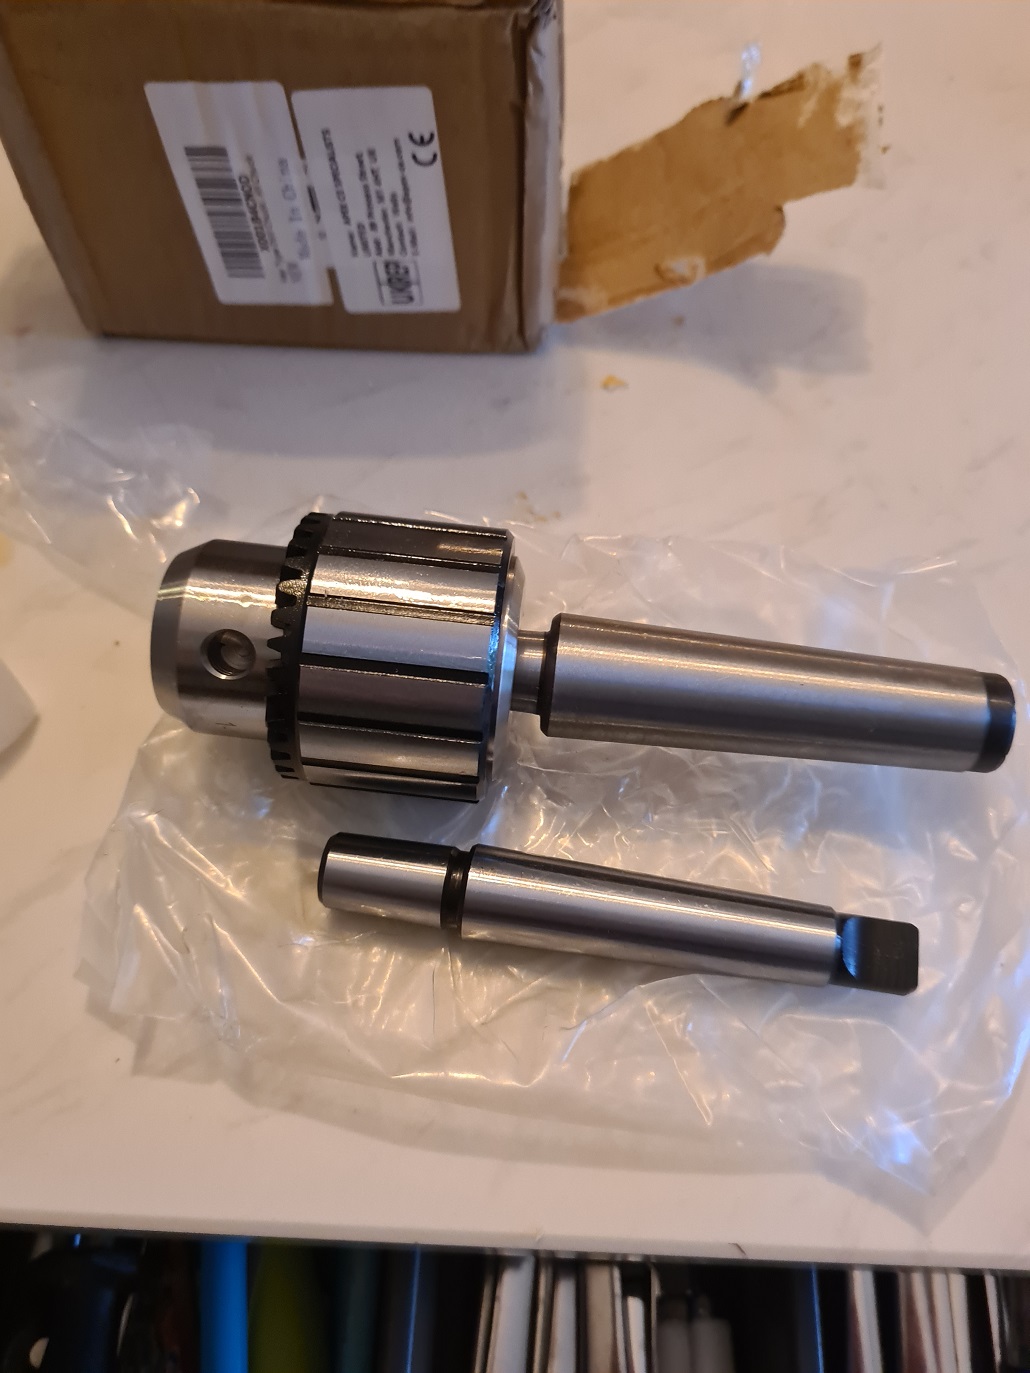
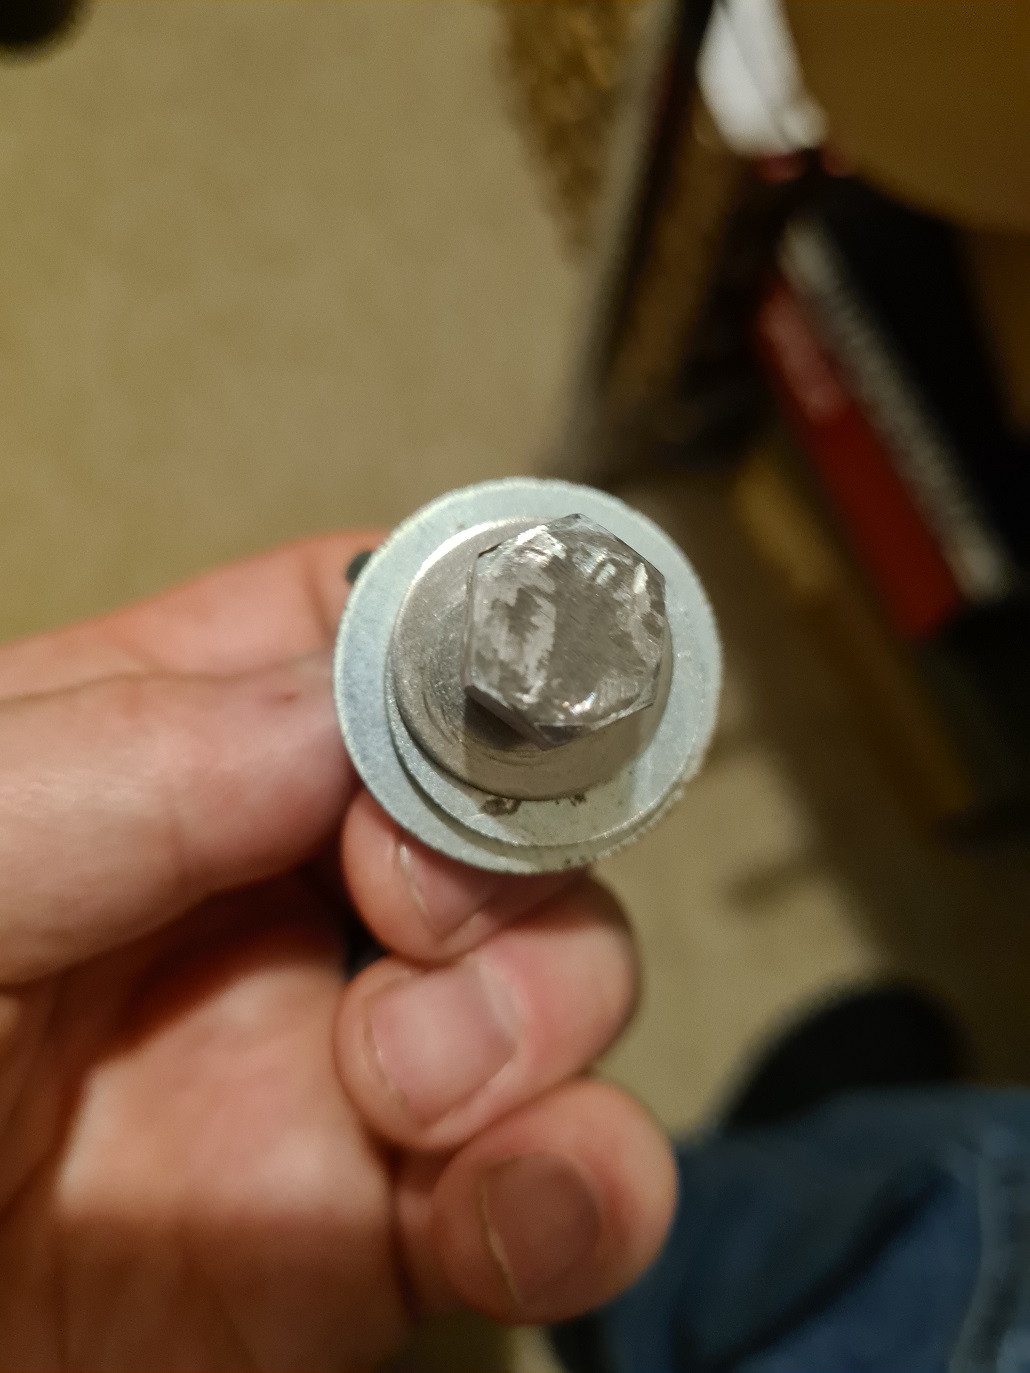
This is a big chunky M12 bolt.
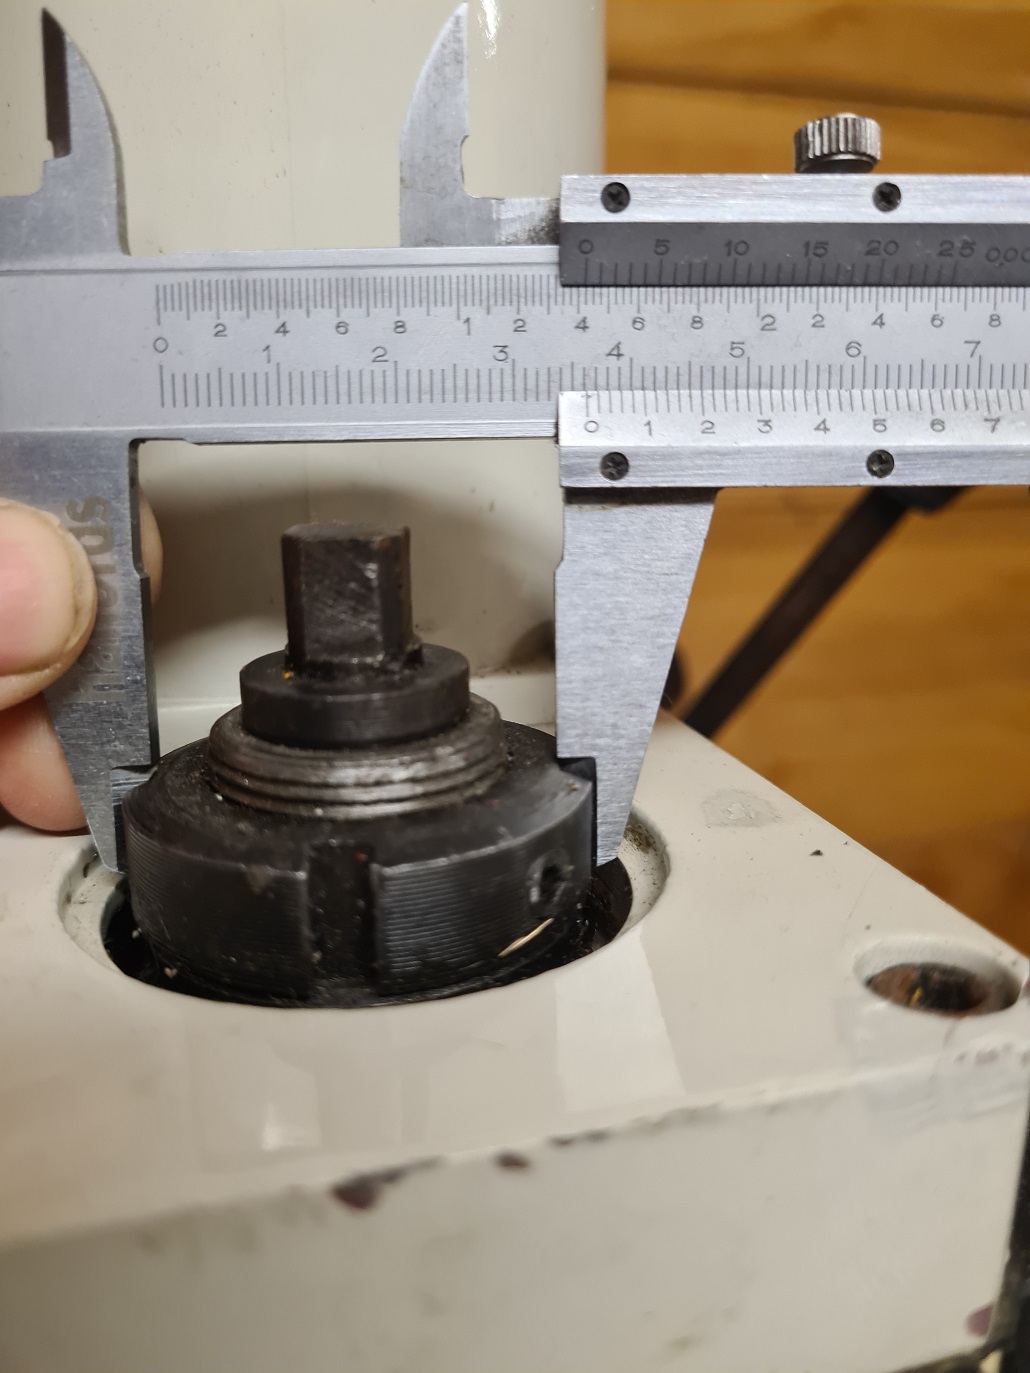
With an odd shaped retaining nut as well that I needed to measure to buy a special hook spanner to hold it still.
Now I have a cutting head to remove material I need to hold the work still. I use the old drill press vice I bought when I was trying to use a drill press as a mill.
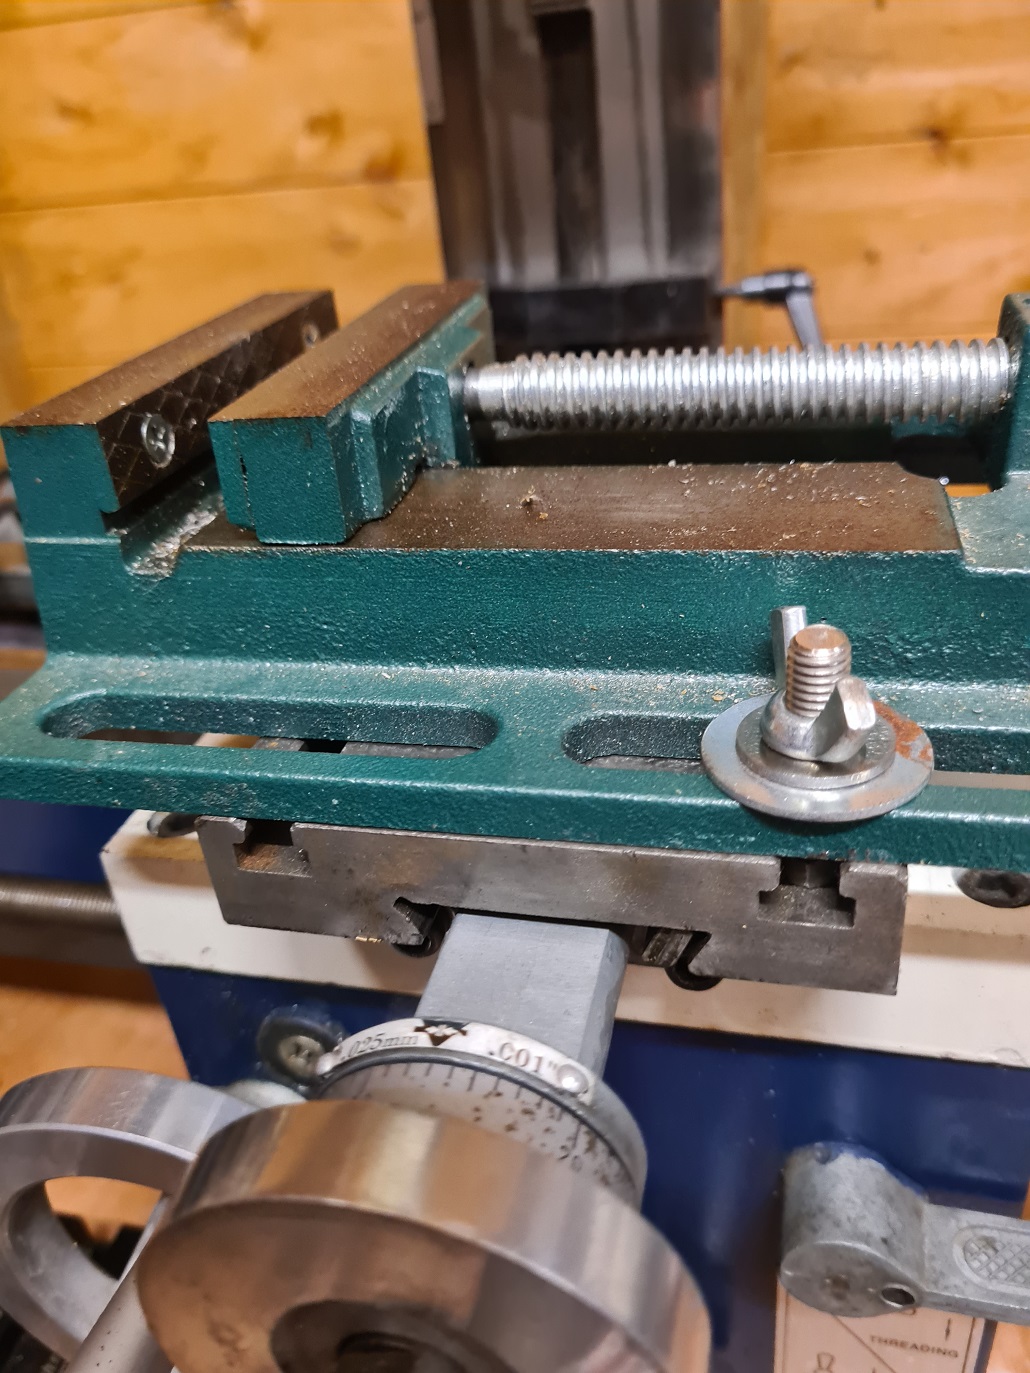
Sadly the T channels in the cross slide are a bit small so I have to grind the heads down on a couple of bolts so that they will fit. Ironically, if I had a mill with a vice I could do this on the mill…
And now the vice is mounted on to the cross slide, we are ready to machine!
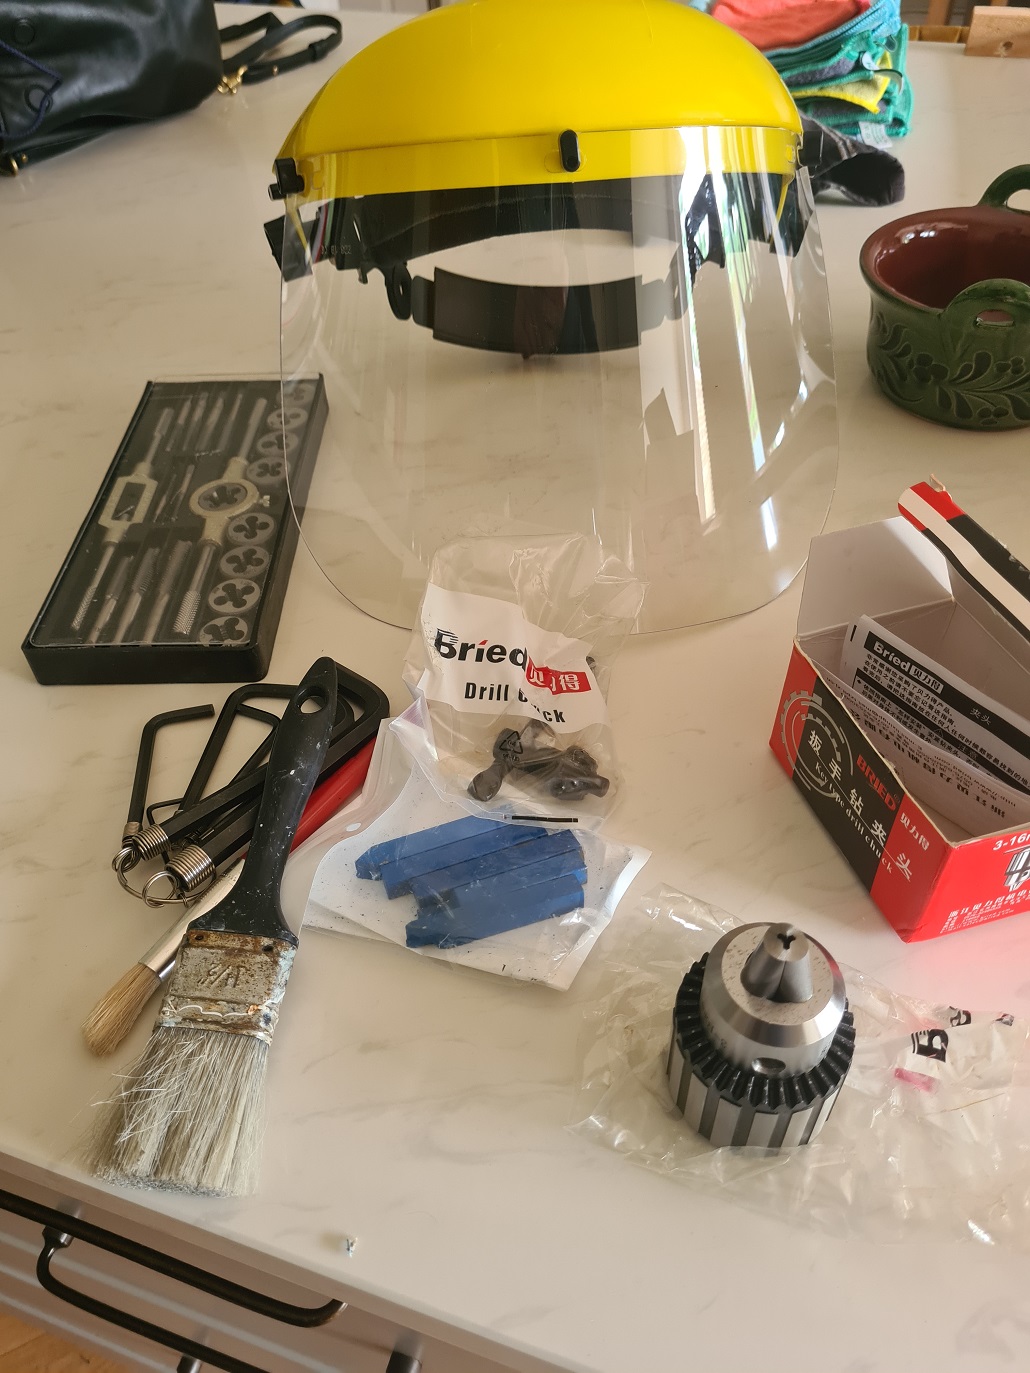
That in mind, I realise this is no longer toy level DIY stuff and before I begin I get some safety gear delivered.
The mystery of dial setting is solved, it is to do with the cutting of threads on the machine.
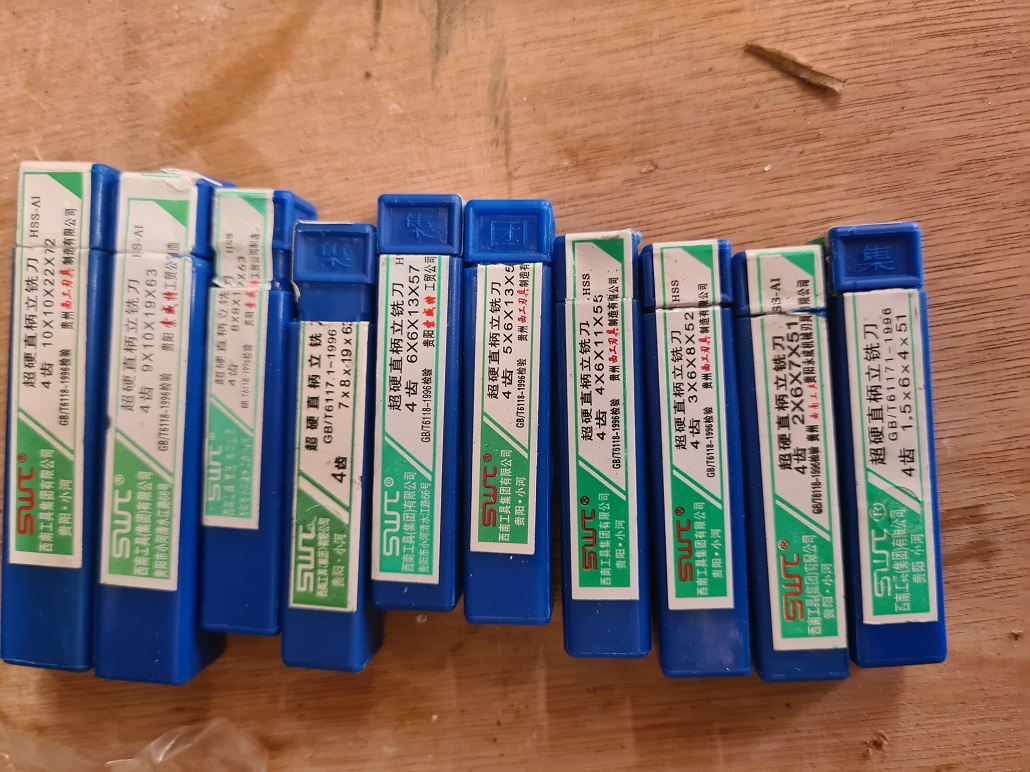
I dig out the end mills I bought when trying to use the drill press as a mill
And then get interrupted.
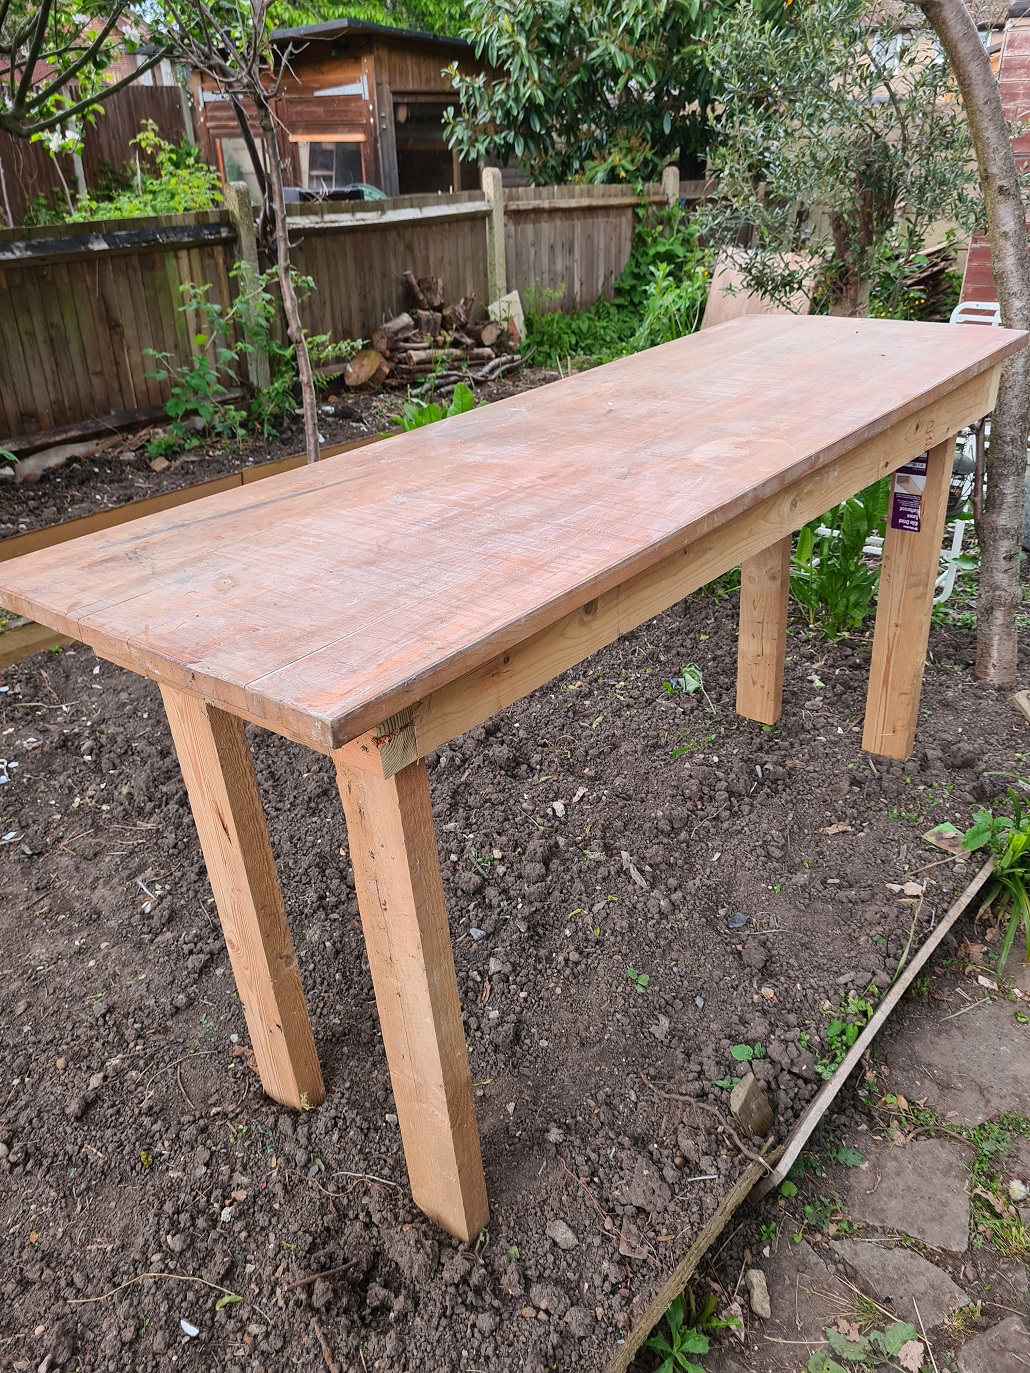
While I was waiting for the safety gear to arrive I took the opportunity to build another bench to assemble stuff on.
And finally, the safety gear arrives and I mark out the cuts I want to make.
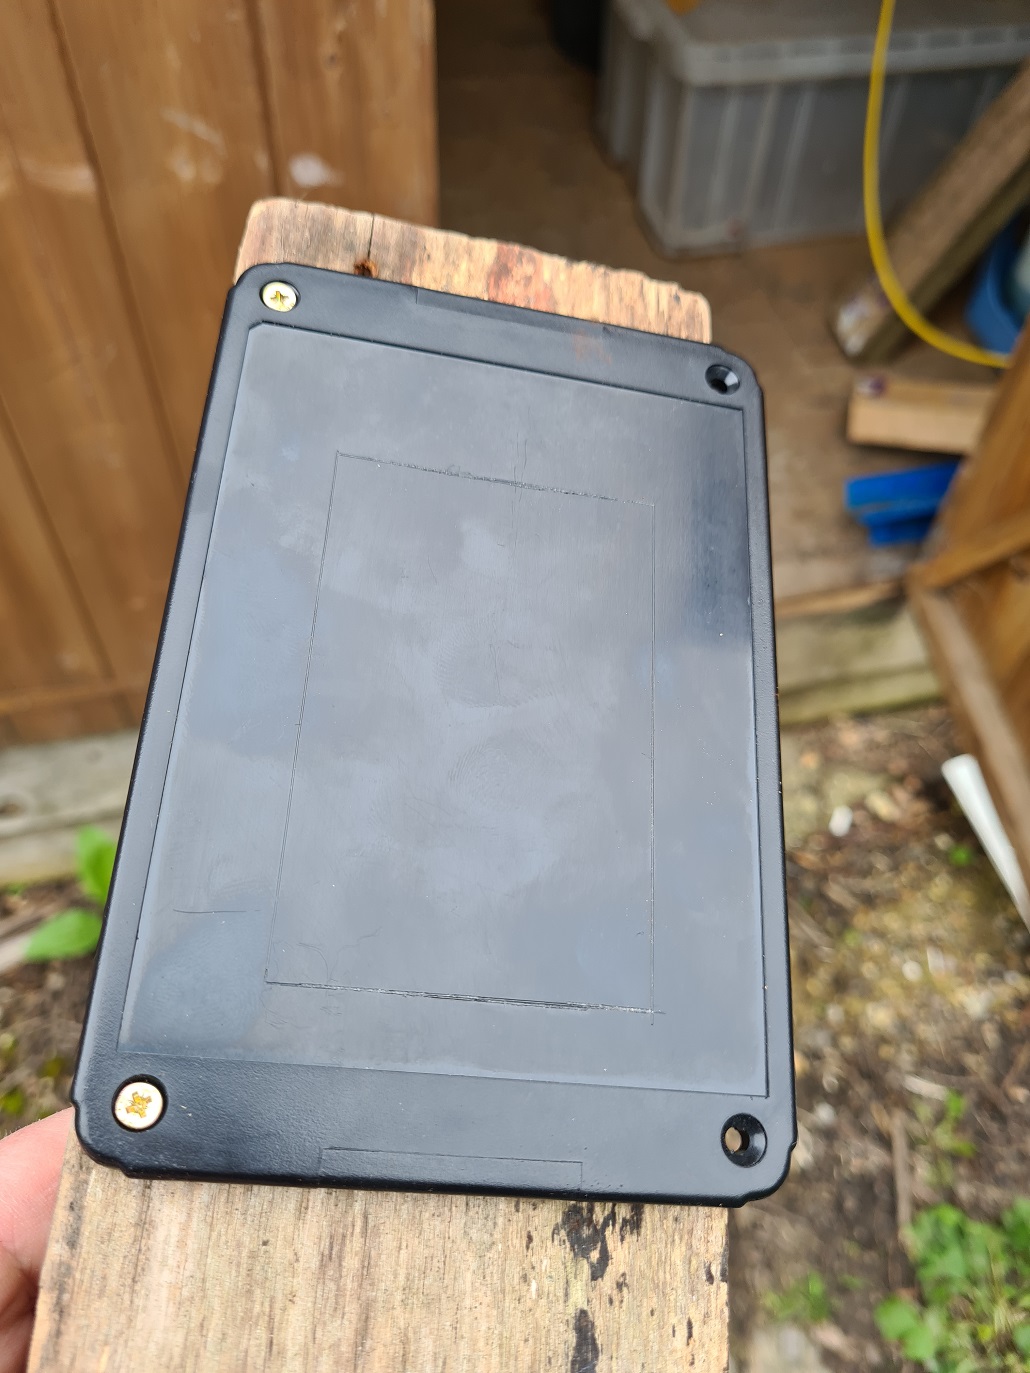
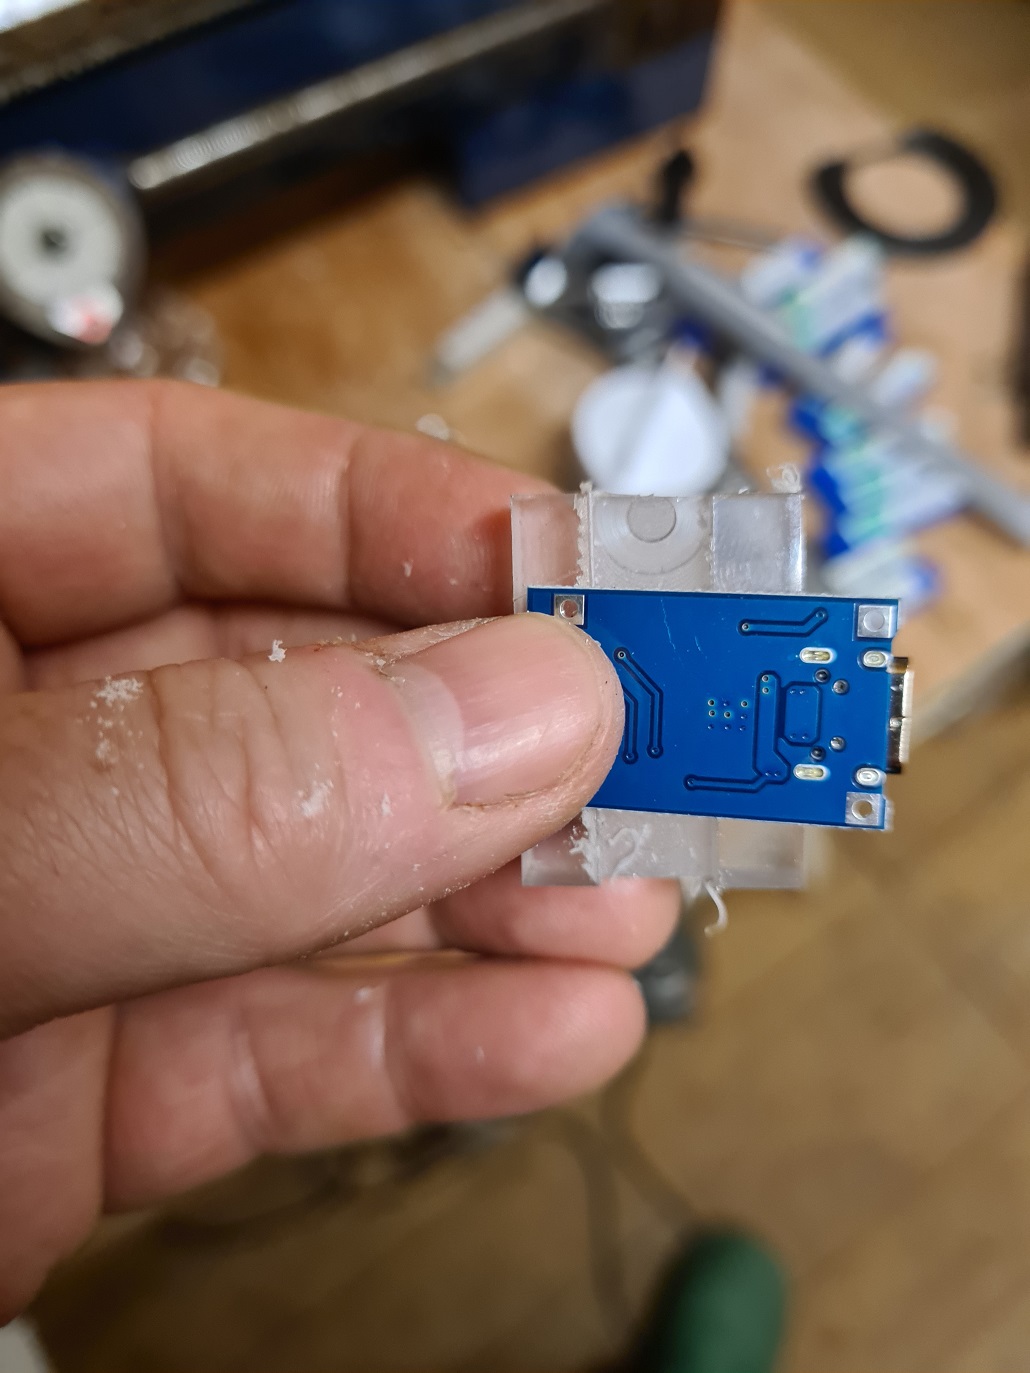
The picture above is the shape I need to cut out to fit the LCD screen to the BladeOMatic sword tester, see previous articles. It has been secured to the wooden block so I can secure it without crushing the plastic.
Reading machining forums, they keep going on about feeds and speeds, so I look up the ideal speed for ABS and try that. The mill has 2 gear settings, high and low and I choose the speed of around 12000 RPM as a test.
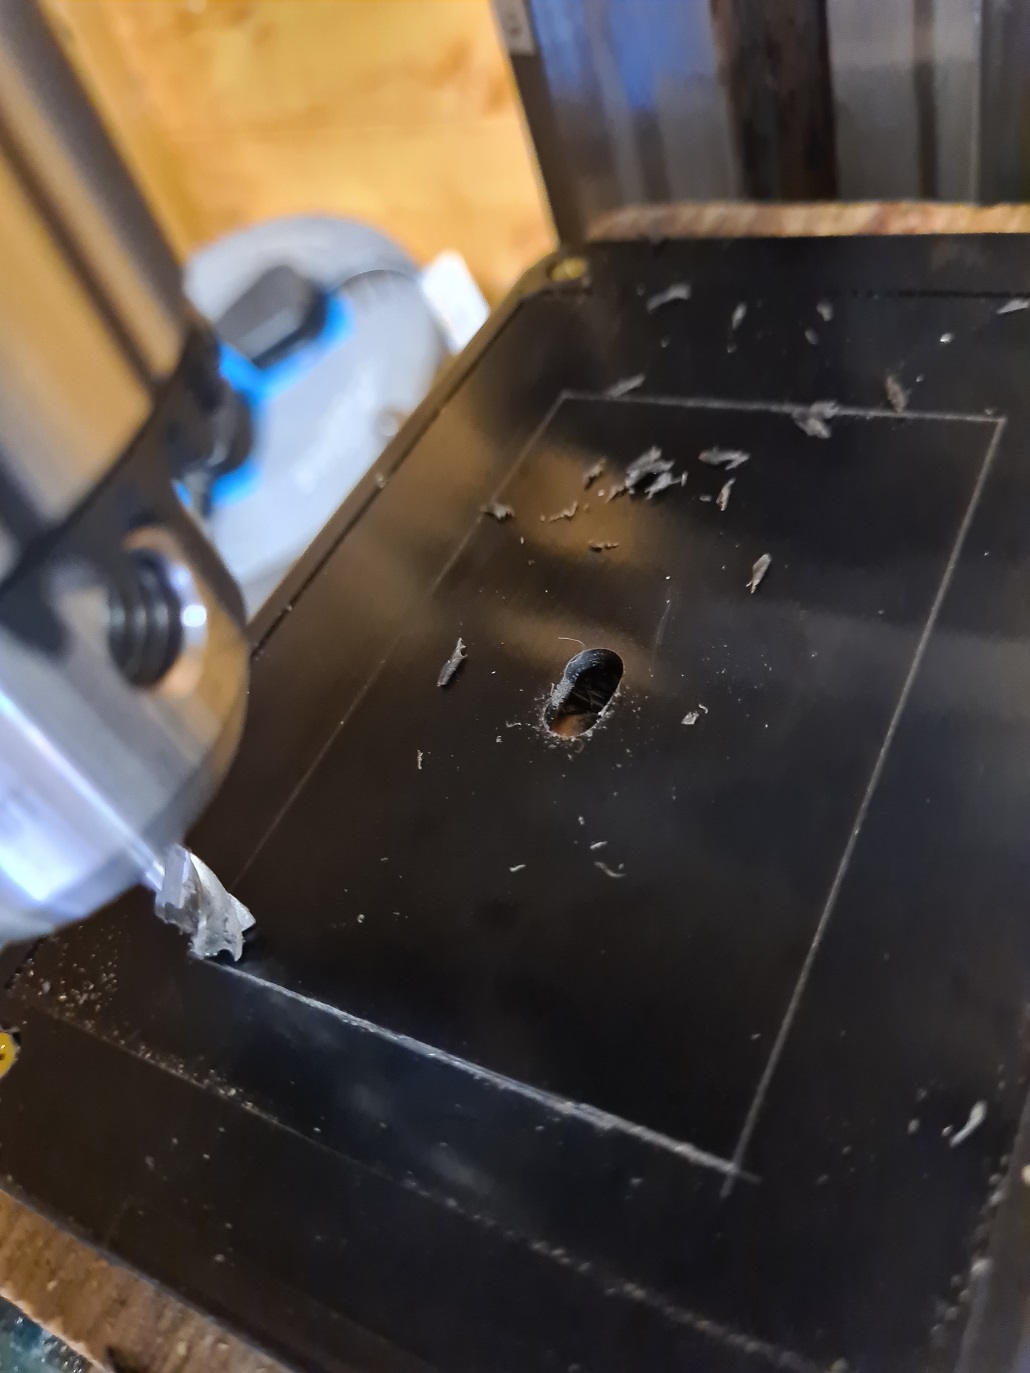
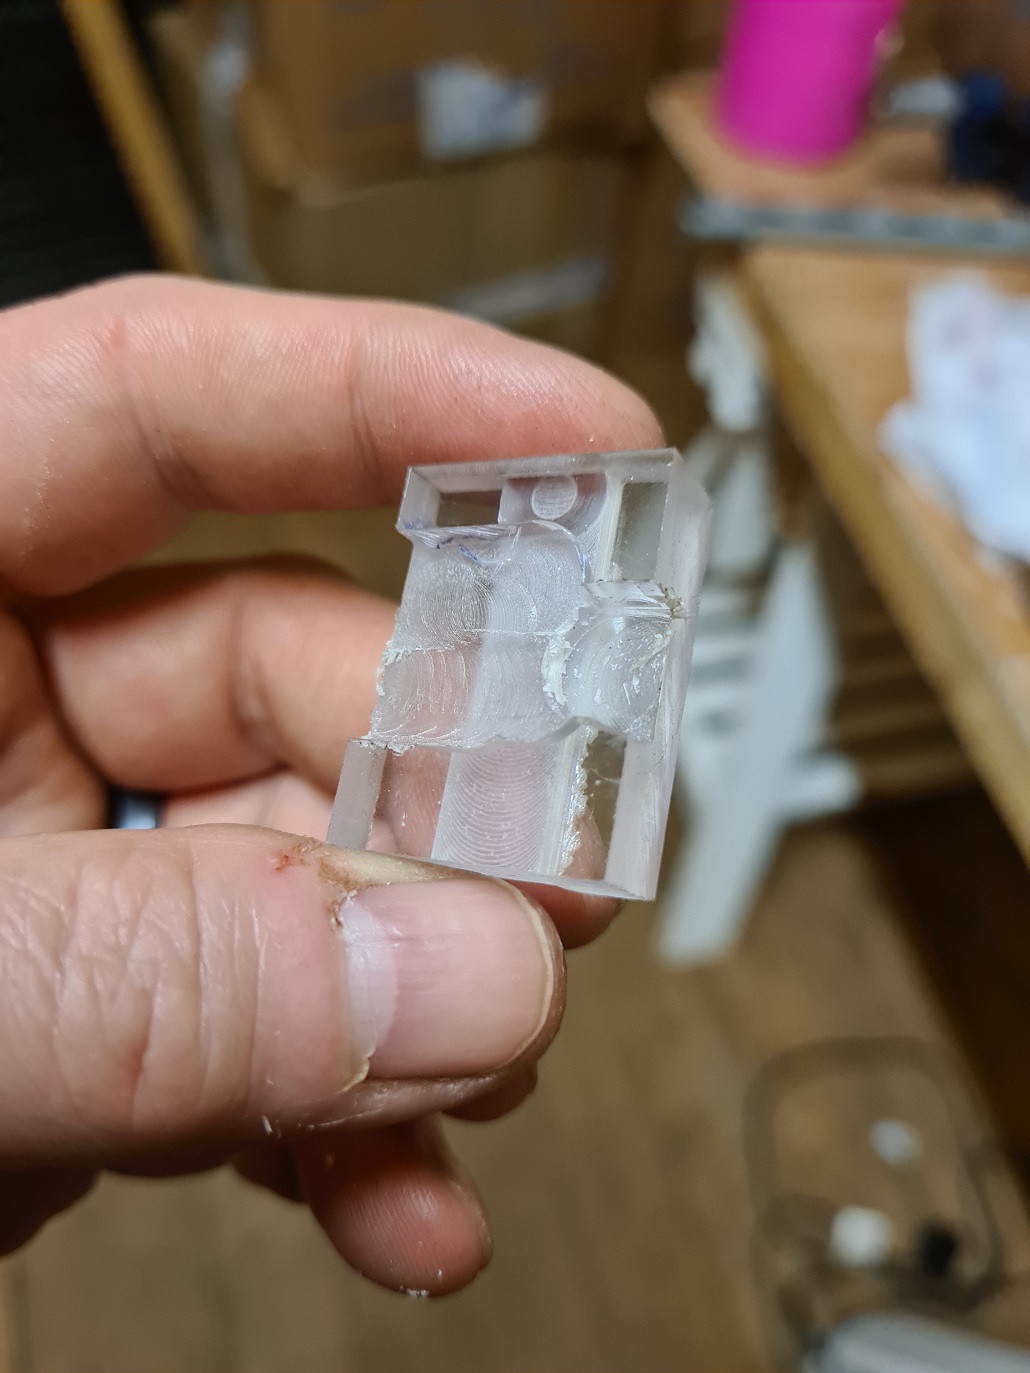
The channel is cut neatly and cleanly so I go for the full cut:
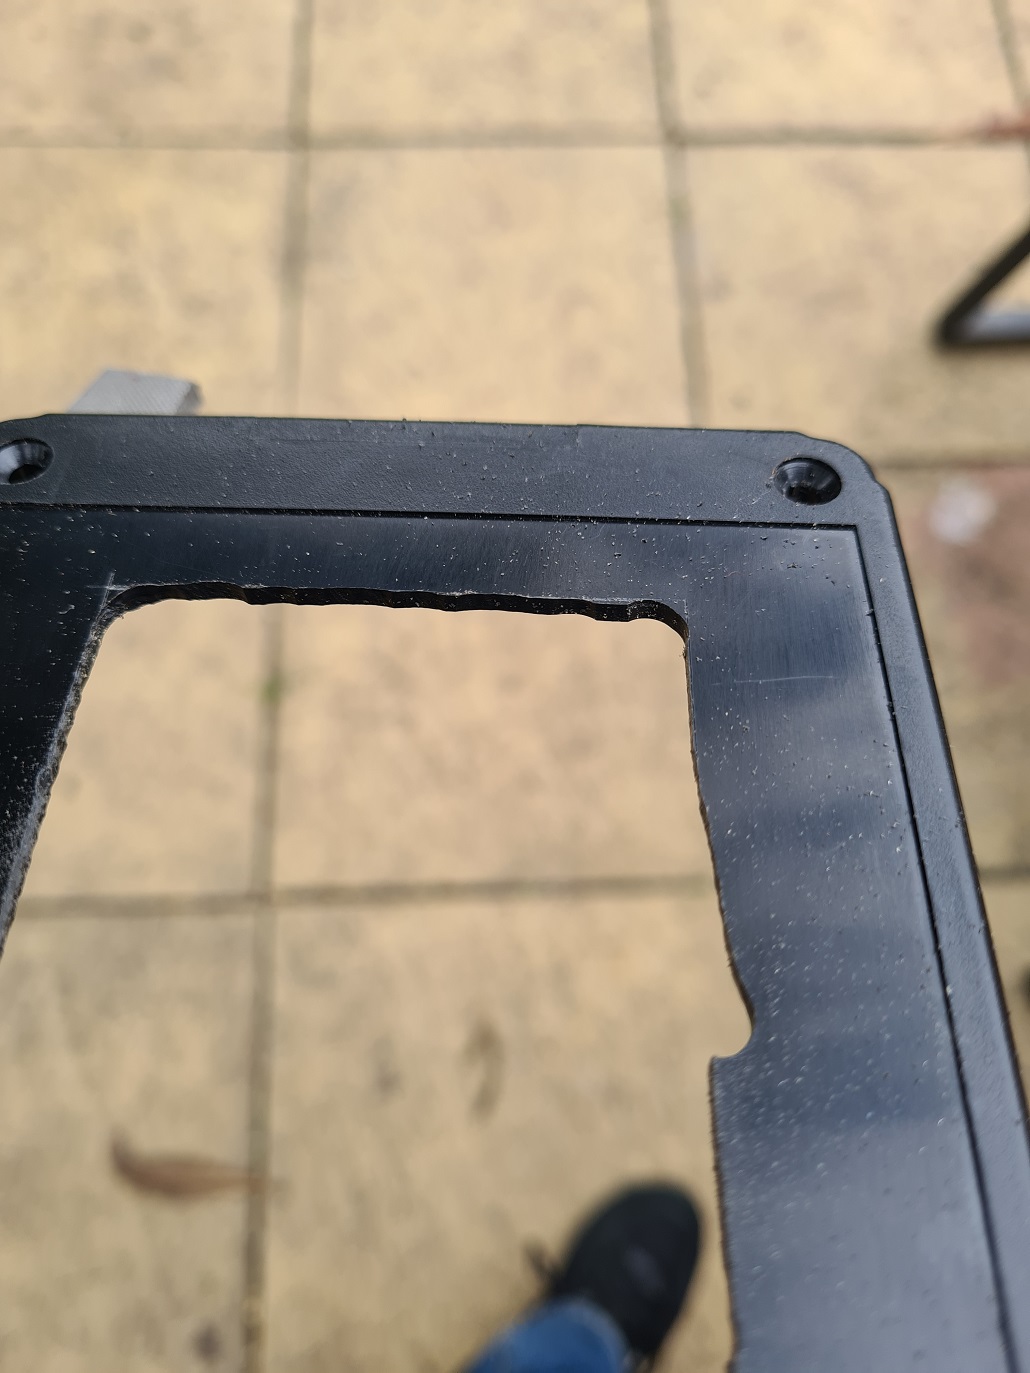
And as we see, this is why the sideways lock must be used or the milling bit drifts as it hits the edge of the work. One thing as well – the attachment of the work to the block of wood was a good idea but it needed to be more solid as when I had too slow a speed (worried about melting the plastic) the work would ride up the milling bit and ruin the clean line.
So three lessons learned here:
• Be consistent in RPM speed for the milling bit
• Secure the work down completely
• Engage the crosspiece lock so the work can only move in one direction
The next thing I needed to make is a holder for the charging port for the BladeOMatic.
Another lesson learned: check the orientation of the work before cutting! I am 90 degrees out!
And I forgot to engage the lock again when cutting this piece.
There is a wider lesson here though, when Cnuteeering I have just relied on my eye to cut up to the line and then sand to accuracy. With a mill this is not possible, as the channels can’t always accommodate a file or sandpaper in the crevices. This is made worse by the material the milling head removes obscuring the lines drawn on the work. I am going to have to learn how to cut holes and channels accurately using the dials on the cross slide.
So lots of hard lessons learned on the way but I do feel a little more competent with the machine. I do need a better vice though, this one rolls the work a little when it is clamped. And I must remember to roll my sleeves up, there was very nearly an incident when the oddly shaped retaining nut grabbed my sleeve. Luckily it only tugged it but the outcome could have been significantly worse.
My pleas for the CHFWLAMM finally are heard, and our very own GrimyMiner steps up with some kind offers of stuff and advice:

Aside from ferreting out some bits, he also sent me some very useful links:
Beginners Start here
Mill Skills
Lathe Skills
I am not above admitting I have a little bit of a machinenerd crush on blondihack, she has a great way of explaining things in those videos above. Thanks a million, Grimy Miner!
And so finally, the Shed Of Charity And Hope is set up, a blessed refuge for those abandoned and abused Lathes and Milling Machines, a beacon of hope and kindness for all desktop milling, drilling and lathe machines.
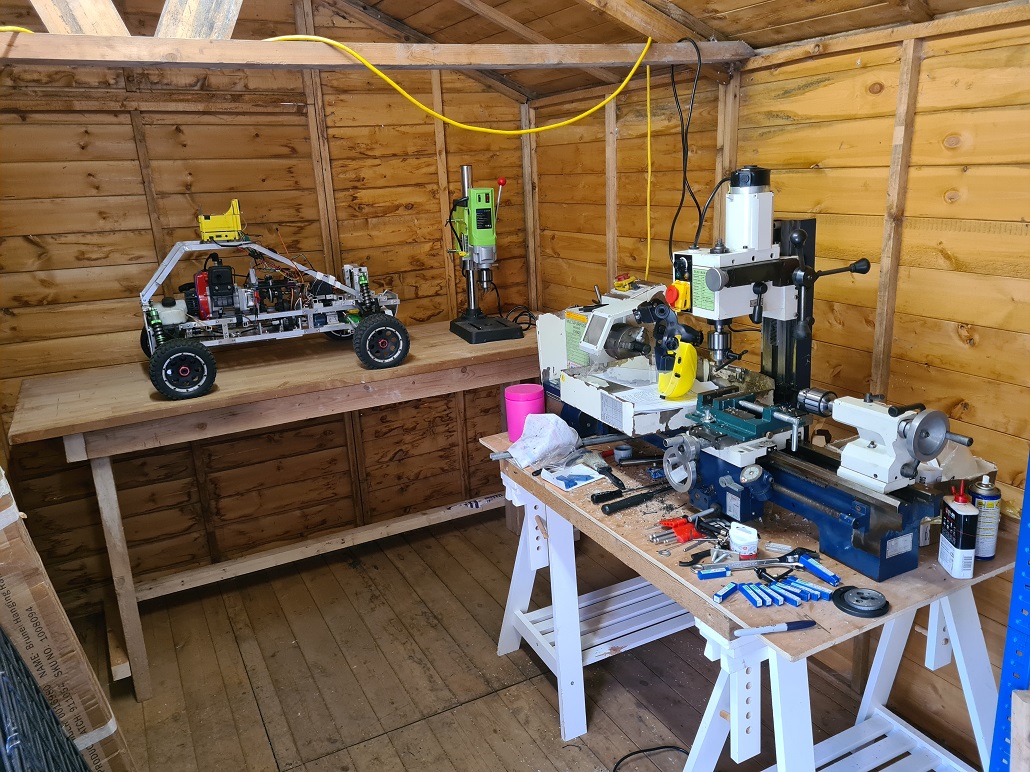
Now I can get down to some serious Cnuteneering, and finally get cracking again on the Cnutmobile.
Pics, words and music © El Cnutador 2023