… for The Professor
I’ve recently been working on a little project, to make a very personal (and I think appropriate) keepsake for my old boss, to mark the end of his many years loyally serving science (proper science, that is) as a Professor at the University of Cambridge. He’s not retiring, mind you. Oh no indeed—he never will, as he is one of those old school academics whose work is his life. His lifelong passion for his research topic means he’ll never call it a day, simply hang up his lab coat and gown when the big man upstairs calls.
A project this may be, but it’s not an entirely new one to me as I have tied, mounted, and sometimes framed flies for a number of people over the last couple of years. I’ve tied some traditional flies such as the ‘Surgeon General’ for our paediatric surgeon friend, and the ‘Norse Shadow’ streamer for another friend, a lovely chap of Viking origins who really ought to be a Puffin. His fly was a pattern variant of the Sunray Shadow salmon fly, giving a little a hat tip to the Rökkr, the Norse Gods of the Underworld who embrace change.
Some of my flies have been tied for Puffin friends too. One of the first I made was a hair wing fly, the ‘Silver Doctor’, fashioned as a tiepin for 1642again.
SharpieType301 2020
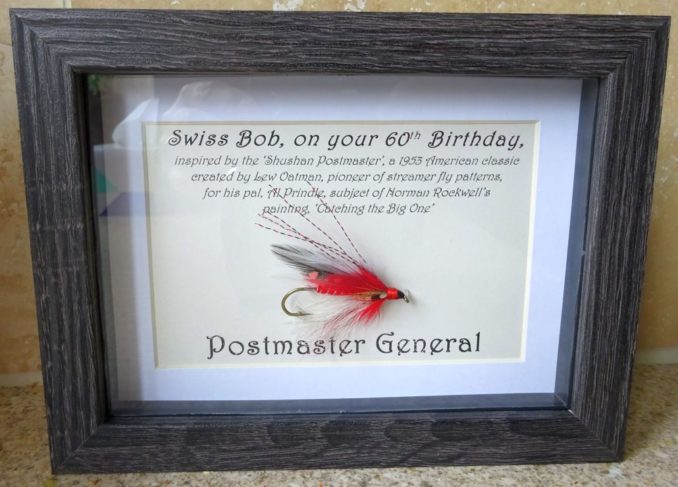
More recently, I tied a ‘Postmaster General’, which I mounted in a frame to mark the 60th birthday of ‘the Gaffer’, our very own Swiss Bob.
SharpieType301 2021
Way back in January of 2021, which now seems like several lifetimes ago, I started work on another little pet project—making a custom ‘fishing fly’ for another of my Puffin pals, Moscowflyer. I find that it’s always interesting, for me at least, to see the process, which is why I so thoroughly enjoy reading El Cnutador’s ‘Cnuteneering’ series.
So, while creating the custom fly, I went on to write an article about it in Evolution of a Puffin, following that up with the tale of how the finished object was presented nicely in a box frame, in You’ve Been Framed. Goodness, to think that all of this had come about on the back of some thought-provoking conversations with a number of interested Postallers, when I’d written about my very first forays into fly tying in Flies Undone.
To some extent, this piece will follow similar lines, as it tracks the ups and downs of my latest project. On this occasion, I had planned to make two keepsakes, one for my old boss, presented in a frame, and the other as a wearable piece for his lovely wife.
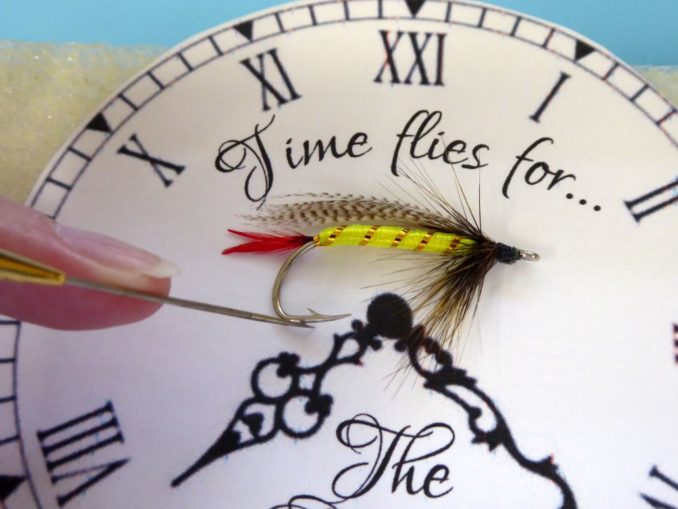
Of course, the fly I chose to tie for my old boss simply had to be ‘The Professor’.
A bit of background about this fly. A wet fly, that is one which is fished deep in the water to attract a fish’s attention, the ‘Professor’ is no upstart. It has a long and, I think, rather interesting history. The respected American fisherwoman Mary Orvis Marberry included an illustration of the ‘Professor’ in her 1892 book, Favorite Flies and their Histories.
Mary is, perhaps, one of the unsung heroines of fly fishing and tying. She compiled and published this, the first definitive book of fly patterns, since she was also the first person to devise and standardise a system to classify fishing flies. Her book was beautifully illustrated, and was a significant tome, not least because it was one of the earliest in which chromolithography was used to create the thirty-two delightful full-colour plates.
To produce the source material for these plates, Mary tied many of the flies herself. Her flies are framed and preserved as part of the collections held by The American Museum of Fly Fishing. She also spoke to fishermen and tiers, so collected stories about each of the flies from those who tied and fished with them. Including the most popular and successful flies of the late 19th century, the book quickly took its place as a standard reference for fly fisherman and tiers.
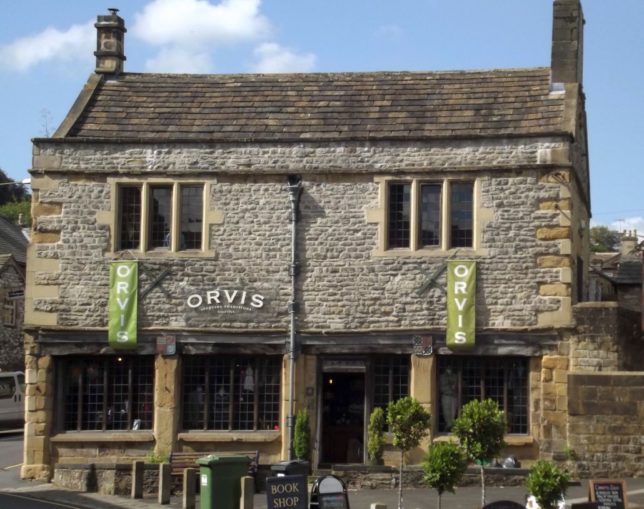
She worked for her father’s family business — the C.F. Orvis Company, founded in southern Vermont in 1856. Some of you may be familiar with Orvis, an American family-owned business, which specialises in fly fishing, hunting and sporting goods. They are still going strong to this day.
In fact, it was while I was visiting their Bakewell shop that, watching a lovely gentleman called Bob demonstrating his skills, I first decided I would give fly tying a go.
© Elliott Brown, licensed under CC BY-SA 2.0
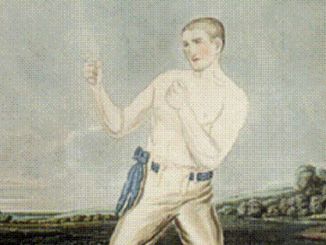
But bringing us back to The Professor fly. It was named after the renowned Scottish angler Prof. John Wilson, who was born in 1785. Fellow Scottish angler and poet, Thomas Tod Stoddart, described the fly in his book The Art of Angling (1836). Although originally tied as a salmon fly, one particularly suited to fishing on the Spey, a large river with high banks lined with trees, he mentioned that it was also an effective trout fly, exclaiming:
“Foremost is the fly commonly called the Professor’s, after Professor Wilson of Edinburgh. The wings are formed of a mottled, brown feather, taken from the mallard or wild-drake; the body is of yellow floss silk, rather longish, and wound about close to the head with a fine red or black hackle; tails are often used, but we think them unnecessary.”
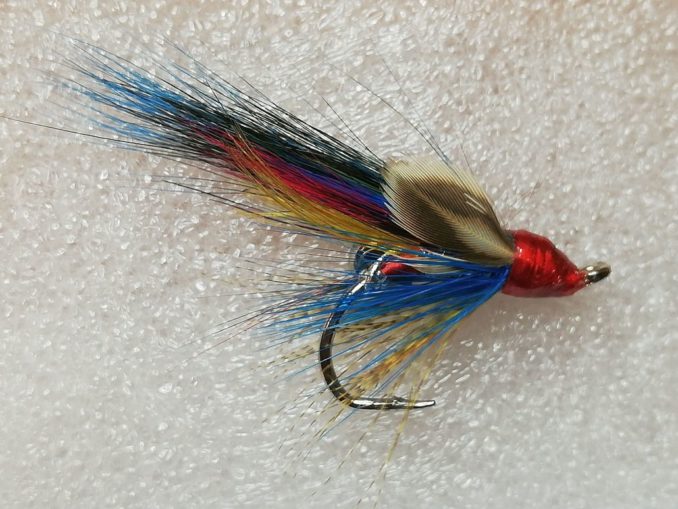
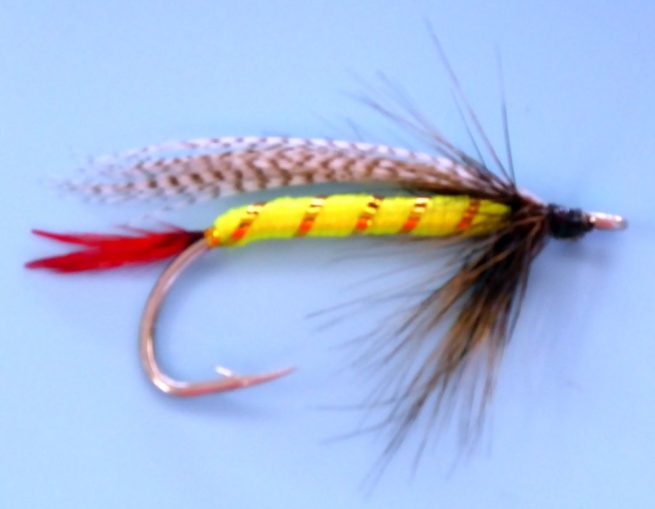
I shan’t go into any great detail here about tying the fly itself. Suffice it to say that I used the materials and guidance provided by one of my fly-tying legends, Davie McPhail, but tied it somewhat oversized (in fact, more like the salmon fly it originally was) so that it could be seen more clearly once framed.
In fact, I tied several iterations, selecting the best of these to put into a frame. Heaven knows whether it’s the one shown below, but the photo will give you a good idea of the fly’s appearance.
SharpieType301 2022
The story goes that, out fishing on the riverbank one afternoon, the Prof. ran short of flies that he had already prepared. Exasperated, and earnestly wishing to continue but loath to waste precious time away from the water’s edge, he cobbled together a fly-like lure with whatever he could scavenge and chucked this into the water to chance it.
He had secured soft buttercup petals to his hook, adding scraps of leaf to imitate a fly’s wings. He was in luck—this Heath Robinson jury-rigged ‘fly’ proved to be wonderfully enticing to the trout. Delighted, Wilson made sure to tie a batch of flies very similar in appearance as a durable lure.
With its now characteristic yellow silk body, the resulting ‘Professor’ has been a charming, extremely successful, and timeless fly. In fact, a classic.
As a little aside… Wilson, who was Professor of Moral Philosophy at the University of Edinburgh from 1820–1851 was also an author. He wrote under the pseudonym ‘Christopher North’, and contributed to a series of colloquies, the Noctes Ambrosianæ (Ambrosial Nights), in which imaginary but lively conversations take place between friends in the congenial surroundings of Edinburgh’s Ambrose’s Tavern.
Satirical, for the most part, these conversations tended to explore men and the state of the times in which they lived. Some of the most expressive and animated discourse came from a man noted for his broad Scots. This character, based on James Hogg (the late 1700s Scottish poet, novelist and essayist), was identified in the Noctes as one ‘Ettrick Shepherd’.
John Wilson was an inventive and passionate man, with a deep love of his field and of nature. My professor is cut from that same cloth. A respected and dedicated scientist, musician, humanist, and a lover of beauty. He too is, in fact, a classic.
For the presentation of my finished fly, I wanted to incorporate a timeless, classic feel into what I made for him. Instead of a normal box frame I looked around for something else in which I might display the fly.
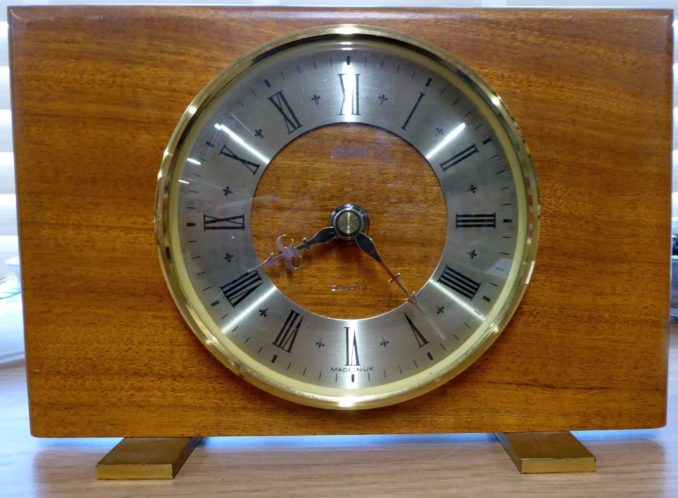
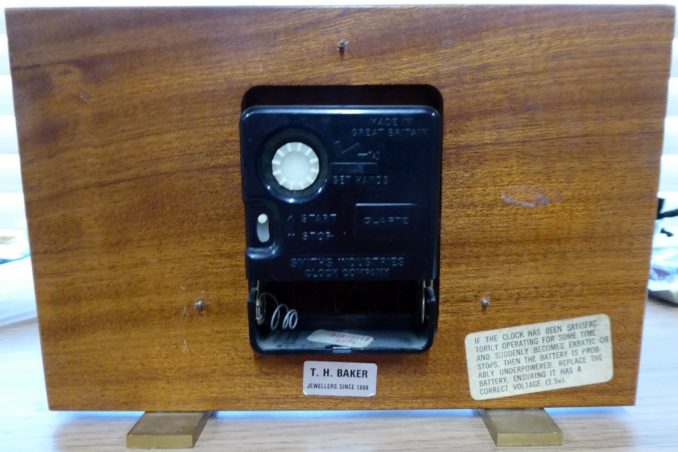
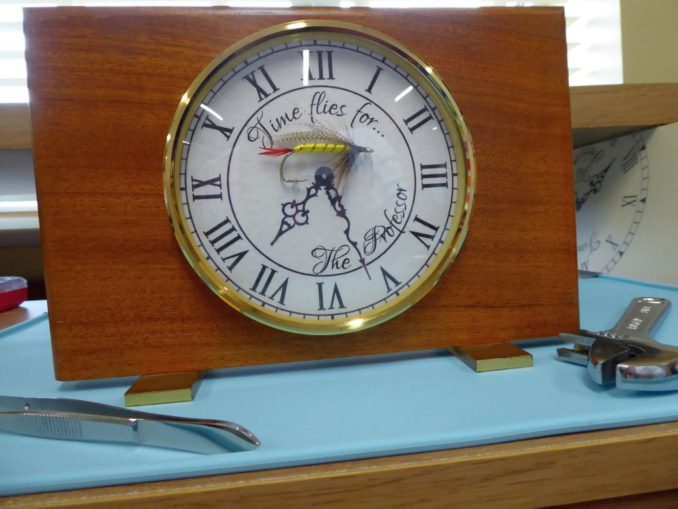
And there it was, a brass-footed Smiths mantel clock, traditional in style, with a lovely wooden surround and a domed glass front. It was in pretty good condition, given that it probably dated to the 1960s. Perhaps as important to me as the look of the clock, both the surround and the movement proudly declared that it was ‘Made in Great Britain’.
But, having found the clock, it was now game on!
SharpieType301 2022
Although I originally thought I could feature the brass face, I decided that I needed to remove and replace it. Being shiny and bright, I thought that if I left it in place it’d detract from the fly.
What I wanted to do was incorporate the fly, its name, and a reference to time flying, while keeping the feel of the original clock. On paper, I roughed out a replacement clock face, making sure it was the right size to neatly fit under the domed glass and its surround.
I started to assemble what I’d need to dismantle the clock, preparing to remove the hands and dial, plus the movement.
SharpieType301 2022
As I began to remove the nuts holding the surround which held the clock’s glass in place, I realised that the reverse bore a small sticker from the original seller. Being the curious sort, though some might say nosy, I looked them up.
SharpieType301 2022
A family firm, T.H. Baker, whose first store was opened in Brierley Hill. Goodness me, what a coincidence. That’s where my husband and I stayed when we recently visited the International Festival of Glass. The coincidences didn’t end there though. It seems that T. H. Baker still has a Cambridge branch, based in The Grafton Centre, just a short walk away from the Department where my professor has worked since the mid-1990s.
All this certainly seemed to confirm the choice of this clock was a good one. Let’s rip it to bits!
SharpieType301 2022
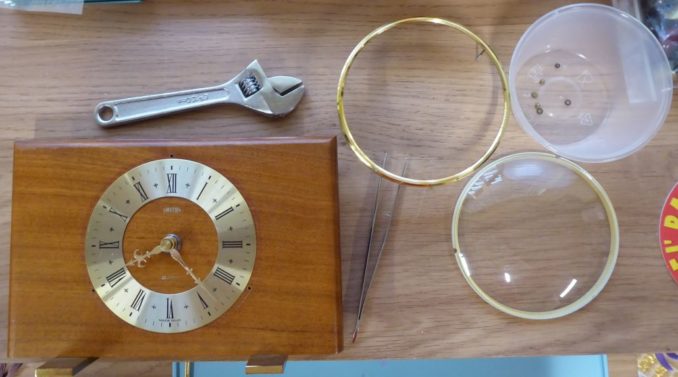
Meticulously cleaning each piece as I went, once the glass and its brass surround were removed, it did seem rather a shame to jettison the hands and dial. These were in great condition, but I felt that the fly wouldn’t show to its best advantage if they remained in place. So, off they came, a task that was surprisingly easy having looked up how they were fixed in place.
SharpieType301 2022
SharpieType301 2022
Slightly more problematic was detaching the movement. Visible in the photo above, this was held in place with a threaded plastic collet. As I tried to unscrew this, it crumbled. Hmmm, I suppose it is at least fifty years old, but it means there’s no chance of reusing the movement then.

SharpieType301 2022
You can see the residue of old adhesive tape on both the surround and the back of the movement. This had aged too, so was very easy to remove.
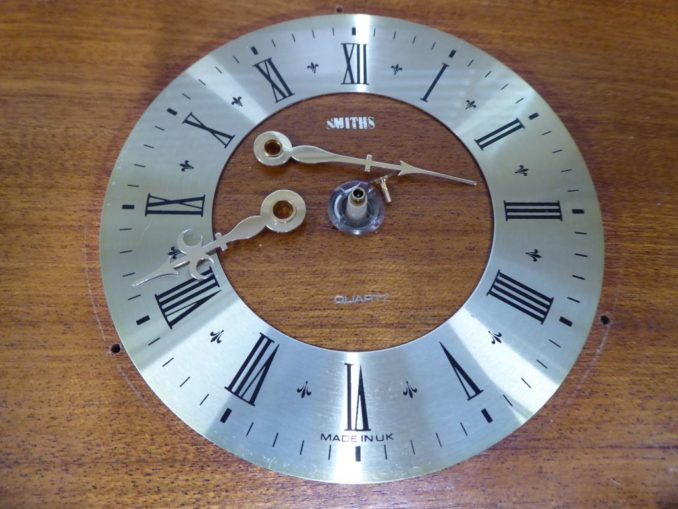
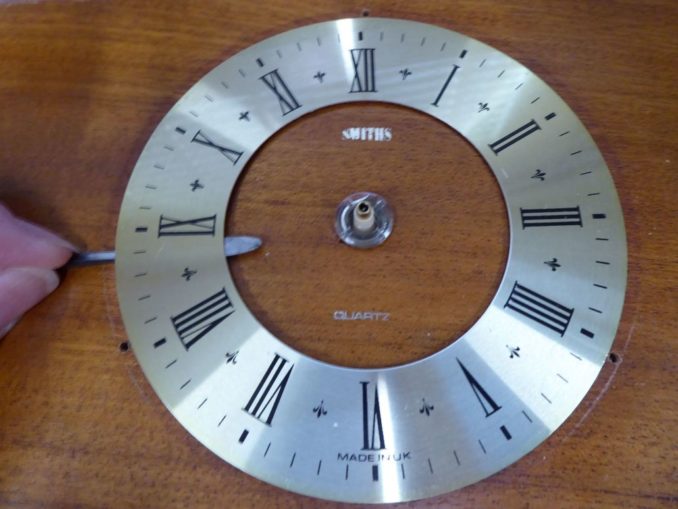
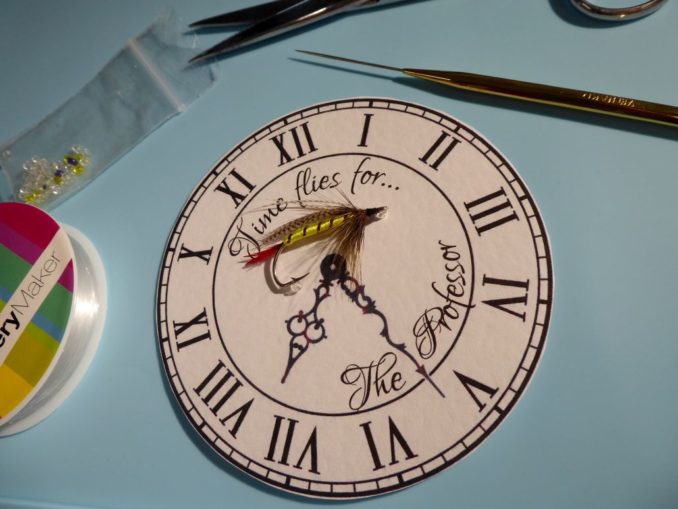
Next step, cutting out the ‘new’ clock face, complete with the motto. I laid the fly in place to make sure it’d fit nicely and not obscure the wording, carefully marking the holes where the fixings would go.
It was at that point that I realised that the printing was fuzzy (technical term) and looked absolutely crap! Worse still, the clock’s Roman numerals didn’t make sense. They appeared to be correct through from IX to XI, but where on earth did XXI come from?
SharpieType301 2022
OK, let’s rethink that clockface and print a different version. The eagle-eyed amongst you will doubtless notice that I changed the layout of the design quite a bit too.
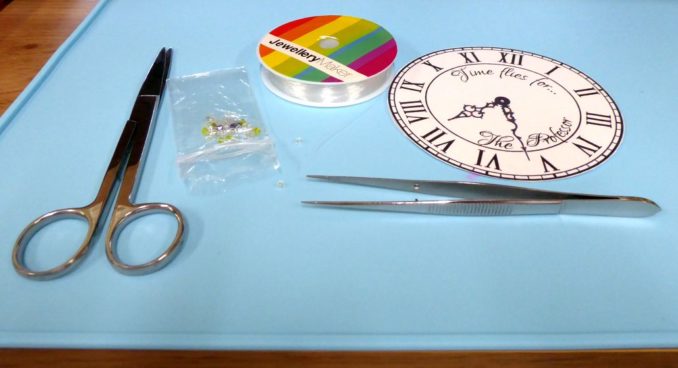
Time to assemble the bits and bobs I’d need to fix my fly in place. A decent pair of scissors to cut both the new face and the backing card, transparent beads to hold the fly clear of the card surface, and good old monofilament to secure the fly.
SharpieType301 2022
Once again, the position of the holes to secure the fly was marked, and the painstaking task of threading slippery monofilament through paper, card and those small slick beads began. Hmmm, I really could have done with an extra pair of hands or six for this. Since I hadn’t secured them together first, the newly printed clock face and the backing card didn’t stay aligned. Irritatingly, if I got one of the fixing points on the fly positioned, the other shifted. More annoying still, each time I adjusted anything, I had to tidy the delicate fibres of the fly again—it can’t look messy after all this!
That pretty red tail and the fine brown hackle kept getting messed up, and as for that blasted folded wing… There was rather more unladylike language during this phase than at any other point yet, especially as I now discovered that I’d forgotten a vital component, the adhesive tape to secure it all.
Ah well, we live and learn. At last, the fly was held in place firmly to the card, the feathers had been gently smoothed and tidied to look at their best. It was time to lift it into position and get ready for the clock glass and surround to be replaced.
SharpieType301 2022
Now came the moment of truth, and with it the worries. Had I positioned the, now bonded, face in exactly the right spot? Was it both central and level?
Phew! The libations had obviously done the trick, the sticky tape gods were smiling and, so far, it’s looking pretty good.
SharpieType301 2022
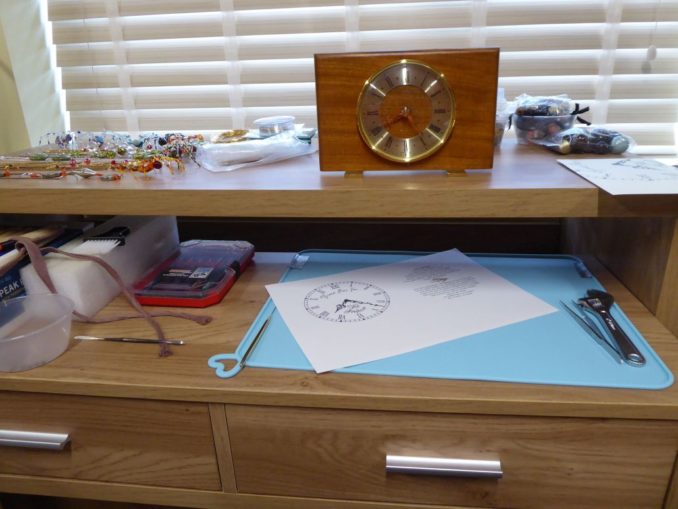
That’s Phase One completed. I could now start to rethink the second stage of this project—what to do at the back of the clock to include the information I wanted to provide about the fly. I had originally intended to affix a circular back panel covering the recess where the clock’s movement had sat. This would have told the story of the fly. But that nicely finished aperture seemed to call for a better solution…
It was at this point that the initial plan was torn up and a new challenge accepted. I wanted to make a book. Albeit a small book, but one which would sit neatly in that aperture. Moreover, I wanted it to be a proper, leather-bound book.
Hmmm, only one tiny problem I could foresee… I’d never tried anything like this before.
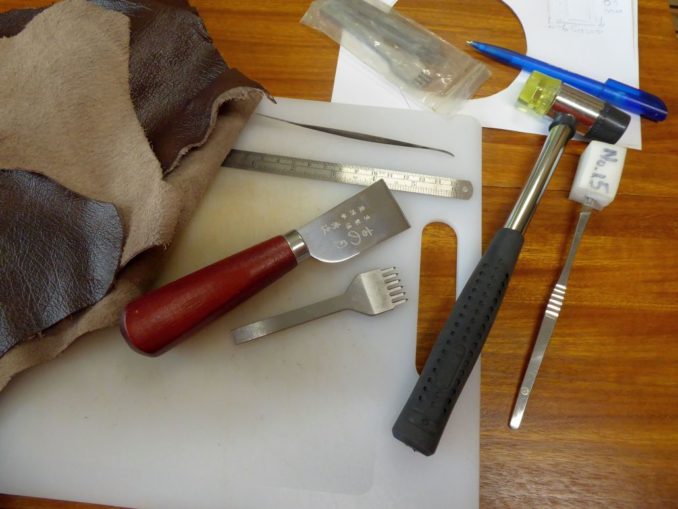
What the hell. I already have, from my jewellery-making exploits, some leather (actually leftover scraps from an old sofa), some tools, and most importantly of all, the will to make a complete pig’s ear of it and start again if needs be. So, Phase Two began, with me collecting whatever I thought I might need. I daresay there’ll be more, but this is enough to crack on.
SharpieType301 2022
I carefully measured that aperture. Then I carefully measured it again (can’t be too careful!), noting down the absolute maximum space I had to work within. Those rounded edges (see Figure 7) were going to be a challenge, but I’d worry about that when I got to it.
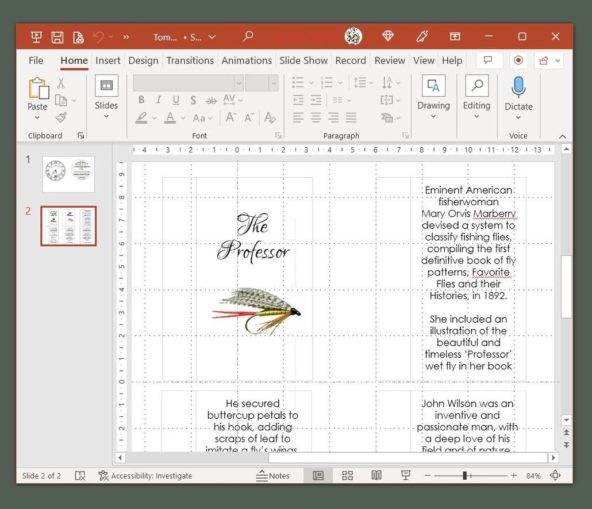
The next job was to set up an A4 ‘slide’ in PowerPoint, laying out half a dozen of the ‘pages’ for my little book, complete with content. These had to be carefully marked up so that the text would all be visible when the book was constructed, and the pages turned, but leaving enough margin for the binding, and for any trimming which might be necessary. Sounds straightforward, eh?
SharpieType301 2022
But, with a bit of adjustment and a few refinements it was doable, so with the pages printed, cut to the appropriate size (with a teensy bit of extra leeway), and stacked, the next task was to decide how to approach the leather binding.
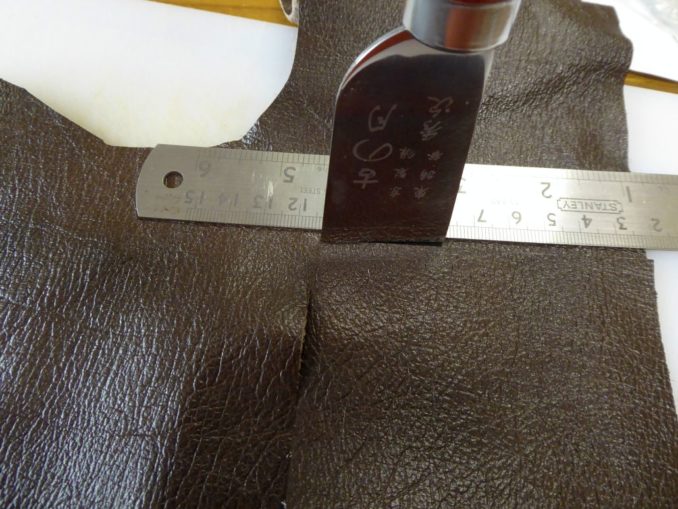
A single piece of the leather was cut to size, again with just a little leeway, enough to make the front, back and spine.
SharpieType301 2022
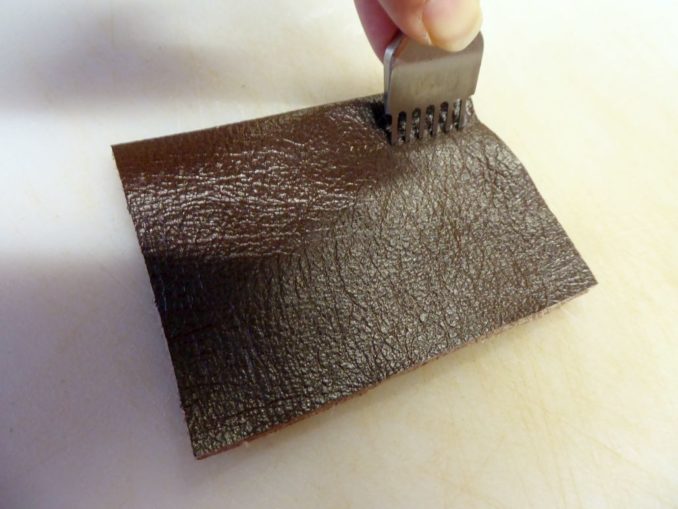
The spine needed to be thinned so it would fold nicely, and so that sewing through it (and the paper) wouldn’t pose quite so much of a challenge. This was done with a skiving tool, basically a slightly curved razor in a handle to reduce the thickness of the back of the leather. So, I’m now officially a skiver!
SharpieType301 2022
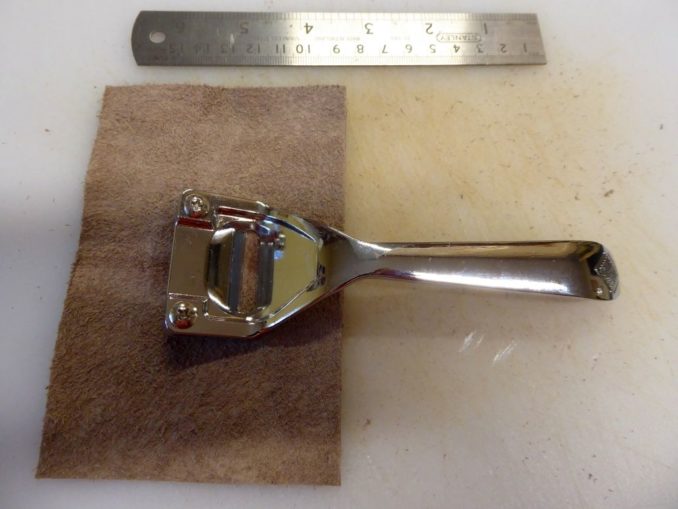
The next step was to measure carefully and mark the line where the stitching would bind (hold) the pages into the leather binder. This would line up (hopefully) with the faint grey lines I’d printed on the book’s pages. There’s a tool for this too, a stitching punch, used to make sure that the stitches are evenly spaced.
Now this caused me a few headaches. That scrap leather I was using was textured and also highly polished. This meant that the holes left by the punch were extremely difficult to see. Maybe I just didn’t hit it hard enough? However, a raking light helped me identify where to enlarge the holes with an awl so the needle could be pulled through.
SharpieType301 2022
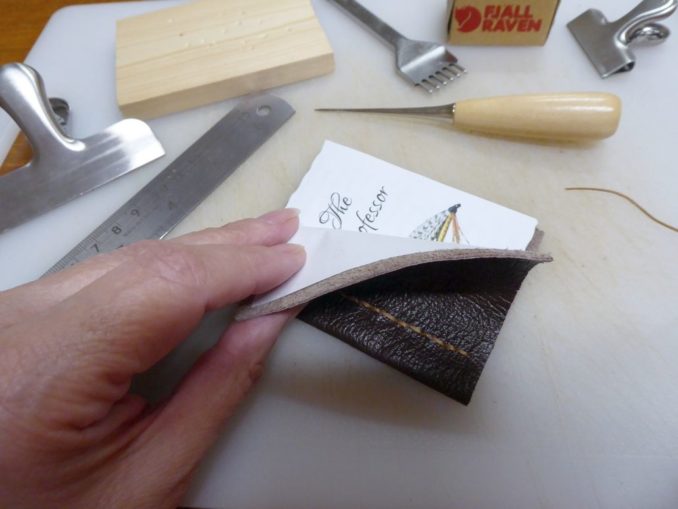
At this point, the book’s pages were held securely inside the leather binder with some clips on two sides to prevent anything moving.
The use of an awl would be necessary as the punch simply wasn’t man enough to penetrate all of the paper as well as the leather cover. A piece of waste softwood allowed me to be quite brutal with the awl, while not blunting the tip.
The binding was secured with a simple saddle stitch, but it was sewn by hand. The thread was waxed to help it run smoothly through the holes. Even so, it was tough going. A tip for the future… use a thimble!

SharpieType301 2022
Saddle stitching is usually done with two needles, but I was concerned that if I tried this the loose pages would shift before they were sewn in place. So, here, the stitching was done along in one direction, then the needle taken back through each hole in the opposite direction to give a neat line of thread.
The pages of the book can now be turned while staying securely in place inside the binding.
SharpieType301 2022
Looking at it closely and critically, I could see that the stitches aren’t entirely evenly sized, but this is a pretty fair first attempt. As it’s hand-made or, should I say, ‘lovingly hand-crafted’, I think I can be excused… on this occasion.
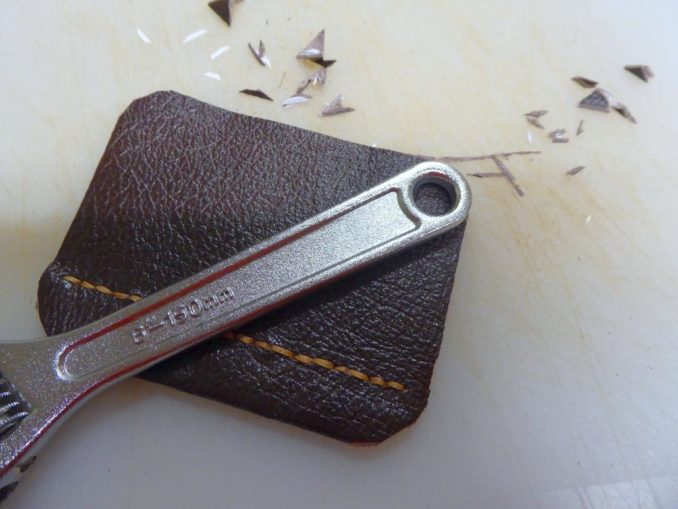
What’s needed now is a little bit of adjustment to round off the corners and trim the excess so the book will fit neatly into the aperture on the back of the clock. The end of an adjustable spanner made an excellent template for the desired curve.
SharpieType301 2022
As you can see, this trimming took away the squared corners of the book’s pages too, so the whole thing fitted nicely together. Rather more care had to be taken with the curves at the spine so that the stitching wasn’t affected. Thankfully I’d actually thought about this beforehand and hadn’t taken the stitches all the way to the edge.
Just a little more trimming and tidying up to be done, and the book could finally be fitted into the aperture in the back of the clock.
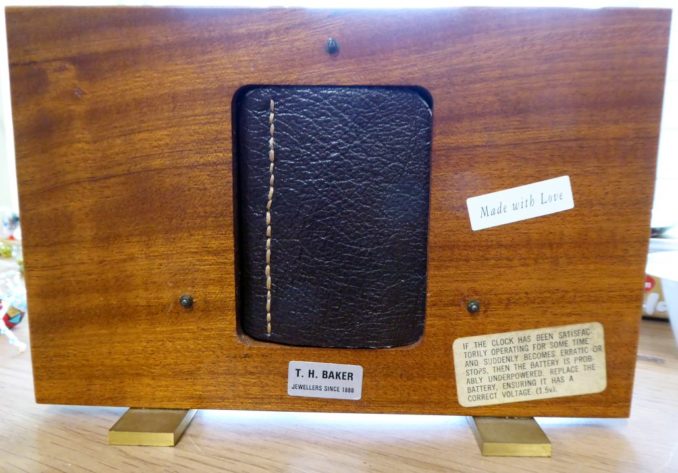
SharpieType301 2022
Great. That’s Phase Two completed.
Now for the final part of the project. This was to be a fly tied as a brooch. A pretty but robust, and wearable piece for my former boss’s lovely wife.
Thankfully, this was to be much less of a challenge, since Veniard, who have been in business since the 1920s selling all sorts of fly-tying materials and equipment, make ‘Salmon Fly’ brooch pins in a gold colour, in a size 1/0 hook. No faffing around to be done here, just tying, plain and simple, though you do have to be a little cautious not to catch the materials, or fingers, on the sharp pin.
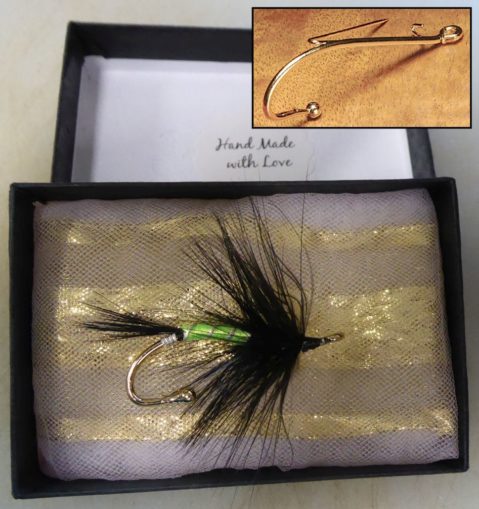
SharpieType301 2022
The fly I tied is another traditional one, the ‘Shady Lady’. Despite the name, this has nothing at all to do with the B-24 ‘Liberator’ bomber, this is simply an Atlantic salmon fly. Again, I shan’t go into details about the tying, but the pattern I followed in tying this fly was from Global FlyFisher’s Jim Misiura.
The precise history of this fly is, sadly, lost in the mists of time although, weighing up different aspects of the design, this pattern may well derive from a variation of an older Spey fly, as we’ve seen for the Professor. I did discover that the original Shady Lady would have been tied with a deer hair body, but it now includes a chartreuse floss or yarn body with a black hen hackle.
Quite a striking fly, all in all, and this is actually a lot stronger than it looks. It is well-suited to a brooch and, here, presentation in a simple jewellery box is all that’s needed.
The two flies are to be presented to their respective recipients at a dinner in Cambridge, in the run up to Christmas. Mind you, bearing in mind the welter of rail strikes by the RMT and ASLEF in the next few weeks, the harrowing tale of how I can actually get there in person to hand them over is a more challenging than anything here. Definitely a story for for another day!
© SharpieType301 2022