
© Sweaty Dave, Going Postal 2020
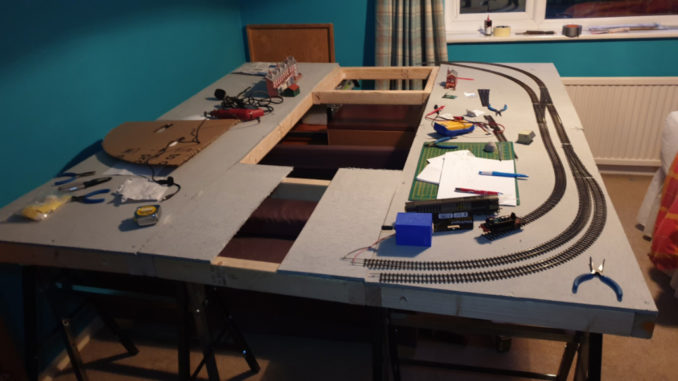
The last episode included the terrible news that the board wasn’t big enough to accommodate decent curves without tracking right around the edge of the setup. That is not something I want to contemplate, with the risk of stuff falling off the edge of the world, coupled with lots of empty space in the middle making for an unbalanced and simply rubbish layout.
© Sweaty Dave, Going Postal 2020
As with many problems, letting it sit for a while until inspiration came along has been the right thing to do. My subconscious mulled over the problem – extending out into the room was not an option as it was already as close to the bed as allowed without marital strife. Finally I noticed that there was enough space on the other side of the room to place the large three door wardrobe next to the layout – it needs room in front for access plus its own depth taking a lot of space. One day I emptied it out and dragged it over to the other side of the room and refilled it. It took Mrs. SD a day to realise it’d moved, and wasn’t having it when I insisted it had always been there.

© Sweaty Dave, Going Postal 2020
The layout could then be much wider without encroaching upon the bed. Naturally as this is a spare room, an assortment of other furniture is in the way – a sofa bed, and side table – but they can be stored under the layout as the trestles are high enough to provide room, overall giving a lot more room to work with.
Delighted with that, the decision was then as to how wide should it go? Two full width baseboards – 40in x 23in as per the rest would be huge and mean the layout going right up to the wall – no room to move around to access the back. I don’t have sufficient board left to cover even one fully, but that’s fine, they were always going to be the type that are open. That means rather than having a board over the whole thing, you put a strip of wood to hold the track, the scenery around is then built up and below track level, so can be a river or a gorge. In the end I decided to make two half size sections – 20in x 23in. They can then both be stored in the space of one board, give the width necessary to accommodate the curves and allow room around the layout to move.
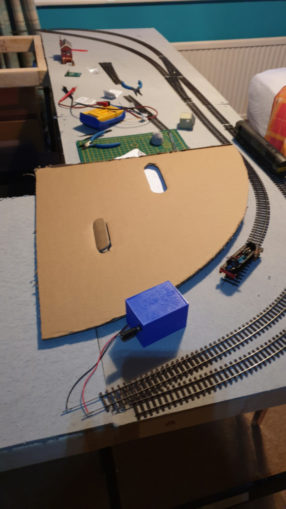
To that end I dug out the last of the timber and boards and made up a couple of half-size sections. They were soon bolted into place and using the precision cardboard curve showed all was good. Yes I took some flak for ‘taking over the room’ but no damage done.
© Sweaty Dave, Going Postal 2020
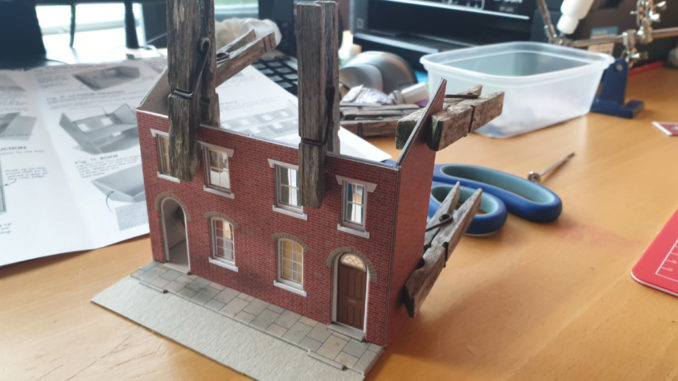
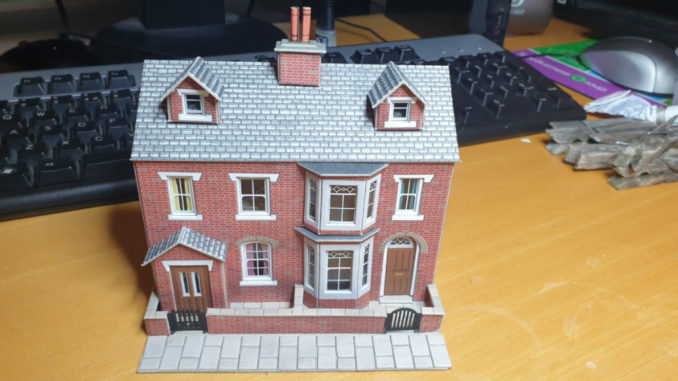
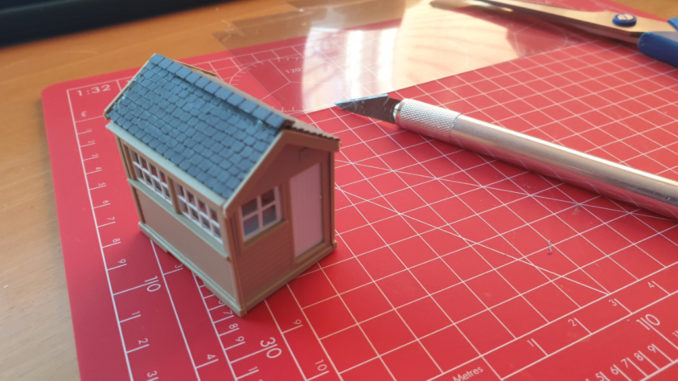
While waiting for that inspiration, I carried on with making the buildings. The cardboard Metcalfe models have a rhythm to them, you can quickly pick up what to expect – cut out components, glue down tabs, add strengthening backing, stick in windows and curtains, make a few sub-assemblies and it’s done in a day or so. They are really well measured with all the parts fitting precisely.
© Sweaty Dave, Going Postal 2020
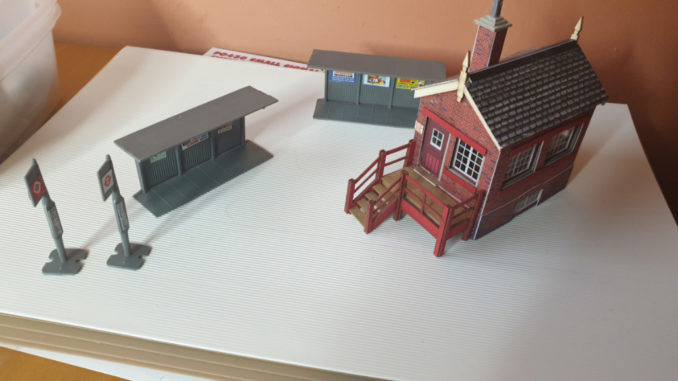
You saw the shops that were completed last time, I also found a pair of terrace house fronts. They are also relief models – one pair was used on the cyclists layout so nice to find these needing doing. This time rather than using a piece of printed card for the paving stones, I went with the self adhesive paving stones. They are fiddly but when done look rather better.
© Sweaty Dave, Going Postal 2020
I did a second signal box while on a roll, no internals this time as they really weren’t very well displayed (more likely created for a larger signal box that is available) and moved on to some plastic ones. These are ten minute tasks, cutting out some posters and sticking them to a couple of bus shelters and posts. Similarly a shunter’s hut in plastic quickly goes together – not as satisfying as the cardboard ones, but a welcome variation.
© Sweaty Dave, Going Postal 2020
© Sweaty Dave, Going Postal 2020
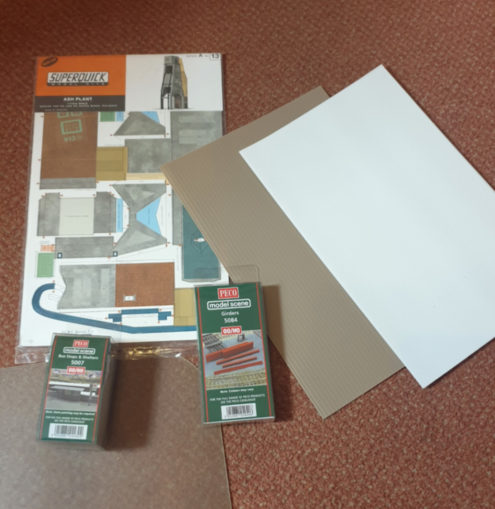
I have been thinking about how to build a coalmine. There are no obvious kits out there. Pola does a European kit but that looks a little out of place in what should be the Durham coalfield. I have purchased some plastikard – it is sheets of plastic with patterns akin to scale material. One set is for corrugated iron – commonly used to clad industrial buildings, the other … sadly both are unpainted, so I’ll need to invest in an airbrush and paints. Also in the delivery are scale girders – they’ll be used to lift the building off the ground to allow space for trucks beside or underneath as many mines.
© Sweaty Dave, Going Postal 2020
In the meantime I happened across one cardboard kit that could at the stretch of the imagination, be part of a mine complex. The mine will involve winding gear, a boiler house and ancillary buildings including something to load trucks.
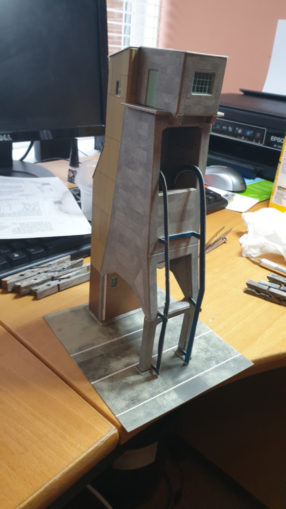
Superquick used to produce a kit of something called an ash plant – an ungainly structure for dragging trucks up a set of ‘rails’ on the front then tipping them into other trucks stationed below. I found an unopened one on ebay for £5 or so, so gave it a go.
© Sweaty Dave, Going Postal 2020
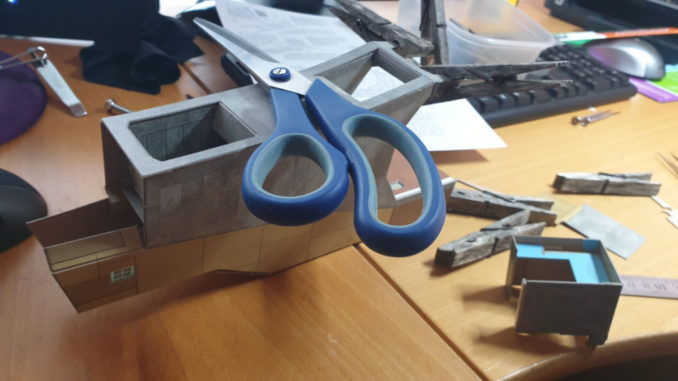
The card kit is similar to Metcalfe kits I’ve been doing, but different in many ways – the instructions are poor, the illustrations less detailed and the markings showing what should be scored, what glued and so on haphazard. In the end the construction was more challenging, but not for good reasons! Much puzzling and I did manage to make something of it. How it fits into to colliery is yet to be decided…
#ash in place.
© Sweaty Dave, Going Postal 2020
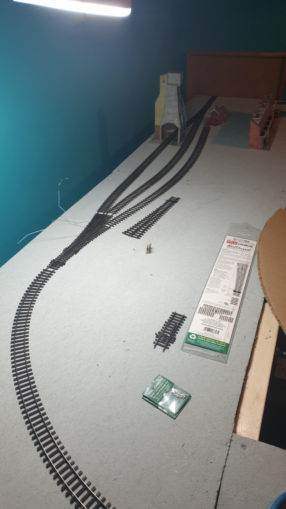
To see how it worked in context, I started to build the sidings/run around that will be within the mine. This consists of three lines, emanating from the single branch line. Using uncut flexitrack is just about do-able as the curves involved are minimal. Two of the lines meet at the end at a ‘Y’ point to allow an engine to uncouple and move back around to the other end of the train once filled. The third line is for storage/a link to a future engine shed.
© Sweaty Dave, Going Postal 2020
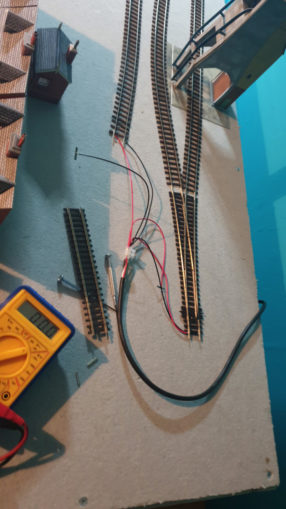
Trying this out gave mixed results – the diesel loco working some of the time and not most of the time. I guessed it was due to the points being isolating – only allowing power to the line that is switched so had a go at adding extra power hook up points. Once the line is properly installed, each board will need power hook ups to lines as the rails will be cut at the joins, but for now that is not the case so the power should really run just about anywhere. I added extra power hook up at the other end – I think the whole power supply to all tracks is likely to be a challenge in itself. I’ve ordered a handy indicator which will tell you when track is live, which will help me to understand what’s needed.
© Sweaty Dave, Going Postal 2020
The railway hasn’t progressed much in the run up to Christmas, with Santa specials and the usual tasks getting in the way. Now the big day is over, hopefully there will be some progress – I may even sum up the courage to start cutting track.
© Sweaty Dave 2020
The Goodnight Vienna Audio file


