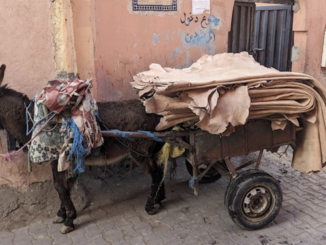
By now, you will doubtless have figured out that I have a very keen interest in glass, so while we were visiting the lovely Northeast of England for a few days recently, we took the opportunity to visit the National Glass Centre in Sunderland. Fortunately, Mr. S. shares this fascination with all things glass. I hadn’t really been aware of the Centre nor of the interesting history of glassmaking along the River Wear until quite recently (you may hear more of this another day), but the Centre had been mentioned in comments by another Puffin, to whom I give my thanks.
While we were at the Centre, we couldn’t resist gong to a demonstration of glass blowing, which captivates me, no matter that we’ve seen this being done many times in the past. On this occasion, as Halloween was rapidly approaching, the objects being produced by the studio glass blowers were pumpkins, so I thought it would be nice to share a little of that experience with you.
To reduce the glassblowing process to its simplest terms, a blown glass object is made by collecting, or ‘gathering’, a blob of molten glass at the end of a long hollow metal pipe, the blowpipe. Air is blown through the pipe to introduce a bubble into the centre of the hot, malleable glass blob. Then, by repeatedly reheating the glass to keep it flexible, and continuing to blow air into the viscous blob, the piece can be inflated like a balloon. This has the advantage of thinning the walls to form a globular shape which can then be stretched and formed as required. If a pre-heated mould is used, the glass can be pushed into the mould by the pressure of the air blown into it, giving a specific shape and texture to the finished object. All well and good, you might think, but how exactly does this happen?
In a typical hot glass studio (with ‘hot’ being the operative word here), there will be several furnaces, normally three, although there may be supplementary ones depending on the setup.
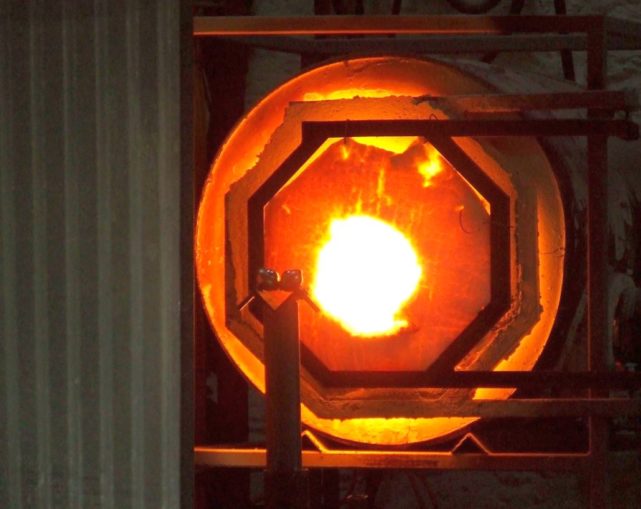
The main one, usually just referred to as ‘the furnace’, contains a large ceramic crucible of molten glass. This molten glass may have been produced by using a mixture of raw materials, primarily soda ash, limestone, and sand (called ‘batch’), by melting nuggets of pre-formed glass (often recycled waste glass called ‘cullet’), or from a bit of both. Glass melts at extremely high temperatures, somewhere in the region of 2,000-2,500 degrees Fahrenheit (c.1,100-1,400 °C).
For forming glass objects, the second furnace is a particularly important one. This is called the ‘glory hole’ (stop sniggering at the back there!) and this one is maintained at a temperature of about 1,500-1,800 °F. It’s a dedicated space for reheating glass to keep it soft enough for it to be worked, since the glass is continually cooling as long as it is out in the air. A piece in progress will be frequently reheated between the different steps, so a yoke (a ‘V’ shaped support) can usually be seen set up in front of the furnace’s aperture to support the blowpipe. This makes it easier to rotate the glass smoothly in the furnace to reheat it.
glass.h0uses, licensed under CC BY 2.0
As a slight aside, some glass historians have suggested that the name for this furnace derives from an old religious concept of ‘glory’. As the glass on a blowpipe is inserted into the circular aperture of the glory hole, it can appear to form a ‘halo’, not dissimilar to that seen in paintings of angels or saints where ‘The Glory’ radiates from their heads. I’ll leave you to decide for yourselves whether that seems believable.
To ensure your finished object remains intact, the third furnace is also pretty vital. This is the annealing furnace, or ‘lehr’, which operates over a temperature gradient from high to low. Cooling molten glass rapidly leads to an uneven temperature distribution through the glass, especially if it is thick, which produces mechanical stress. This stress can cause an object to crack or even spontaneously shatter, so glass is cooled gradually in the lehr. It is held, or ‘soaked’ at its annealing point, a temperature just below that at which it solidifies, for a period of time then slowly cooled over hours (or even days) depending on the thickness of the object.
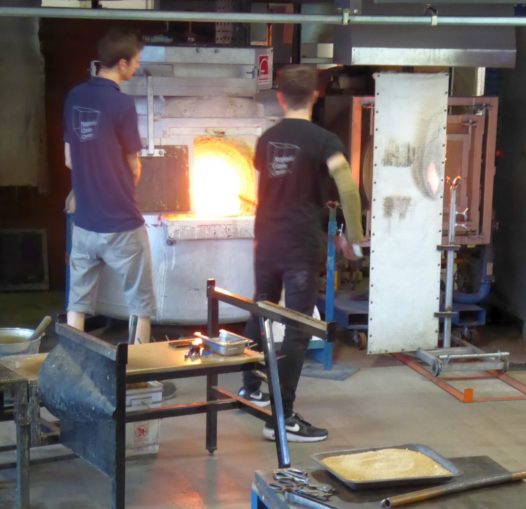
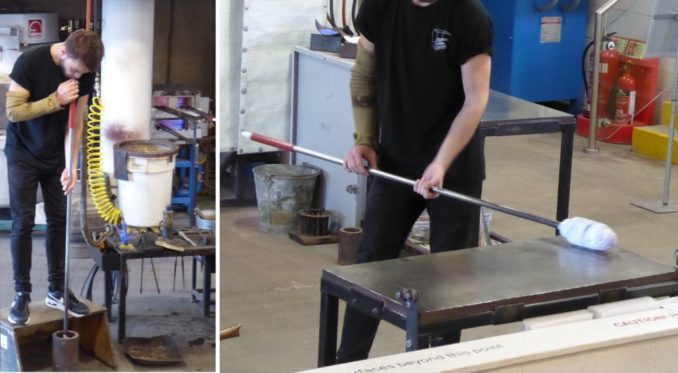
Let’s have a look at making our pumpkin. The glassblower, also called the gaffer, selects a blowpipe. This will have been preheated at the tip of the pipe until just starting to turn red, to ensure that the glass affixes well to the steel and so that unwanted bubbles don’t form in the glass (which can happen if the pipe is cold).
Wearing a Kevlar sleeve on the arm which will be closest to the hot glass during working, the gaffer inserts the pipe into the main furnace. He picks up a first small ‘gather’ of glass from the crucible, turning the pipe bit like you would when using a honey dipper (not too dissimilar from the nifty ‘poo’ collector sent out by the NHS to test for bowel disorders).
When that blob of molten glass is first removed from the furnace, it will be at its hottest. The molten glass used is usually transparent at this stage, as permanent colour can be added later, but it will appear to glow an intense white to bright orange in colour and have the consistency of a thick, gloopy syrup.
SharpieType301 2022
In studio glassmaking, both colour and the feel of the glass are important guides for the experienced blower to help him or her determine the temperature, and hence the workability of the glass. In fact, a good glassblower can reasonably accurately measure the temperature of their glass by looking at its colour (actually the amount of infrared radiation it emits). This skill, together with the breadth of different techniques to learn and become expert in, means that glassblowing takes years of practice and dedication to master.
As can be seen below, that blob of really hot molten glass straight from the main furnace, just like your breakfast runny honey, will simply drip off the end of the blowpipe unless the pipe is continually rotated to keep it in place. Given its high temperature, you really don’t want that to happen, as it would pose quite a hazard. You’re not going to be able to pick it up off the floor, indeed you’re not really going to be able to do anything much with it except wait till it cools enough to be dumped into a waste bucket.
So, we learned very early on that it’s essential that the blowpipe is kept rotating the whole time the glass is being worked.

SharpieType301 2022
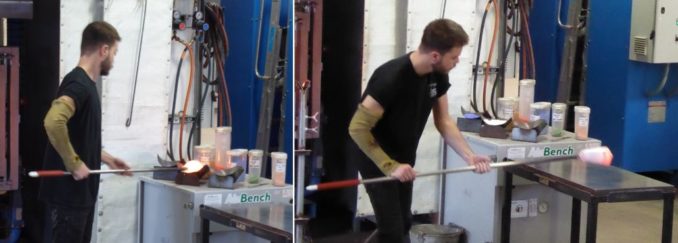
When first removed from the furnace, the gather (that molten blob of glass now stuck to the blowpipe) is a lop-sided, irregular lump. The first stage in producing a pumpkin is to introduce an air bubble by gently blowing short, controlled puffs of air down the pipe into the hot, viscous glass. The next task is to centre the glass, with its bubble, balancing it around the blowpipe.
This is done by rolling the glass over the surface of a ‘marver’. The marver, usually sited fairly close to the furnace for obvious reasons, is generally a polished steel surface on a metal or wooden table, although in days gone by it would have been made from slab of marble, hence the name. It’s used to provide some shape and structure to the blob and slightly cool its outer surface, making it more viscous (more like blackstrap molasses) by rapidly absorbing some of the heat from the outer part of the glass.

SharpieType301 2022
The next stage is to further shape the blob, now referred to as the ‘parison’, a partially blown glass object, transforming it into a more practical globular shape. The blowpipe with its parison is transferred to a cradle in front of the, now seated, gaffer to help him keep it rotating smoothly. Forming the globe is done with a remarkably inexpensive and low-tech tool—a wad of wet newspaper. Yes, it’s hard to believe, but that >1,500° F glass can be manipulated by hand with a folded-up pad of soggy old Guardian pages!In fact, the hot glass is actually supported by a tiny layer of steam that forms between it and the newspaper, and it’s thought that the ink also helps prevent the glass from sticking to it. Throughout this process the pipe is kept rotating, smoothly and constantly. If you stop, even for a moment, gravity takes over and your precious glass will slump.
The next stage is to return it to the main furnace to reheat the whole gobbet of glass. That wet newspaper will have cooled the glass surface considerably, so the glass won’t be as easily worked. This return to the main furnace also allows more glass to be gathered.
At this point, once you have as much glass on the pipe as you want, colour can be added to your original transparent parison. You may remember that different colours of glass are created by adding different minerals and elements.
For our pumpkin, adding colour is accomplished by rolling the hot blob in a container of small pieces of already coloured ground or powdered glass called ‘frit’. This frit is typically the consistency of granulated sugar. The clear glass parison is so hot that the frit sticks and melts into the surface.
SharpieType301 2022
This process is helped along by using the marver again. This helps to embed the frit into the surface of the parison where it melts to become part of the surface, giving the glass streaks or speckles of colour.
All the time this is happening, the glass will be cooling, so it is time to pop it into the glory hole once again to soften the glass. The addition of colour may need to be done in several stages to ensure the depth and intensity of colour appears as you would wish in the finished piece (don’t forget that it will stretch like a balloon as it’s blown), or to add several different colours to the parison. Here, the gaffer has chosen to add both a blue, then an opaque white frit, although the heat of the glass makes this colour impossible for us to see clearly right now.
The gaffer can now concentrate on creating the desired shape of the finished piece. He may, as he is doing here, choose to add texture to the surface by blowing the piece into a preheated mould, as here. To make handling the long pipe easier, and still be able to blow, he stands on a block.
SharpieType301 2022
By now, as you can see from the more whitish appearance of the glass as it’s marvered, the glass has cooled again, so it’s back into the glory hole to reheat the parison. Then once hot, it’s time to blow, blow, blow, to inflate the piece to its final size, carefully rotating it all the time to retain that nice globular shape.
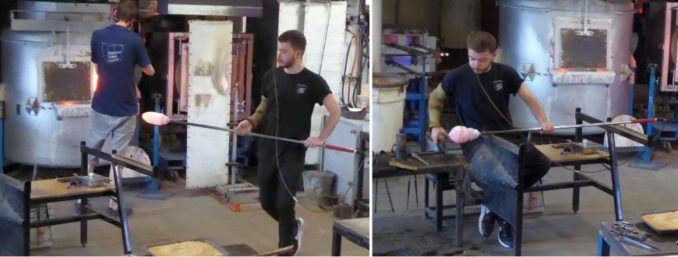
For this part of the process, it isn’t possible to reach the end of the long blowpipe (they are something like four feet long), so the gaffer has two options. He can employ a willing assistant with a bit of puff (one that he can trust), or he can choose to use a flexible tube so that he can continue with working the glass whilst minutely controlling every aspect of the entire process.
SharpieType301 2022
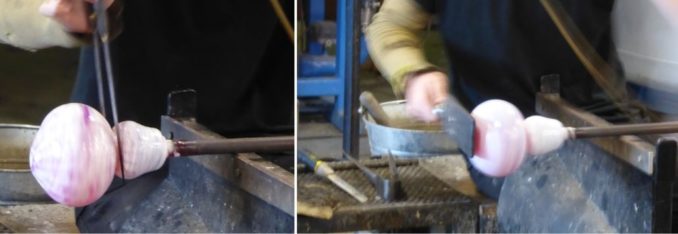
With the final size of his object right, a neck is then created using ‘jacks’. Originally called Jack’s Tool, this is a hairpin-shaped tool with long metal blades like large tweezers. The jacks can be used for several different tasks: to shape the parison as it’s being inflated, to create a neck to separate the parison from the blowpipe towards the end of the process or, by pushing outwards, to widen the opening in a glass vessel.
Here, our gaffer is first using his jacks to create a narrow neck. He then applies a wooden paddle to form the nicely flattened base for the pumpkin, carefully pressing the paddle onto the globe to create a flat bottom.
SharpieType301 2022
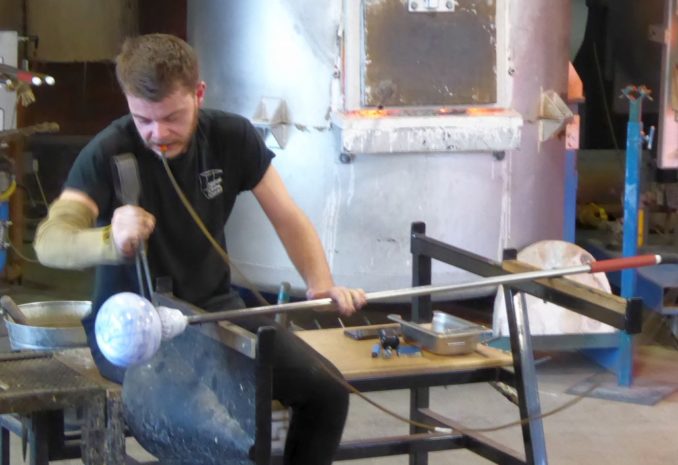
The gaffer must work fast now as, with continual small puffs of air into the globe, the glass now quite rapidly cools. You can see the colour changing, and he uses this to judge how long he has left to continue working or whether he needs to reheat the piece in the glory hole once more.
That hot reddish colour from the heated glass is beginning to diminish and the blue and white colouration from the frit gradually starts to show through. The neck is further narrowed with the jacks, ready for the body of the pumpkin to be detached from the blowpipe, all the while with the blowpipe being rotated on the cradle and air blown into the globe. This requires intense concentration.
SharpieType301 2022
A sand tray sits ready for the body of the pumpkin’s body to be held securely when it’s broken away from the blowpipe at the narrowed neck with one solid tap, but this isn’t the end. Meanwhile, the gaffer’s mate has been gathering a small amount of glass onto another pipe, colouring this with an orange frit and blowing it into a small narrow mould to give it a distinctive grooved appearance. This will form the pumpkin’s stem.
This new glass is brought over to the still hot body of the pumpkin, and pushed onto the top to which it adheres, covering the hole left by knocking the body off the blowpipe. Working together now, the gaffer and his mate stretch the stem and wind it around a second pipe to form a characteristic curly stem.

SharpieType301 2022
The second pipe is withdrawn, and the hot glass of the stem, still attached to its blowpipe, is stretched, and twisted and pulled thinner. It can then be trimmed to the desired length with nippers, a tool used to break off small pieces of glass. The sharp edge this inevitably leaves can be melted smooth with the hot flame of a hand torch.

SharpieType301 2022
All that remains now is for the pumpkin to be placed into that annealing furnace, or ‘lehr’. Our pumpkin will be in there for at least 24 hours, gradually cooling very slowly down to room temperature, ensuring that internal stresses are removed. The slower the better.
Our blue glass pumpkin, together with other pumpkins of various sizes and colours, each of them a unique piece of glass art, will then go up to the National Glass Centre’s shop for sale.
© SharpieType301 2022