
Last year I moved into a new house. On moving in I tried to get the Hive heating system up and running so I could control it from my phone. The previous occupants had left behind all the hardware, including the Hive hub. This is the gizmo that connects to the internet, so I can see what’s going on with the boiler and radiators even if I am not home, though a phone app or web logon.
I previously had the Drayton Wiser setup in the old house and it was pretty good, allowing some great individual radiator control which was a boon when working from home. At 8:30, turn off all the radiators in the kids rooms and rest of the house, keep the radiator in my office on.
Being too cheap to buy in all the Drayton kit – it is nice kit but pricey, especially the radiator valves I thought I’d just have a go with the Hive stuff.
Turns out that Hive will only create you an account so you can remote control the boiler if you buy a hub. Speaking to a polite but ultimately unhelpful Hive employee, there was no way I could bung them a few quid for hosting the account, it had to be a new purchase of a Hive Hub.
As a sometime engineer and full on systemiser, this deeply offends my view on efficiency. Why buy needless electronics – I have a working hub, just let me give you some cash and I’ll use the one I have.
I understand the infrastructure costs money and I am willing to cough up to make use of it, but for some reason Hive really got my goat. Looking at other providers it does seem that home automation ecosystems really do love a walled garden approach, we’ll sell you the hub at a reasonable cost and then milk you on all the peripherals which will only work with our stuff.
Providers can hold you hostage to their future plans though, even Google backpedalled on their Internet of Things (IoT) OS. I don’t want to buy into a platform only for the manufacturers to withdraw support later, leaving me with a home full of obsolete hardware.
On top of all that, there are some serious privacy concerns with one of the major players like Alexa and Echo
Definitely a three pipe problem, Holmes! I can feel some Cnuteneering coming on…
First – let’s define the problem.
• I have a big house with crap windows and I want to be able to control each radiator to conserve energy and save myself cash
• The downstairs hall light is not on a 2 way switch and rewiring is going to be costly so I can turn it on and off from upstairs
• The DogCam is in a walled Tapo garden of its own.
• I might want to plug in extra random crap I build
• Watering the garden automatically would be a result
• I don’t want to be imprisoned in a walled garden of one manufacturer only
• The solution must give me total control over my privacy
• I want to be protected from manufacturer’s whims so I don’t end up with a pile of obsolete hardware that needs replacing
Absolutely none of the home automation providers get anywhere close to the above. Before firing up the compiler and soldering iron, I took a look at the Free/Open Source (FOSS) offerings out there.
And I got it in spades.
Home Assistant – “Open source home automation that puts local control and privacy first.”.
Sorted. A quick shufty through the hardware specs and it looks like it’ll run on just about anything. The Raspberry Pi 4 is a small, neat little box and runs quietly though, I have prior experience with mucking about with it when I built the TelePi so that’s a goer.
Unfortunately due to the current supply chain problems our would be elites have engineered, getting hold of a new Pi4 is all but impossible. I end up getting one second hand off Ebay. It arrives, and I prepare for the onslaught of endless mucking about trying to get it all set up.
Following the handy guide from the Home Assistant (HA) webpage, all I have to do is point, click and drool. Flawless setup, just connect power and a network cable and everything installs and updates itself. I feed in the WiFi details and unplug the network cable and that is the main setup for Home Assistant done.
I can’t help but feel there should be more buggering about to be done, but there is nothing to do.
Being the cheapskate I am, I am going to keep the Hive boiler controlled and thermostat and integrate them with HA. To do that, I need a so called Zigbee adapter so I can talk to the Hive gear. It would seem that this is the only open standard that hardware manufacturers adhere to. There is also the competing Z-Wave technology which is very similar, but Zigbee seems to be the more widely supported.
Zigbee is a mesh network protocol so it’s a bit like your home WiFi signal; it carries data over radio frequencies on a sealed network. This means that only a device that has been paired with the controller is allowed on the network so it is nice and secure from any passing by bad actors. One big difference to your normal wifi is that Zigbee devices can be both client devices and traffic routers. Each Zigbee device chats to nearby devices and passes messages along to other devices. This gives you a resilient, low power network so no worries about the far bedroom having a bad or nonexistant signal back to the base unit.
And so, here we go. El Cheapo case for the Pi:
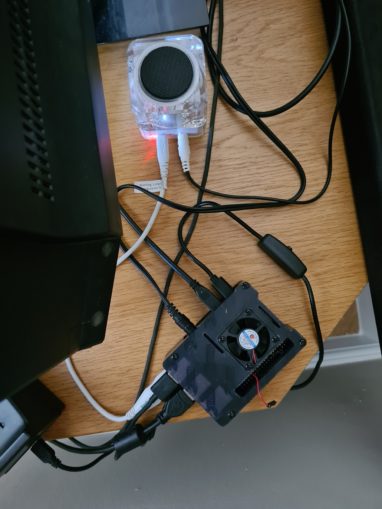
Here, I have plugged in a spare USB speaker that one of my kids no longer has a use for.
So I can talk to and control other devices, I get an Itead Sonoff Zigbee dongle. This is pre-hacked to work with HA, it arrives, I plug it in, it just works straight out of the box.
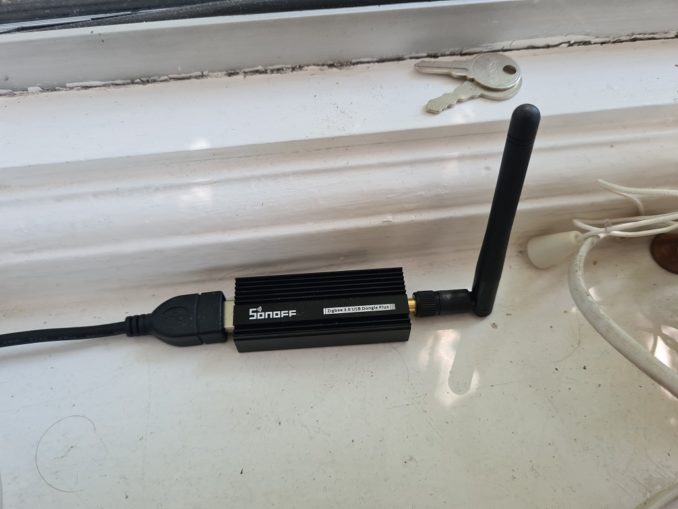
It is on a cable as Zigbee and Wifi signals can fight each other, so the further you can get the Zigbee aerial away from the Pi, the better.
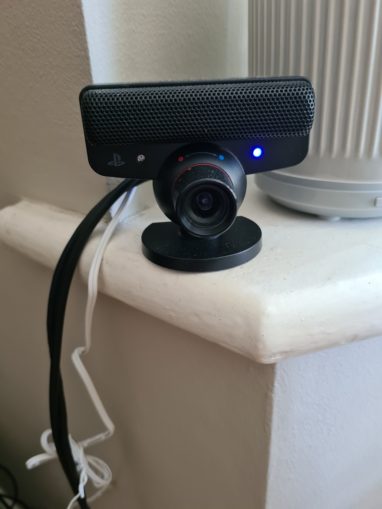
Everything is coming together and my no longer unicorn loving now teenage daughter asks why we’re not just getting an Alexa instead. Some gentle parental advisories on online safety later, she still wants voice activation. Some more faffing about and I get a PS3 Eye camera from Ebay for a fiver. I can upgrade to the ReSpeaker Mic Array if things don’t work out.
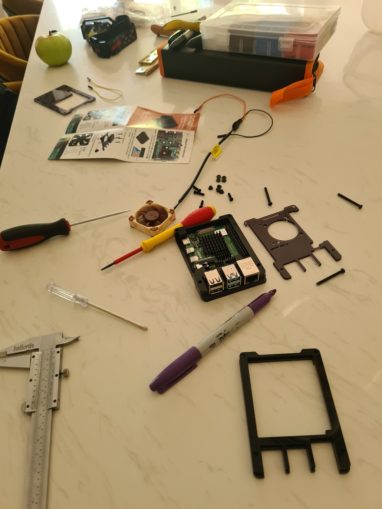
At this point in time I realise the case fan is very noisy and need a replacement quieter one. Originally I was going to put the Pi in the cupboard but the new requirement of voice activation means that the mic needs to be in the same room to apply voice commands.
The quietest fans it appears are the Noctua fans. Not cheap but oh my they are *silent* in operation. Unfortunately there is no fan that fits this case size I have so I take a punt thinking it might squeeze in.

Nope.
Finally, some buggering about! I fire up the Dremel (yay!) and rejig the case mounting.
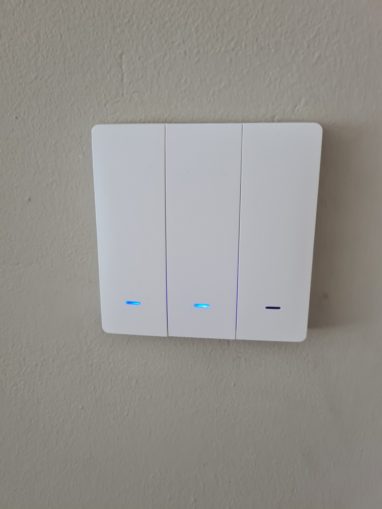
The light switch arrives, and some fitting is needed.
One thing that is an issue with UK sockets is that the switch is essentially a live-live connection to the light switch, there is no live and neutral supply. This diagram tries to explain how it works:
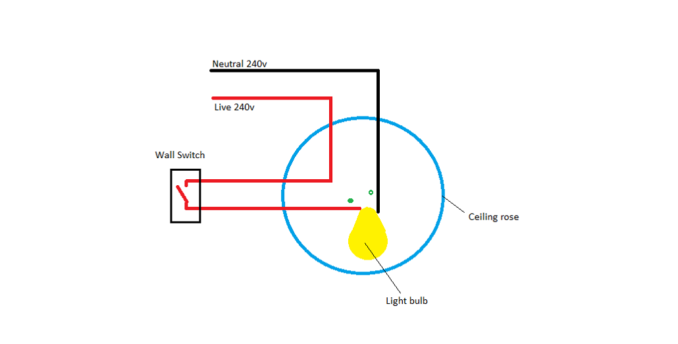
If the switch is off, there is no current flowing through the switch. If there is no current, the lightswitch cannot power the smart circuit to connect to the HA Zigbee network.
Some light switches get around this by having a small battery to power the light switch but changing the battery every six months seems a bit of faff. Luckily some clever folks came up with the idea of parasite power. The switch is permanently closed but restricted by the smart circuit so when the light is off, only a small amount of current is allowed through. This is not enough to hit the threshold for many incandescent bulbs so the light is off. For lower power LED lights or low threshold bulbs, a small capacitor is connected in parallel to the light bulb (the two green dots in the pic above), which eats the current before it hits the bulb.
The capacitor fits neatly into the ceiling rose and is quite small:

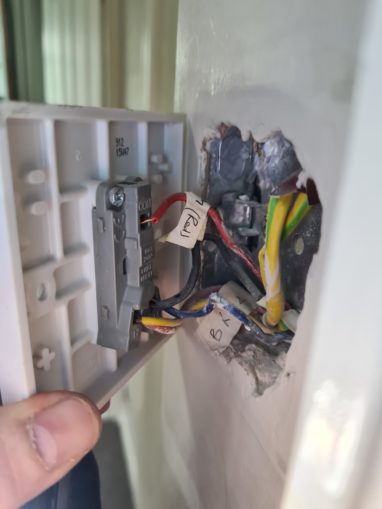
And now to the hallway switch that needs making 2 way. It already has a 2 way facility but this is for the upstairs light, no the downstairs. Some careful analysis of cables is required, the connection to the downstairs light switch is isolated and made safe on both switches, leaving me with just the live – live pair to feed the switch with. One limitation of the switches is that the unit takes power from the left hand switch only, which is a shame as I’d like the left switch to be the downstairs light. No matter, both switches are installed and work to switch the local light on, even when not connected to the HA controller. So no problem if the HA unit dies, the lights can still be switched on and off.
There is a picture rail running around the walls in the living room and I’d love some disco uplighting. Reasonably cheap from ChyNa, the Govee LED strip give you RGB control to mood match the uplights to TV night, bright light for cleaning, and mad scientist lab.
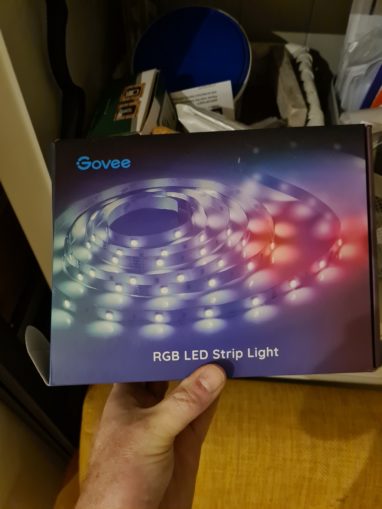
The powersupply and controller are Zigbee enabled.

Right then so that is all of the lights sorted, but attentive readers will have noted the initial impetus to get the automated home up and running has been sadly ignored up until now – the radiators! I suppose it’s not proper Cnuteneering if there’s no seemingly random deviations from the original plan.
Radiators connected to a boiler take hot water in one side and put out slightly less hot water on the other. You can isolate a radiator by closing the valves either side of the radiator so no water can flow through. These valves are pretty much the same as the ones in the taps on your sink. You can limit the heat output of a radiator by judiciously limiting the hot inflow by partially closing the valve. This is of course a massive pain in the arse if you’re going to do it for every radiator every day.
Old school mechanical radiators can have a different valve fitted – instead of a valve driven to close by a thread, they have a sprung loaded pin. The further you push the pin in, the more closed the valve is. A so called Thermostatic Radiator Valve (TRV) has an expansion chamber of liquid that presses down on the pin to open or close it. The expansion chamber can be calibrated to be off, and all values up to fully open. These are self regulating, just twist the dial on the TRV and the radiator will be hotter or colder, when the boiler is on. Of course, you want the bedroom radiator hot in the morning but not when you’ve got up and gone to work, so they are good for saving energy and roughly setting each room’s temperature, but there is no orchestration to them.
Smart TRVs though, they will connect to the HA controller (Hive and Wiser etc TRVs do this) and give temperature readings, plus receive the setting to adjust to from the controller.
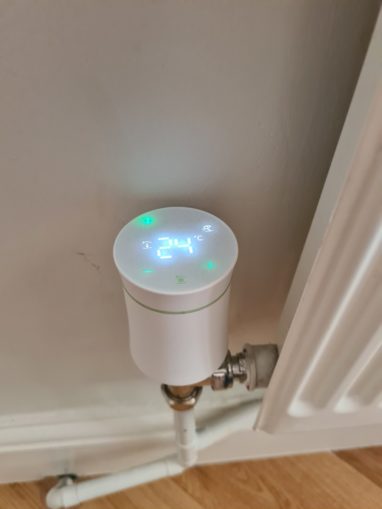
These are Moes Tuya ZigBee3.0 Mini Radiator Actuator Valve, about 26 quid a pop (vs 40 quid for a walled garden Drayton). That 14 quid per unit difference adds up when you have 14 radiators to fit.
Of course, all the radiators in the house have the old style tap valves installed so I have to drain the radiator system, remove the old screw-in valve and install the pushpin style valve. There were a lot of crushed olives inside the fittings, a soft metal hoop that compresses when you tighten the nut on the valve. After many leaks, I finally got all bar one radiator back and running without any drips.

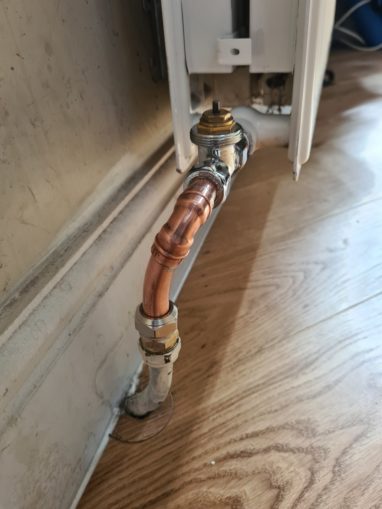
This one was a bastard to fit, a large bend in a short pipe. The olive had been crushed inside the nut and could not be removed and replaced.
So I fettled a replacement. Not being a plumberologist it took almost a day to get it bent, shaped and watertight.
And that is it! We are now done with all the hardware installations.
We pause briefly to congratulate El W on passing his pet gundog training.

And so, to the software itself. Home Assistant is a web based interface so there’s nothing to install on your computer to get things going.
The default dashboard loads up all of your configured devices. Each new device will need to be paired with the HA controller and this was disappointingly straightforward with no faffing about. Hit the pair button on the device, tell HA to pair and wait a minute or so, and HA will magically download whatever it needs to install and configure your device.
It will also sniff your WiFi network (with your permission) for any compatible devices as well; it found my Roomba robot vacuum and dishwasher.
There is also a phone app you can download and install that means you can view your Home Assistant from the comfort of the sofa. With some faffing about, you can also enable it to be connected via the internet as well. As security is a concern for me I am holding back on this for now.
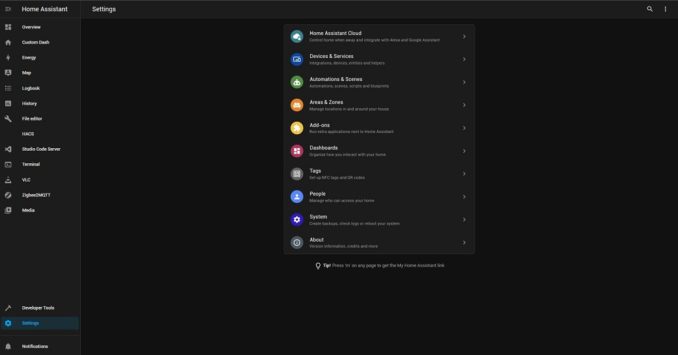
Here is the main dashboard with lots to look at. For a FOSS project, the documentation has been of an incredibly high quality, so I am not going to go through the set up here – it is done far better and more thoroughly than I can manage. Once you have core components ready (which are installed as part of the initial setup) you can load addons and integrations to connect to your specific device. There is even a massive list of compatible hardware in the HA docs, so you know that you can connect to devices before you buy them.
The real power of HA though is the Automation side of things. Even though the hall light is only physically connected to the hall lightswitch, and the landing light is connected to the landing light switch, with a little automation I can link the two and control both the lights from both the switches.

Individual automations are also editable through the web UI, where events can be used to make actions on devices that are not directly connected together. I even added my mobile phone into the devices, so when I leave the house, if it is before 10am and the Roomba has >50% battery, it automatically starts cleaning. Lights can be scheduled to come on at a certain time, if I am not home of an evening. The DogCam integrates just fine.

The setting up of the voice activated commands needed a little bit of extra installation, but the instructions were clear and non technical. Once the voice command service, RhassPy, is set in motion, you can configure what sentences it should look out for, and then what action should be triggered. On the HA Automation side, you simply set this up to catch the fired actions to *do stuff you want*. They key to voice commands is the “wake word” – for Apple, it’s “Hey Siri” and Google – “OK Google”. For this implementation, it is “porcupine”.

There is a little meta-language to learn but it is basic stuff. The rule for the “Intent” (as in I want something to happen when I say _this_) ChangeLightState first defines some expressions:
light_name = ((light | living room light) {name}) | <ChangeLightColor.light_name>
light_state = (on | off) {state}
Here, we are capturing two variables, light_name and light_state with the words “Light” or “Living Room Light” or the name of any known light
turn <light_state> [the] <light_name>
turn [the] <light_name> <light_state>
Rhasspy will then turn this into an event, ChangeLightColour with parameters of the light name and the desired light state which is fired off to be caught by the HA service. And that is all there is to setting up voice control.
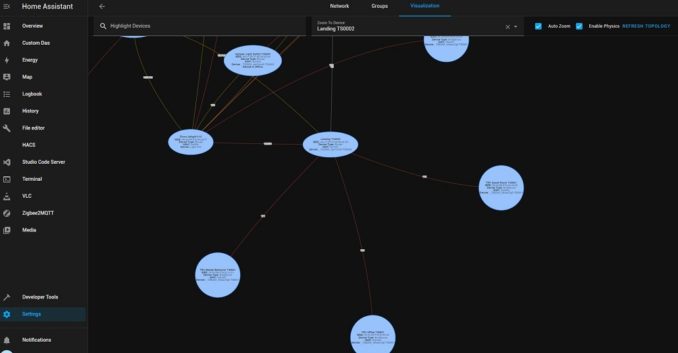
The visualisation of the Zigbee network is pretty awesome as well, you can see how the mesh network is formed and how the individual devices are talking to each other to pass info around the network. You don’t need to worry about network dead spots even in large houses, the network map gives you an indication of how strong each link is between devices.
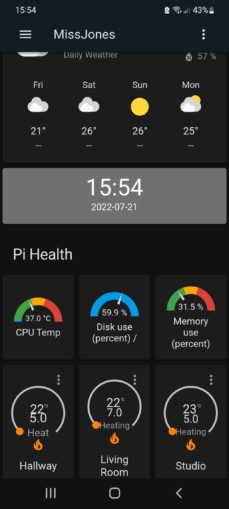
By default, new devices get added to the default dashboard which is handy when setting up new devices. You can create your own dashboard showing you just what you’re interested in only, using the UI to edit the dashboard to your likes.
This is a screenshot from my phone:
All in all these were the costs:
£360 for 14 TRVs
£120 Pi +peripheral bits
£40 quid for 6 Thermostatic Radiator Valve Body Only
£80 for 3 Zigbee light switches
About 600 quid to automate the heating, lighting and voice control for one room. No unwanted intrusions from “helpful” companies monetising my private conversations; at the moment no traffic goes in or out of my house unless I say so. At today’s prices I reckon this will save me enough in energy bills to pay for itself in about 2 years, if not sooner. Plus, if I forget to turn off the light downstairs when I go to bed, I can just do it from my phone.
The fitting of the hardware was pretty involved though so unless you’re confident of what you’re doing, don’t mess with electrics or heating systems yourself. As a software project though, this was utterly crap, there was no esoteric editing raw hex files, no editing obscure text files and scouring the internet for weird error messages – anyone who can follow a guide can set this up themselves with no problems; it is all browser based.
And you’ve got to admit – voice activated lights are pretty excellent.
Pics, vids, words and music © El Cnutador 2022
The Goodnight Vienna Audio file


