
It is a while since I’ve written anything on here, mainly through lack of anything worthy that would get anywhere near the quality of pieces we see every day on such a wide range of topics.
Hopefully a topic of interest, that reflects the banality of our current situation, will be accepted. Something that describes what many here would expect to be dead easy, is something that others would find interesting or even useful. I have been surprised how many have expressed horror at the thought of tackling something of this nature.
With lockdown in force, many things have changed, not least the view of what we can and cannot do in the coming months. Summer will be upon us in time, and expected restrictions, no matter how worthless, are likely to remain in place. Simple life events like going to the pub or eating in a restaurant may be restricted for some time.
Three weeks ago – on the VE day bank holiday, myself and Mrs. SD were out on our Government approved exercise and happened to go past a friend’s house. They were in their garden, sat on the patio, enjoying the rare warm and sunny day, (this is Northumberland after all). A quick chat over the fence was a nice opportunity to catch up, having not seen them for weeks.
On the way home, Mrs. SD was quiet, I could tell she was planning something, most likely involving money and me doing some sort of DIY. After a few minutes, she suggested ‘we’ look at creating a patio – as she’d been looking enviously upon the friends’ patio set. We have spent quite a bit of time recently tidying up the garden – having nowhere else to go – but despite there being plenty of room, do not really had anywhere to sit and enjoy it. The garden has always been there to provide a playground for the kids. Now they’re late teens, the lure of slide, trampoline or even goalpost is less enticing. It is ready to be altered to our needs or will forever be a bane to look after.
With restrictions in coming weeks meaning it is unlikely the pubs or restaurants will open, the only option to meet friends would be to go to each other’s houses. At present we have nowhere decent outdoors to entertain.
There is paving at the side of the house, it is old seventies council paving stones with added weeds. It is a bit of a wind tunnel, between house and greenhouse and not particularly pleasant. The garden is nothing complex, the house being stuck in the middle of the plot so mainly lawned garden front and back. The house faces west, so much of the back garden is in its shade in the evening, the front garden is the larger of the two, but naturally you have little privacy with people walking past. The task was to find somewhere suitable and make it so! Somewhere sheltered but sunny, with privacy.
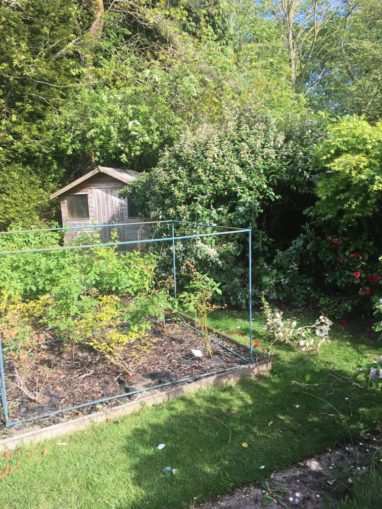
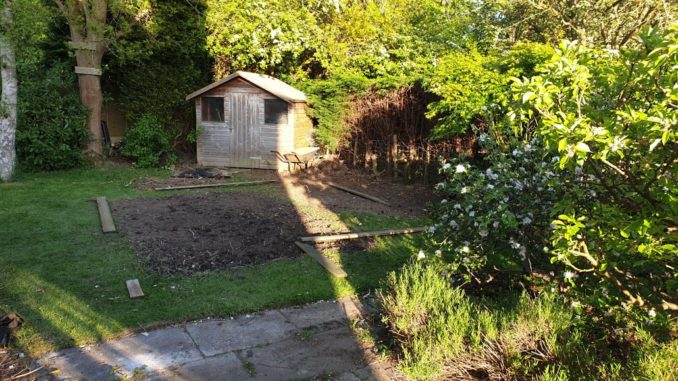
I needed to find a spot that would be big enough to create a patio say 4m x 5m to put a corner sofa and table, out of the wind but with some sun in the late afternoon. One place did look possible – it currently has a huge leafy bush – about 12ft high, 12ft in diameter that hides the shed. Next to it is a half hearted fruit bed, containing raspberries (good), Gooseberries (never did that well), a rhubarb root that’s finally coming good and some shoddy blueberries. Add in a couple of compost heaps and you’d not get location location people raving about it, but the space is there to use. It is surrounded on two sides by trees and hedge, with small apple trees on the third side and facing the lawn. In the evening the sun shines on it until around 8pm when the shadow of the house comes over.
There are a couple of decent plants in there – an Acer and a Camellia (I think) that are currently overrun by the big plant, a rhododendron and a laburnum. Clearing that lot out should give them a real boost.
Day 1 – Clear the shrubs
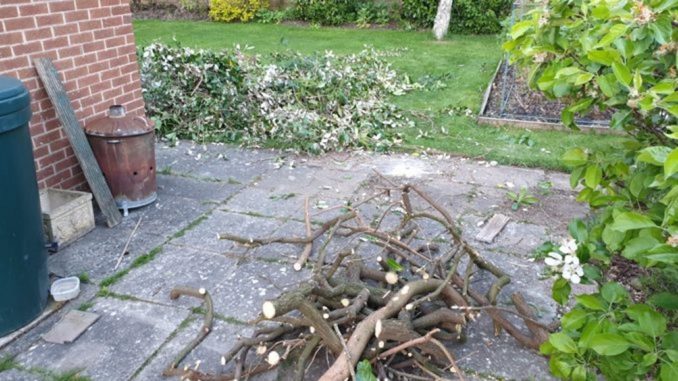
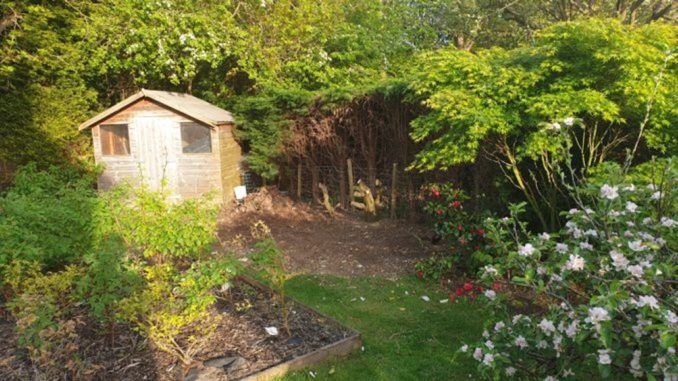
We made a start clearing the site – first to go was the huge bush of unknown name (silvery leaves, lots of twisted branches), rhododendron and a self seeded laurel. The green bin was soon full, so it all had to be shredded – a two hour+ job of fighting with an underpowered shredder.
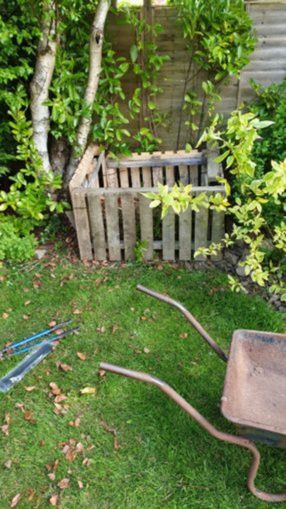
Day 2 – Remove the compost heaps
The next step though was to remove the compost heaps. The larger one, built in the traditional way of a couple of pallets cut in half an held together with cable ties was due for replacement, the pallets rotted through. The smaller, one of those council efforts from a few years back containing nothing but dust. Luckily a neighbour was also suffering from a garden project so I rescued a couple of pallets from him, sawed them in half and found a new home for it at the other end of the garden. The contents of larger heap were transferred over a couple of hours and the smaller one stashed under some trees, no mice spotted, but a rather large ants nest upset.
Day 3 – Go shopping for furniture
It was a poor weather day, so we went to a local independent garden centre and after a bit of wandering around, saw what we wanted. Price bartered and furniture ordered for delivery a week later.
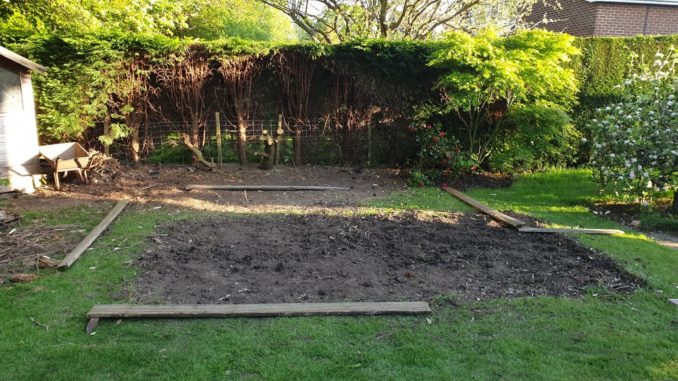
Day 4 – Fruit bed out
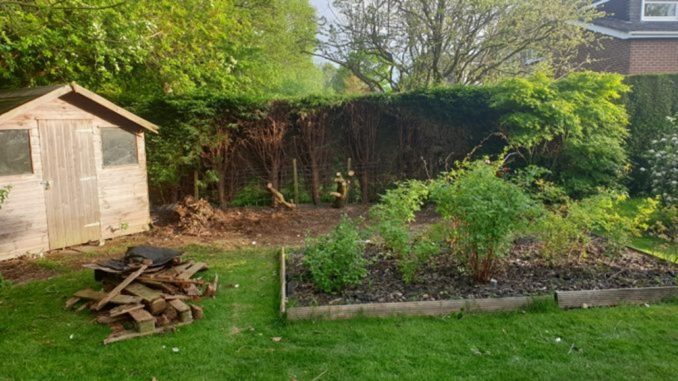
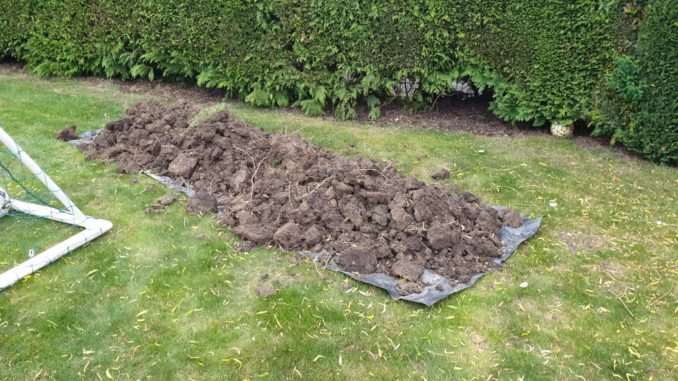
Taking the fruit bed out was interesting – I’d covered the soil with a weed blanket and bark having been sick of weeding. Taking this up showed the soil to be in a poor condition – not least due to the myriad of roots from all the neighbouring trees. No wonder the blueberries hardly rooted out of their original potball – pulling them up and you could have put them back into their plantpots, three or four years after having been planted.
I enlisted the help of my teenage son – who for once wasn’t after money, just some exercise as he’d realised that endless trips to the fridge and copious alcohol wasn’t getting him any slimmer. We dug out the fruit bed, replanting some of the raspberries and rhubarb root in gaps around the garden, throwing the rest onto the heap for the tip. The soil was spread around the rest of the garden where it could go – under hedges, anywhere that was clear. Lifting it was tough – when you lifted it, the embedded roots, held it in place – a recipe for a bad back! Some were up to an inch or two in diameter needing use of an axe.
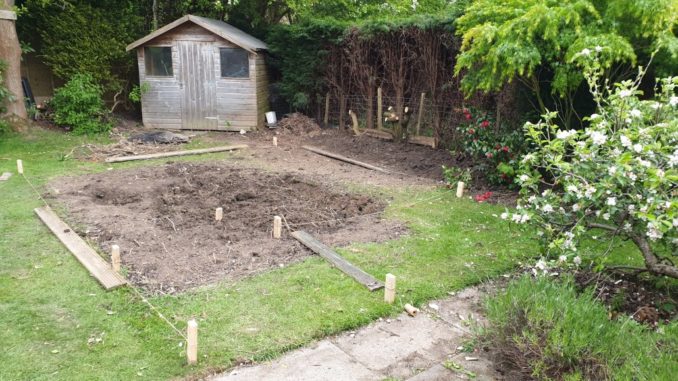
Ok so measured up – 4metres (I know, should be using feet and inches and will when explaining stuff) out from the fence and about 5 metres along it. Add a path to link to the existing paving and you’ve about 22sq metres of paving. Having it sense checked with the foreman (Mrs. SD) and the only alteration was to pull it away from the hedge a little – no reason to squash it right back to the boundary. Agreed – it’d mean less hacking away at the roots of the hedge, an 8ft leylandii, when creating the foundations.
Materials choice was next – well having looked through the various websites it appeared that a lot of stock was unavailable, either as everyone else was doing the same thing or the merchants were closed. Paving can be very expensive but if you want something that’s not too pricey and fairly rustic (this isn’t Islington, it’s a well to do housing estate), then Indian Stone will suffice. I cecked a couple of Garden DIY books, which suggested a 4 inch deep foundation – two inches of sub-base then two of sharp sand upon which to lay the flags. At 22Sq Metres (a 4x5m square and 2m for the lead in path) that would be a volume of around 2.5m3 of material estimated. (the Kelkay website gives you a reckoner, put in dimensions and it gives you the volume)
A few days earlier I’d heard about a builder I’d used in the past – Colin Darnell had retired from being out of doors in all weathers, by starting up a builder’s merchants about 5 years ago. It had slowly grown but was still a small enterprise – www.darnelltradeprices.co.uk. I’d overheard a couple of builders in the queue for the curry house takeaways talking about him – that he’d been the only place in the region to stay open throughout the covid fiasco. As a result, on those first days there was a queue of builders vans up to a mile long waiting to get in. Now things had quietened a little I gave him a ring. He admitted it had been ‘a bit busy’ recently but was happy to chat, and priced up a big bag of sub base, one of sharp sand and the paving. The big bags hold about 1 M3 or 800kg. The paving only came in 15Sqm packs so two needed – the rest can be used at a later date when the 70’s stuff is replaced. He suggested I’d need more material as everyone underestimates, so we went for two bags of sub-base and added a couple of bags of cement. He priced it all at £950 or so, to be delivered two or three days later. You have to expect it to cost about £50 a sq metre for this stuff, much more when someone does it for you.
Day 5 – Starting to dig
Having got it to ground level, it was clear we were going to need somewhere else to put the foundation spoil – a skip was needed. We also toyed with the idea of hiring a small excavator, but I’m sure it’d take longer to get shipped in, learn to use and ship out than just to dig by hand. The teenager would probably crash the thing into the house by mistake so best avoid any distractions.
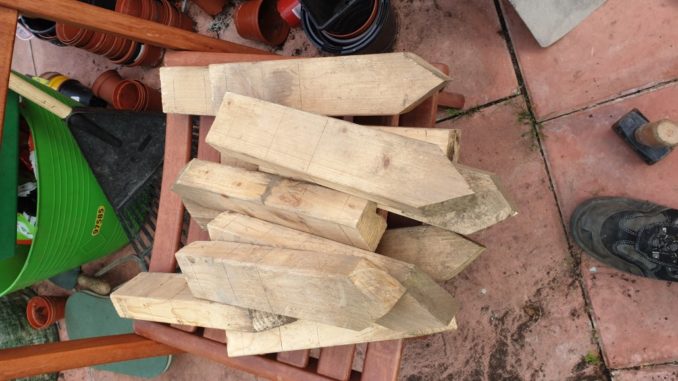
Getting a level foundation for the paving flags is essential and the most technical/tricky bit. You do so by making a number of pegs for the ground, measuring and lining them at the necessary points from the top – so in this case 22mm for the thickness of the paving to line 1, then 2 inches for sand and another 2 inches for sub-base. Set one as the point you want to work from and drive them into the ground at reachable intervals. Take a spirit level on a plank of wood from your first peg and get all the others level – you then know how deep to dig, how deep the foundations need to be to get it all flat. I had a couple of 4x2s, so cut them up to make the pegs and picked a reference point, aiming to have the paving flush with the lawn.
To be continued.
© text & images Sweaty Dave 2020
The Goodnight Vienna Audio file


