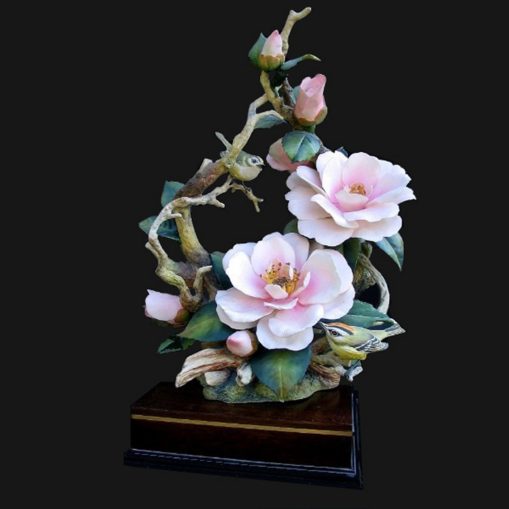
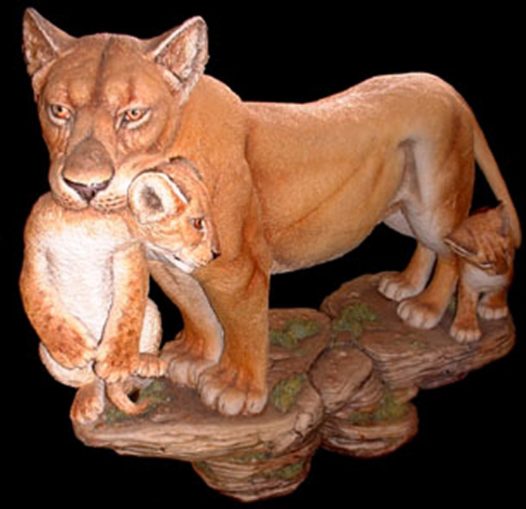
Porcelain, in many ways, is an ideal material for making sculpture, strong, light and is both amenable to colour and beautiful just as it is.
It will not, however, resist thermal or mechanical shock. Treated with reasonable care it will last, as far as we shall ever be concerned, forever.
If recovered from the ground in a thousand years or so, it will look as fresh and new, as the day it left the studio, unlike the modern cheap resin counterparts which will be lucky to survive the next ten years.
To achieve this end strict parameters must be adhered to, and as the process is, by definition, labour intensive, technically and scientifically accurate and intricate. there tend to be many failures.
Failures are very expensive!
Allow me to give you a verbal ‘conducted tour’.
Stage One
Decide what you want to make. Seems easy so far doesn’t it?
Well not quite…it’s all very fine making what you want to see, but will it sell?
It may appear to be somehow demeaning to associate “ART” with filthy lucre, but we are about to embark on an extremely expensive and time consuming process.
If you don’t get this section right this will be the last sculpture that you will ever make, and you will probably spend the next few years at Her Majesty’s Pleasure into the bargain! On average the pre-production cost of a small new project will be anything between £2,000 and £5,000 (figures from 25 yrs ago).
Alright, lets assume we think we’ve got stage one squared away.
We now know our project.
Next problem is what price band is it to conform to?
This question is directly related to “How Big” and “How Complicated” and will have proportional bearing on the all important “How Many” and at “What cost” …
This problem is not faced by many other categories of fine art.
We cannot hope to recoup even the development cost with only one sculpture, plate, cup & saucer or whatever we produce!
Remember. These rules apply to ALL porcelain production.
Stage two, make the sculpt
In the early days an assortment of materials was used, wood, plaster and beeswax was common.
This process can be executed in many materials, clay, PlasticineTM and PlastolineTM being the most favoured. (yes, the stuff that your kids used to use, though not coloured, grey….. And before you ask the time honoured question, yes, We still get it in the bloody carpet!).
The Cut
Things are about to become complicated..so pay attention!
Firstly we must cut off any appendages, arms, legs, wings, tails, that sort of thing….but carefully …there are probably supporting armatures in them ( Armatures… sculptorspeak for bits of steel..or anything else that the idiot designer had to hand) and we must not disturb the surface of the model or it will destroy the faces where the finished pieces will eventually fit back on.
That’s the cut-up done.
Moldmaking
Now we must make plaster molds of all these small bits and pieces. I won’t describe just how this is done…take my word for it, it’s very difficult! This set of molds you will be gratified to know is called in the trade “The Block”.
There will be at least two parts to the small moulds and many more to the larger ones.
You will now be happily surrounded with what will appear to be a multitude of bits and pieces of irregularly shaped wet plaster…..Don’t lose any of them..mark them,…. number them,…..Cherish them!
At this stage it is advisable to try them out….but they must be dry….when I say dry I mean arid.
Drying will take about three weeks, you might think about taking a holiday because if you have nothing else ‘in the pipeline’ there is absolutely no way to safely dry them out any quicker than by putting them in a warm room.
Back already?…Love the tan….
Let’s assume that you’ve cast one or two trials from them and that they are working correctly! Don’t worry about ‘casting’ yet…that subject deserves a whole paragraph later.
Now we must arrange for these moulds to be duplicated…
What MORE PLASTER?..you cry….. Yea verily,….. these molds will wear away with use, after all…..they are only made of a softish dental plaster! One mold set will only make about twenty models, after that they will have lost detail and must be shown the door.
Right..where were we?…. Oh yes…..Casting!
First we must mix up the porcelain slip (runny porcelain).
We buy this in, it’s far more consistent and if it all goes horribly wrong…well…..we know who to sue, don’t we?
We can add water (if it’s too thick) and Epsom Salts (if it’s too thin) as a deflocculant (wonderful word isn’t it? (Anybody here got the faintest idea what it means?).
The consistency will enable you to cast to the correct thickness, or thinness in our case, (no we’re not stingy, the thinner the wall is, the finer the finished piece will be!).
Slip should be about the consistency of cream. You can measure the specific gravity, but we’ve never found it to be as accurate as the feel of ‘slip’ on your hand.
It’s now just a matter of pouring the slip into the molds, waiting a few minutes for the plaster to absorb some water from the slip (thereby building up the wall thickness on the interior surface of the mold) and pouring out the excess…..
Simples!
This is, however, where experience and skill come in. Any fool can cast a thick, heavy model, but the very finest work is so light it is verging on the impossible.
Still with me? Not got bored yet?…..
OK, on we go.
Firing
First, make sure that all the kiln bats (shelves) have been dusted with alumina, this will prevent the ware from bonding to the bats. (higher melt temperature).
Load the kiln, giving support where necessary.
Fire the kiln to 1245 C and ‘soak’ (hold temp) for fifteen minutes.
Allow the kiln to cool naturally to about 800 C then remove the fire brick vent….wait until it has cooled to 100 c and open…. …..What do you see?…….
Strewth!…….all the pieces have shrunk!…
Didn’t expect that when you designed the model, did you?…
Fact.. all porcelain shrinks by between 18% and 21% when fired! if it doesn’t you’ve shortfired i.e. underfired, not achieved temperature and you will have to do it all over again!
(Ask the wife if you dare) …
A sure way to tell if the ware is ‘shortfired’, it will look slightly pink in colour and when put to the tongue will ‘suck’. (See wife comment above).
NEVER leave the ware in this condition, I will not explain the horrors that this will lead to, it’s ruined many better men than I, and stories about shorting are apocryphal.
Also you will notice upon closer inspection, that the seams that you so lovingly and carefully sponged out after casting, have magically reappeared!
Porcelain has a ‘memory’! ….you will have to grind them all out again, using the diamond wheel provided.
Thus far, thus good.
Glazing
We must now get the ware glazed smartly, various bugs and parasites can get into the semi-porous body.
Interestingly, for the collector of antique porcelain, black spotting is a sure sign that the item has been ‘interfered with’.
Glazing is exactly what the word infers i.e. covering the body in a thin film of glass. Glaze however does not necessarily infer a high gloss finish, it is likely that a model calls for a matt, or semi-matt finish.
All of these options can be chosen if the model is first spray glazed matt, then selected areas are given special attention. Most manufacturers spray-glaze.
A fugitive bright-blue dye is mixed with the glaze in order that the spray will be of an even thickness in order that the operator can visually check, and so as not to override any delicate detail.
You should now allow the models to dry overnight. (Ever seen a flock of acid blue Robins? The effect is startling, I can assure you!)
The Kiln should have now been scrupulously cleaned and you can reload, ensuring that no glazed portions of any models are in direct contact with the bats or any other kiln part.
Refire at 1040 C repeating the cooling procedure.
Unload the kiln and check the ware for cracking. Smash and throw away any imperfect models.
Applying colour
The ware is now ready for painting, so go and look in the cupboard in the far corner and find the ‘Paint Standards’.
Your quick wit will note that there are more than one, oh yes, the same piece but all looking very different. Which one you wonder?
Answer,…All! Painting has to be carried out in stages, firing at a progressively lower temperature between each stage.
Why?
All the colours we use are either rare earths or metallic oxides, they come in powder form, you have to mix them individually.
Beware….they might not fire to the colour you see in the powder form.
Added to the confusion is the fact that not all colour ‘matures’ at the same temperature.
Hence multiple firings.
Just follow the ‘Standards’, I’ve painted them myself….so I know it works!
Just before you get the idea that it’s just like ‘Painting by Numbers’ you must remember that there are no lines to follow, and you must copy the ‘standards’ exactly.
Near enough is not good enough…

Mix Your Colours
Firstly grind the correct powder with a mortar and pestle…it must be super smooth.
Next mix in some ‘Fat Oil’, this is pure turpentine left on a plate in a thin layer for a few weeks, topping up as necessary.
It takes about a pint of turps to make a small egg-cup full of the stuff!
Now mix in a touch of ‘Aniseed Oil’ (you could substitute Oil of Cloves, both are equally repellent!).
The studio now stinks to high heaven….so do you…but you’ll eventually get used to that, (whether your partner will is a matter of conjecture, but I doubt it. Mine never has!).
Grind the resulting paste with a palette knife until you achieve an even, thick consistency, the proportions of oils are most important, if it’s not quite right you’ll never get the colour correctly on the glaze!
Done it all now? OK…paint away!
Did you know…just as a matter of interest, whilst you’re throwing on the paint, that Renoir, the French impressionist, was a decorator of factory-made porcelain?
No?….Many great painters have begun their careers in such humble circumstances….So you never know!
Second, Third et al Paint Fire
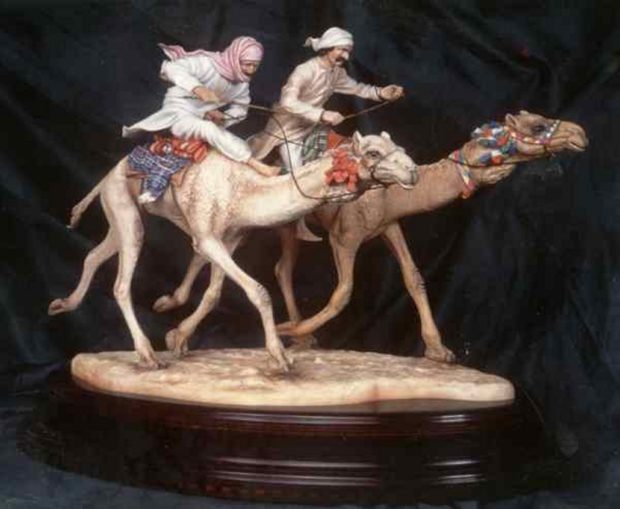
Done?…OK!. we fire it again, then you can paint from the next ‘standard’…and again…and again… till the end. The “Jousting Knight” by David Fryer Studios takes seventeen separate paint firings!
How do you become good at it? There are no hard and fast rules , I’m afraid. It’s not a thing you can teach by correspondence course.
You learn by bitter experience, I can’t give you that experience….. and I don’t think I would even if I could……….But I have given you some hints.
So now you know how we make porcelain…….. and all it’s concomitant pitfalls, do you REALLY want to make porcelain? or would you prefer to appreciate it?
It is little understood, in these days of mass-production and short-lived plasticised materials, that the traditional methods and materials outshine and outlast their traditional inferiors.
Sadly, the best fitted has been swamped with the ‘cost-effective’, but ‘throw away’ materials.
The ‘Bean Counters’ appear to be in the ascendancy.
History
Porcelain, white, hard, nonporous, translucent pottery was first made by the Chinese during the T’ang period (618-906) to withstand the great heat of their kilns, traditional porcelain was hard paste (a combination of kaolin, a white clay that melts at high temperature (1220-1260 C); and petuntse, a feldspar mineral that forms a glassy cement to bind the vessel permanently). It was exported to the Islamic world and highly prized. During the Yuan period (1280-1368) blue-and-white ware was produced with cobalt blue from the Middle East, and from the 14th to 17th cent. other colours were used as well.
Early English porcelain is soft paste (Kaolin clay combined with an artificial compound, e.g., ground glass or steatite) and is not as strong as Chinese porcelain. In Europe, porcelain was first commercially produced (1710) in Meissen, Germany. The English have strengthened porcelain with bone ash since 1750, this mixture is known as Bone China and little known in America.
Utensils made of clay hardened by heat form some of our earliest artifacts. Clays come in three main types: porous-bodied pottery, stoneware, and porcelain. Raw clay becomes porous pottery when heated to about 500 degrees centigrade. Unlike sun-dried clay, it retains a permanent shape and does not disintegrate in water.
Stoneware is made by raising the temperature, and porcelain is baked at still higher heat. This makes the clay glassy (vitrified) and adds strength. Pottery is shaped while the clay is in its pliant form. Either a long rope of clay is coiled (hand-building) or the clay is shaped by the hands as it is spun on a potter’s wheel (used in Egypt before 4000 B.C.).
After drying to leatherlike hardness, the piece is fired in a kiln The type of finish, or glaze, determines the number of firings. Early unglazed pottery was coloured by firing alone. In most parts of the world pottery was the earliest craft. Prehistoric remains of pottery in Europe and the Americas have great importance in archaeology.
Notable ancient pottery includes the Greek vases of 800-300 B.C.; Chinese porcelain of the 6th-10th cent. A.D.; and the ceramic tiles used in Islamic architecture of the 15th cent. Majolica and stoneware were the major types of European pottery until the advent of porcelain in the 18th century.
In 1712 French missionary Père d’Entrecolles sent home the first accurate description of how the Chinese make porcelain from kaolin. Johann Friedrich Böttger, 1682-1719, was the German chemist and originator of Dresden china. He developed various glazes, used gold and silver decoration, and in 1715 perfected white porcelain, doubtless using d’Entrecolles recipe. His was the first true porcelain to be made in Europe, only made possible through the new found ability to achieve the high temperatures required.
English porcelain production was pioneered in 1754, by Quaker pharmacist William Cookworthy, 49, of Plymouth, who found a deposit of kaolin in Cornwall. In 1756 Cookworthy found a deposit of petuntse, the feldsparlike material that is mixed with kaolin to produce fine porcelain. This knowledge was in turn acquired by Dr John Wall, who had in 1751, set up what was to become the world famous Royal Worcester Porcelain Co.
Pottery made by the prehistoric peoples of the world reveals great artistic and technical skill, and many traditional designs are still being used today. Today, despite mass production and the proliferation of utensils made of synthetic materials, the demand for hand-crafted porcelain continues.
© text & images Sir Robin of Foxley 2017
Audio file

