Introduction
I suppose I’ve always considered myself to be pretty practical and over the years I’ve rebuilt car and motorbike engines and done all my own servicing and repairs saving a fortune in the process. If I can see how things move, I can generally understand how they work and then, given the right tools and parts, put them back together and get them running again. I do however stay well clear of electricity. I can change brushes and clean commutators but anything that doesn’t visibly move yet is capable of giving me a severe wallop is to be treated with great respect. I have tried to understand electronics but so far without success. I have fitted additional memory and installed new graphics cards into PCs but when things go wrong I haven’t a clue how to diagnose and repair them. Until a few days ago I had never even seen the internals of a laptop. So, when my wife’s three year-old HP Pavilion laptop with solid state hard drive started misbehaving I fully expected to have to replace it at a cost approaching £600. Gulp!
But we Yorkshiremen are notorious for being stubborn and tight-fisted gits. I hate the throw-away society and splashing out money for no good reason is anathema to me so I decided to be brave and see if I could repair it myself. Here’s how I got on.
Diagnosing the problem
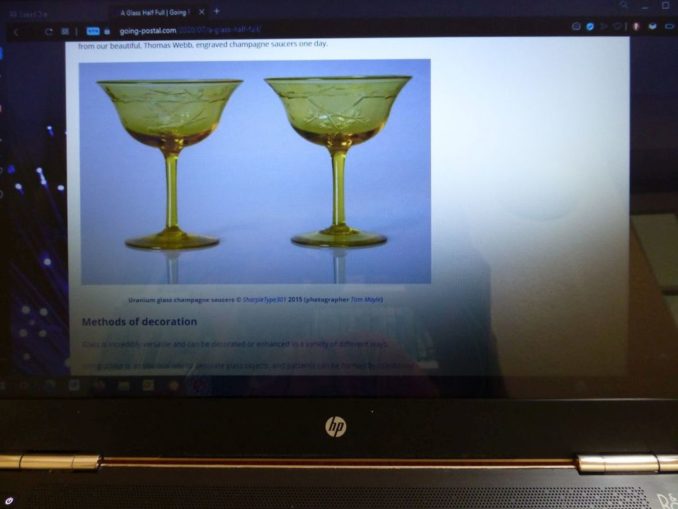
Some weeks ago the laptop started to develop an annoying problem. Every now and again, the bottom right hand corner of the screen would go dark making it nigh on impossible to make out the image in that area or indeed even to locate the cursor. Quite by chance however, we found that if we jolted the computer the image would light up – until it happened again. This was frustrating but we decided we could live with the problem until such time as I could work out a solution but at the back of my mind I’d already resigned myself to forking out for a new one.
Last week the dark area of the screen became progressively larger and at the same time harder and harder to effect a temporary solution even by giving it a vicious clout. And then the problem decided to become permanent and no amount of shaking or hammering the bloody thing would induce it to light up again. In short, it was buggered.
But what was wrong with it? Was it a screen problem or was the graphics card faulty? A bit of research on the Internet led me to a simple test; all I had to do was to connect the laptop to another monitor and examine the picture. If that image was also dark it was a computer problem and if it was good then it must be a screen problem. But this was easier said than done. Although I do have an old monitor lying around, I could find no way of connecting it to the laptop. What I needed was a more modern display that took an HDMI cable.
Now I can be pretty slow at times and it took me a while to realise that our TV is connected to the Freesat box by an HDMI cable so, after pulling the set out of the corner and shuddering at the horrendous tangle of cabling hidden behind it, it took only seconds to unplug the box, connect the laptop to the TV and with metaphorically crossed fingers switch on both and find the appropriate channel. To my surprise (I’m a pessimist by nature) the picture was, well, perfect so I now knew with certainty that I needed a new laptop screen.
Obtaining a replacement screen
Never having done this before, I didn’t even know if replacement screens were available. I certainly anticipated having problems in getting my hands on a new screen as I was sure that Hewlett-Packard would be less than enthusiastic to supply spares for their products at realistic prices to any Tom, Dick or Harry. I needn’t have worried though; Duck Duck Go soon gave me a whole list of UK companies that supply replacement screens for all manner of devices so I picked laptopscreen.co.uk and had a good root around their site.
First off, you need to know the model number of your computer. This is easy if you still have the original packaging or if the machine has an information sticker readily accessible. No such luck with ours but there is an HP Support Assistant icon in the taskbar and clicking on that told me that we had a ‘Z6M14EA’. By typing this into the website search box I immediately discovered that I had a choice of either a matte or a glossy screen at £62.30 and £57.50 respectively plus £5.10 postage and packing and that they had more than 100 of each in stock for immediate delivery. Interestingly, the screens come with a lifetime guarantee.
Doing a dry run
Before placing an order, I thought it best to try removing the old screen to see what I was letting myself in for and this I really recommend. There are lots of guides to screen replacement on YouTube but the one on the vendor’s site is as good as any. Basically, all you have to do is remove the frame or bezel from around the screen, unscrew the old unit and disconnect and remove it before installing the replacement.
I’m glad I did this as I was previously unaware that the frame is secured to the front of the screen with strips of narrow, double-sided adhesive tape so I added a roll to my order bringing the total to £70.92.
Fitting the new screen
Tools needed: a miniature Phillips crosshead screwdriver (preferably with a magnetised tip); a thin, flat-bladed putty knife or something similar (I used a fish slice); 1/8” double-sided adhesive tape; scissors.
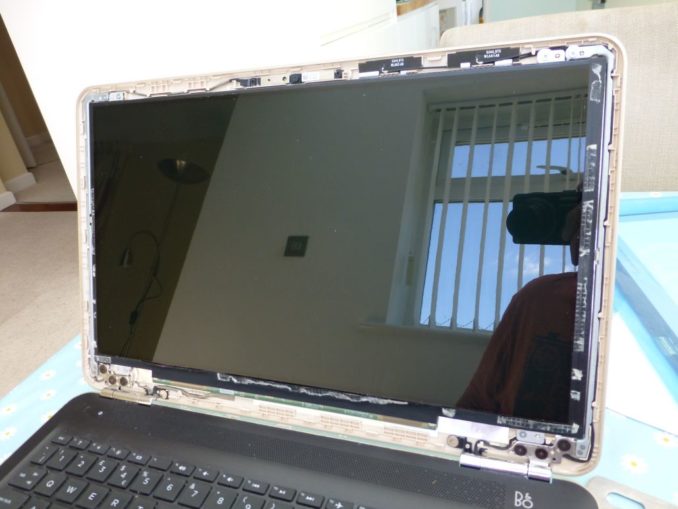
- Remove the screen bezel
Turn off the power, remove the battery if possible and remove the charging cable if attached. Release the screen bezel by inserting the thin blade between the screen surface and the plastic (i.e. from its inner edge, not the outer) and gently ease it away from the screen surround. You will feel the adhesive release and hear the retaining clips snapping free as you do this. Do the sides first and then the bottom edge as these are likely to be glued in place. The top edge that covers the webcam and microphone will probably be held only by the plastic clips in the frame. When the bezel is removed you can clean any adhesive residues off it simply by rubbing them with your finger into snot-like balls.
- Remove the old screen.
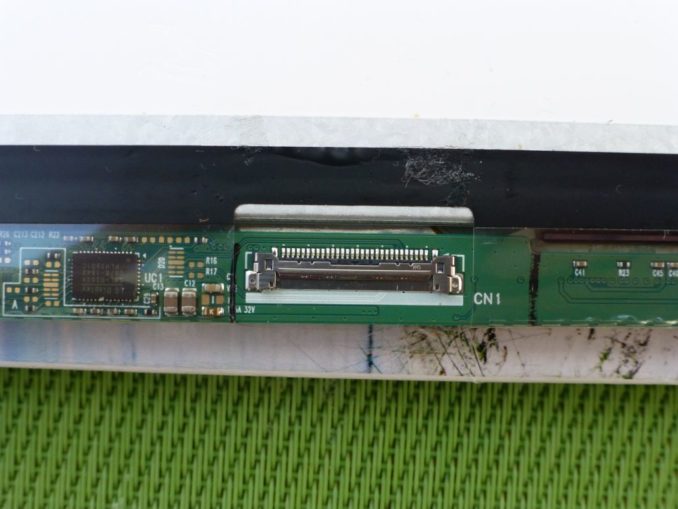
Ours was retaining by four tiny screws, one at each corner. A magnetised screwdriver makes removing and replacing these screws much easier. Place a cloth over the keyboard and lay the screen forward onto it. On the rear of the screen you will see a multi-pin ribbon connector held in place by a piece of adhesive tape. Carefully ease this tape back but don’t remove it completely. The connector can now be removed from the terminal block and the screen can be placed to one side for later disposal.
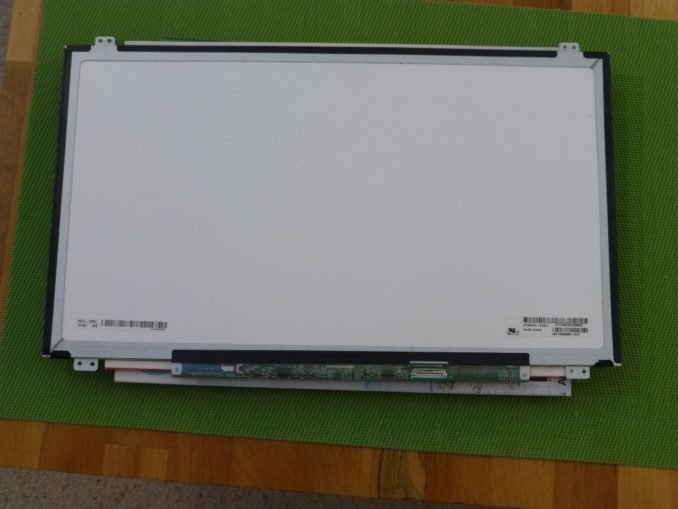
- Install the new screen
Insert the connector cable into the terminal block and secure it in place with the clear adhesive strip. Fit the top two screws and switch on the computer to confirm that the screen is correctly installed and working then switch off again and replace the lower screws. Place strips of the double-sided tape along the side and bottom edges of the screen and remove the paper to expose the glue.
- Replace the screen bezel
Engage the clips on the top edge of the bezel and then work your way around the edges of the screen pressing it firmly to engage the clips (which you will hear snapping into place) and the adhesive strips.
That’s it, job done. Easy innit? Now sit back wearing a smug expression and bask in the respect and admiration of your family and friends who now view you as a techno guru.
Conclusion
I was really surprised by how simple and relatively inexpensive this repair was. Having done a dry run prior to ordering the new screen, I managed to complete it in about 20 minutes, ten of which were spent faffing around trying to pick the backing paper off the sticky tape.
A professional would charge around £120 to replace a 15.6” screen but would more than likely only guarantee the repair for a year whereas the screen supplied came with a lifetime guarantee. We also have to remember that not everyone would be happy to give a stranger with advanced IT skills free rein to examine the contents of their hard drive. Nudge, nudge. Wink, wink. (I wonder how many computers have been scrapped for this very reason?)
By doing this repair myself I reckon I saved around £50 on a professional’s charges (which I never even considered) and in the region of £600 on a replacement computer so, if you do have the misfortune to drop and break your laptop’s screen or it starts acting up like ours, don’t throw it away – fit a replacement yourself.
It really is a doddle.
© text & images Tom Pudding 2020
The Goodnight Vienna Audio file