Shunting on

© Sweaty Dave, Going Postal 2017
A fortnight ago I outlined a plan for a winter project – both explaining and justifying it to myself and the esteemed audience of wankpuffins. Since then a lot of money has changed hands and items have started to arrive. The plan is to produce a working model of a colliery siding next to a town, within the confines of a shelf. No messy wiring is allowed and the scene should be as accurate as possible. Anything that can be automated should be, not just engines and points, but signals, cyclists and cars too.
The first part has been more carpentry than anything else and my degree of skill isn’t high – at the level of ‘that’ll do’ rather than ‘spot on’.
 Ikea came up trumps with the base – a ‘Lack’ shelf in Oak effect, measuring 110cm x 26cm in wood effect – that size would be quite heavy but for the fact they’re 85% fresh air. Removing the top and packing has given me plenty of room to hide wiring. I was half expecting to have to buy a router (the woodworking type, not the electronic ones) to hollow the thing out, but it’s already done for me.
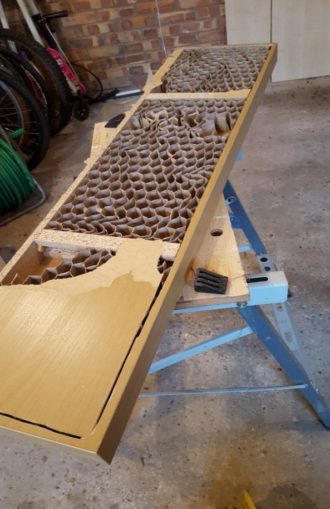
The replacement top is of two layers, a 4mm sheet of plywood topped with 9mm of MDF. The reason for the complication is to enable me to have the plastic track needed by the cyclists/cars to be flush with ground level, so lots of cutting and shaping to get a lid to fit. The internal cross bracing also needed to be trimmed to let it sit flat, luckily there was just enough clearance for a reciprocating saw to do the job.
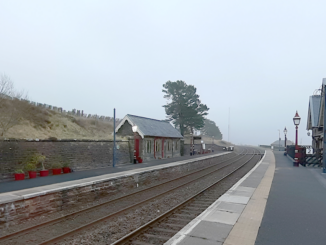
I printed a full size copy of the plan out and overlaid it onto the top – as below.
The Magnorail kit arrived from Holland. It includes lots and lots of tiny fiddly pieces to assemble – so much so that I also bought one of those magnifying lights to help. It is rather alarming how fingers have lost dexterity – that will return with practice. Each link in the chain, around 1cm in length had to be removed from the moulding and the excess plastic trimmed off. Some of the magnets are barely larger than a full stop – the light has proved invaluable.
I found a wonderful new model shop – market towns are best for this and found one about 20 miles away. Tucked down an alley of small shops, it had 90% of what I was looking for – came out with a huge bagful of track, cardboard kits, point motors, wiring, cork underlay, glue pots and more. The owner said she often had customers come in with a plan for a winter project – I am not alone!
So far progress has been steady. The order of construction is complex, trying to remember what needs to be done before or after other so as not to mean having to tear something down. The inclined ramp to the town was first, as that then set the height for the upper level, modified from standard to allow the inclusion of the Magnorail, both in depth and using some incredibly thin balsa, smoothing the transition from flat to gradient and back. Once that was done, further walls and the levels set up, the baseboard given an initial coat of dirty mud colour that will be mostly covered as the scenic are done at the end.
Rather than spend a fortune on a bulky controller, I found a link to a small variable resistor that can control trains or magnorail – for £4! It is tempting to run the rail open, but that only spits it everywhere – it has to be enclosed to work, meaning building up card between tracks and gluing down road while avoiding any gaps. A bloke in County Durham produces pdf files that give you all the necessary road markings to scale – but a file from him and use it as needed – though the printer is taking a hammering. Vehicles that traverse the track are fixed to a slider – a small copper piece containing magnets that move it along. It scuffs along where the surface is matt, I need to boost above the instructions with stronger magnets for heavier die cast motors that otherwise career down the incline.
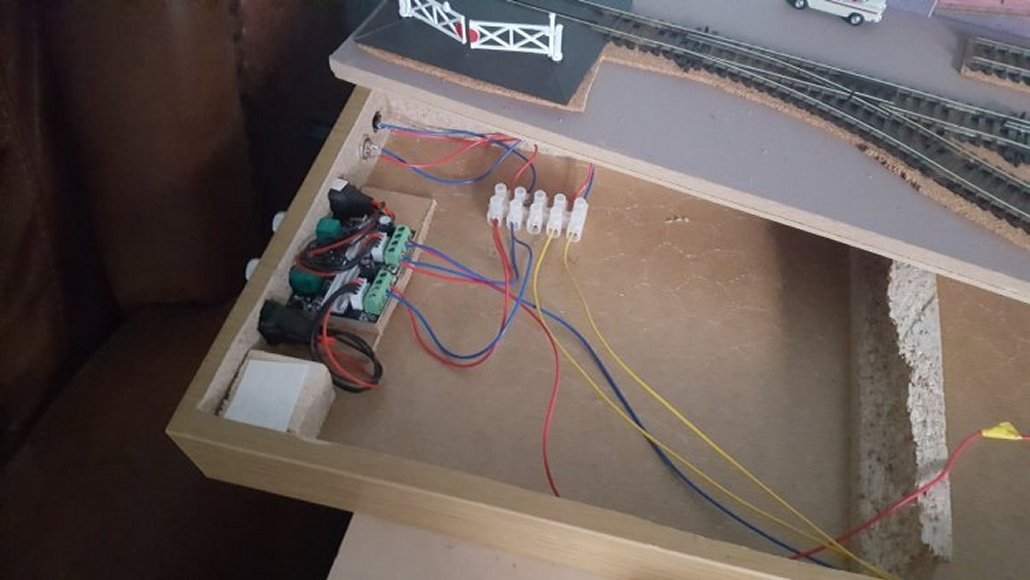
Week 2 has involved building the walls, tuning the road, soldering the wiring built so far. The setup runs on two voltages – 12v DC for moving things (red and blue) and 16v AC for point motors (yellow), so two wires will run to the shelf, everything else is contained under the track. The speed control reminds me of the sort of knob you had on a music centre in the 70’s, the direction like something out of a Triumph TR7.

I’ve added cork under the tracks and glued that down, the track will need gluing once the point motors are installed underneath. I made a start on the house for the top level but a hangover prevented the amount of thinking needed to progress. With a chilly weekend forecast there is plenty to be getting on with. I can see this keeping me busy well into the New Year.
© Sweaty Dave 2017