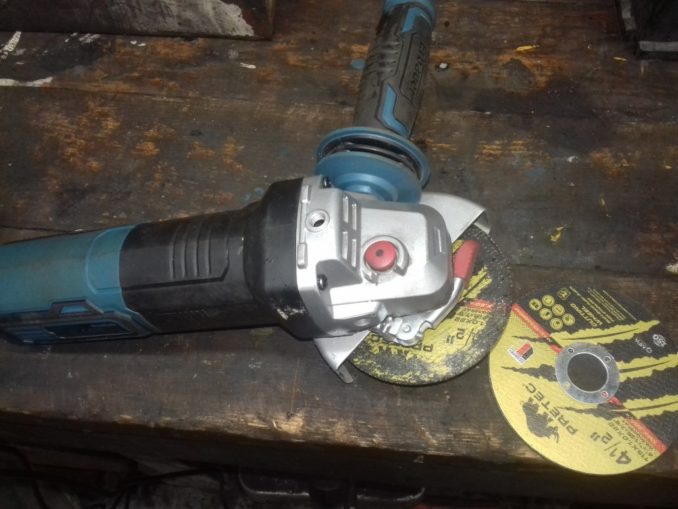
Perhaps it’s worth mentioning the tool I use for cutting sheet and plate steel, a standard 4.5 inch angle grinder. ½ inch thickness can be dealt with quite easily and if you mark the job out carefully beforehand, with practice cuts can be made to a millimetre accuracy, especially since the advent of the super thin 1.5mm thick cutting discs. Discs do not last long cutting thick stuff, but costs are reasonable for packs of 10 or 20. Various other industrial tools can cut far quicker and with greater accuracy but for the keen DIYer like myself the investment needed would be ludicrous. These small angle grinders can be purchased for £15 new and about £30-40 quid gets you a pretty good one. I have 3, one for cutting, one with an abrasive flapper disc and one with a knotted wire brush as I’m too lazy to swap everything around every couple of minutes.
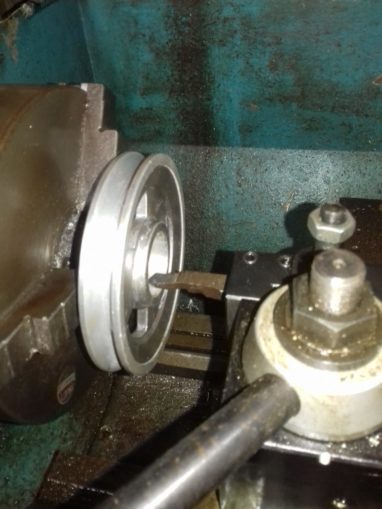
Onto the pulleys, The big one for the engine needed a 1.5” hole boring into it to suit the engine output shaft, so the best way here is to mount it in the lathe and use the tailstock chuck mounted drill to rough it out and finish turn to the required ID (internal diameter) with a boring bar. I used the three jaw chuck for speed and convenience. You cannot expect mounting precision regarding concentricity with a three jaw but the pulley will be centred to within about 10thou (thousanths of an inch) of centre so perfectly good enough for government work. The largest drill I have is 1” diameter with a stepped shank, but before you use that you need to initially make a pilot hole with (say) a 1/8” drill and maybe ¼” drill then you can go for it with the 1”. Aluminium is very soft and the lathe just cuts it away like butter producing beautifully shiny ribbons of aluminium swarf that have edges like razor blades so care needed. I used a boring bar to take the diameter out to 1.5”, taking very small cuts as you near the finished size so that you don’t go over. The graduations on the hand wheels are a huge help, remembering that removing say 10 thou equates to removing 20 thou on the diameter. The graduations are in imperial so being able to work with imperial units is very handy. I’ve been involved with SI (metric) and Imperial nearly all my life and for this sort of work I much prefer these measurements as thousands of an inch are far easier to picture in the mind’s eye than fractions of a millimetre. All went well enough and I drilled and tapped the pulley to accept a bolt that would engage with the keyway on the driveshaft, a little Locktite locking fluid on the shaft prior to assembly would ensure it stayed put.
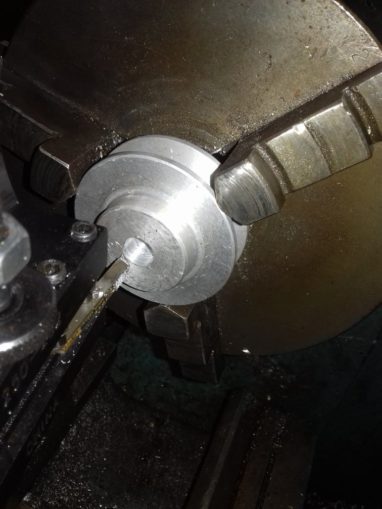
The next challenge was the smaller pulley for the pump. The pump literature advised that the taper on the input shaft is 1 in 8, obviously an industry standard. That being the taper on the ‘cone’ and not per side, so I needed an angle to set the top slide on the lathe to achieve that taper and obviously the angle would be half the cone angle as a cone has two sides. So a simple little right angle triangle could be constructed with some numerical values added to enable a quick bit of trigonometry and the answer was 3.57 degrees which was the figure to set on the top slide to give 7.14 degree included angle if that’s the correct term. This is a rather small shaft, with the smallest diameter of just 6mm. This was going to be a test as I really needed something like a watch maker’s lathe for this job and associated tooling. I produced the basic 6mm hole with a 6mm drill bit in the lathe tailstock, but then it had to be opened out to the correct taper. All of my boring bars were far too big, but I found a little regular turning tool that would do the job and wasn’t too large. All progressed smoothly initially but I got complacent and removed too much material and the pulley sat on the shaft so deeply that it fouled the pump. Bugger, back to the computer to order another pulley and try again. The second attempt was perfect. I cut a keyway into the pulley with a junior hacksaw blade and made a (woodruff) key out of the outer part of a suitable old washer that was lying around. It all worked perfectly.
I manufactured a bracket to mount the pump to the underside of the rear deck, found a suitable belt of the correct cross section (SPZ) to suit the pulleys, drilled 4 holes, turned them into slots with the grinder for belt tension adjustment purposes and bolted it into position. The bracket was just two pieces of flat bar, welded together to form a ‘T’ joint. I had planned to add some triangulation stiffener pieces to it but it was so dammed rigid that I deemed it unnecessary.
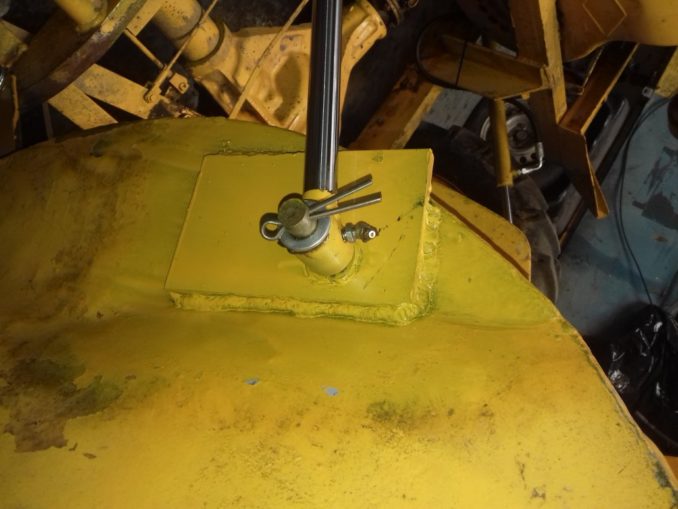
The spool valve, hydraulic tank and filter assembly were very simple jobs, just a question of drilling some holes to act as mounting points on the rear deck with some attention given to the rear axle and wheels articulation to ensure that the tyres didn’t interfere with anything when on full lock and/or axle deflection.
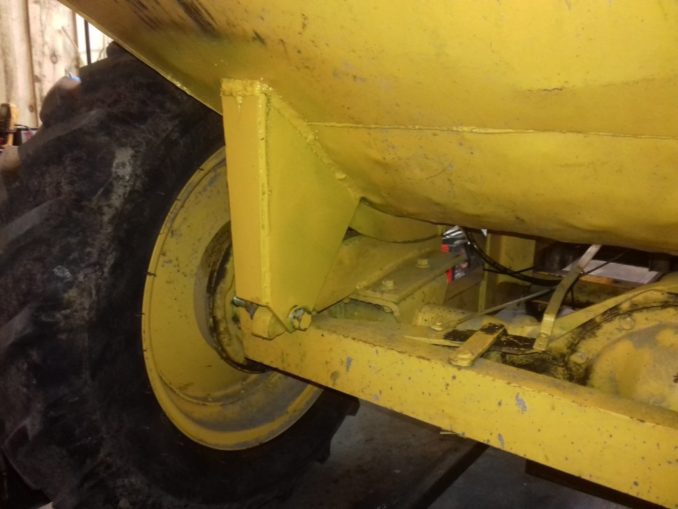
Plates were cut from ½” thick steel and welded onto the sides of the skip to mount the rams. The pivot points were large old bolts that I machined down to the correct diameter but I kept the bold head as a lot more weld could be laid down, for strength. Old bolts are a good choice as they are a decent tough grade of steel. If you look closely you can see that I even put some grease nipples into the holes supplied on the ram. A very similar idea using two steel plates of thinner 8mm section for the chassis mounting points carefully arranged so that when the rams are fully retracted the skip is sitting in its resting position. And error hear could see the rams pulling on the skip and doubtless bending or distorting something. I finished the work off by painting it all with the old JCB yellow colour which matched the rest of the dumper well enough.
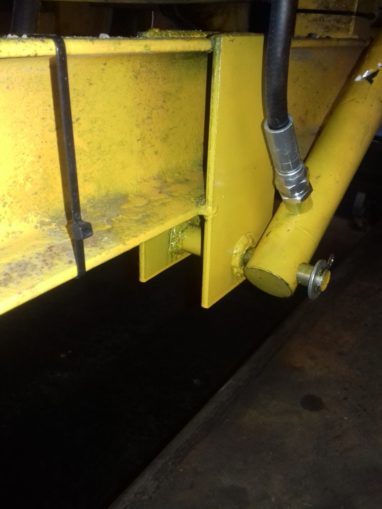
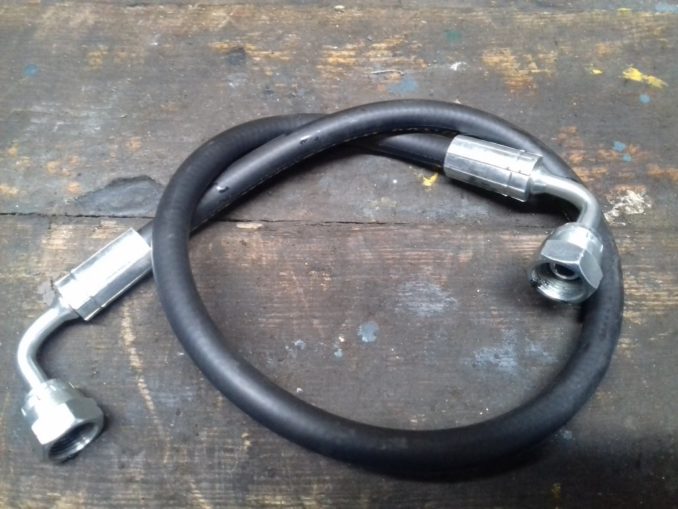
The last part of the job was the hydraulic plumbing which for convenience was to be flexible rubber pipe throughout. I mentioned earlier that all the fitting that I used has 3/8” BSP female ports. So that end of the pipe work would be a given. However it appeared that the pipe fittings (flared unions) could be either manufactured to BSPP, (British standard parallel pipe) JIC ,(joint industry council) or metric. I discounted metric straight away as it reminds me of the EU and then decided upon BSPP because it has the word ‘British’ in it. (top quality thought processes there) The differences are only minor and include small differences in thread pitch used and cone angle of the mating flares, they all work fine but are obviously non-interchangeable so you must stick to one standard. The hydraulic component supplier has a lovely ‘’hose builder’’ tool on the website that allows you to custom order anything you want. Super, so I decided upon ¼” hose as it looked broadly comparable to power steering hose used on cars and then it was just a matter of choosing the length (a little longer on the side of caution as too much hose can be easily ‘’lost’’) and the types of ends, like 90 or 45 degree elbows to keep everything neat and tidy. I just ordered a couple of hoses initially so the price of a cock-up wasn’t too much but they fitted well enough so I ordered all the rest. Hoses are not as dear as you think, a 12” length with two fittings is perhaps a tenner. Think how much one would cost for a high end BMW from the dealers.
Hoses installed, some ‘P’ clips and the odd cable tie to keep the hoses fixed in position and the tank was duly partially filled with oil. I started the engine, pushed the lever and the skip duly moved as hoped for. In fact it travelled to full extension and back again with no issue, I was very happy with that as there were no immediate gremlins to work out of the system. There was one puzzling issue and that was the speed of travel of the rams, they were taking about 40 seconds to achieve full extension which was too long really. It was back to my desk to re-check the maths that I previously used and all appeared correct. I played around with the thing and discovered that it made no difference to speed of travel if the engine was at tickover or running at full speed and that made no sense to me initially. But I remembered about the phenomenon known as cavitation and realised that the supply line from tank to pump was the same diameter as the delivery pipes and the pump simply couldn’t be fed fast enough due to vacuum in the narrow pipe. I ordered another pipe that was the next size larger and that fixed the problem instantly. The speed of the rams was as per my calculation and satisfactory. Another thing I haven’t yet mentioned is that the spool valve incorporated a pressure relief valve so you can adjust to suit the load intended. I filled the skip to the top with rocks and adjusted the maximum pressure as low as possible while still enabling it to tip when asked. I figured that excessive pressure generation would serve no purpose other than to potentially strain the mechanism or load up the pump unnecessarily.
All in all, a nice little project that took about three weeks working perhaps an hour or two most evenings when it was cold and dark outside and good exercise for the brain. Finally, to conclude, a picture of the skip full of rocks that I dug out of the field, they cause havoc with the mower if you don’t spot them in time.

© text & images Cardinal Puff 2023