Introduction
Two questions that I am regularly asked when shooting my long-obsolete 19th century rifles at our local club range are i) how much does it cost to make one cartridge? and ii) how long does each one take you to make? This has become much more evident since I started to produce authentic replicas of French 1866 Chassepot rounds which are without doubt the most complicated and time consuming rifle ammunition ever designed.
Neither of these questions has a simple answer though because it makes no sense whatsoever to produce individual cartridges. It is a far more efficient use of time and energy to carry out the various processes involved in separate batches and then to assemble the cartridges in stages as work progresses.
When the Chassepot rifle was adopted by the French Military in 1866 its big advantage was that in a time of muzzle-loaders, it could be loaded much more rapidly at the breech by means of a modern bolt action mechanism and furthermore its chamber was sealed to prevent leakage of explosive gases back into the face of its user by means of an innovative and highly effective rubber obturator. By the 1860s however the self-contained brass cartridge comprising case, primer, powder and bullet all in one convenient package was being used in America but significantly only in rim-fire, pistol calibres such as the 44-40 Henry and the 56-56 Spencer which used powder charges of only 44 and 45 grains of black powder respectively. Although these rapid firing repeating rifles were very useful at comparatively short ranges, they were nowhere near as effective as the then prevalent .577 and .58 muzzle-loading rifle-muskets against targets such as gun crews at ranges of anything beyond around 300 yards.
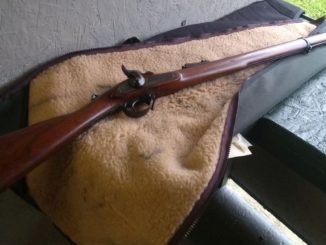
This problem would soon be solved by advances in metallurgy that would allow the introduction of centre-fire rounds in full rifle calibres but the necessary technology would not become available to French government arsenals until the early 1870s. Consequently the French military had no alternative but to commission a self-contained cartridge containing a primer, a quite hefty 86 grain charge of black powder and an 11mm solid lead bullet all held within a paper case that was ignited by means of a needle-like firing pin that pierced the base of the cartridge before striking the open end of a primer when the trigger was pulled. (For more information on needle-fire rifles see my previous article https://going-postal.com/2022/09/the-rise-and-fall-of-the-needle-gun-1841-1874/) It was inevitable therefore that these new cartridges would only have a limited service life before being replaced by drawn brass cartridges once the technology to produce them became available. Put simply, they were obsolete before they were introduced but, as I can confirm, they were perfectly serviceable in use and very powerful.
The other big disadvantage with the Chassepot cartridge is that whereas the manufacture of brass ammunition can be easily automated for industrial scale production, paper cases can only be hand-assembled which is labour intensive making them much slower and more expensive to produce.
The only ‘modern’ ammunition that I use is the .303 British cartridge that was first introduced in 1888 as a stopgap black powder round prior to the introduction of the smokeless propellant Cordite in 1894 and subsequently nitro cellulose powder in its later iterations. The .303 cartridge continued to be used by the British armed forces in MkVII form in rifles and MkVIIIz in machine guns through two World Wars before being replaced by the 7.62mm NATO round in 1954.
As reloading components (brass cases, powder, primers and bullets) have only just started to become available again following post Covid/war in Ukraine supply chain problems, I recently found myself in a position of being able to assemble some .303 rounds for my 1953 Lee-Enfield No4 MkII rifle and to compare their production with that of a batch of replica Chassepot paper cartridges that I was also preparing in an attempt to answer the two questions.
Reloading the .303 British cartridge
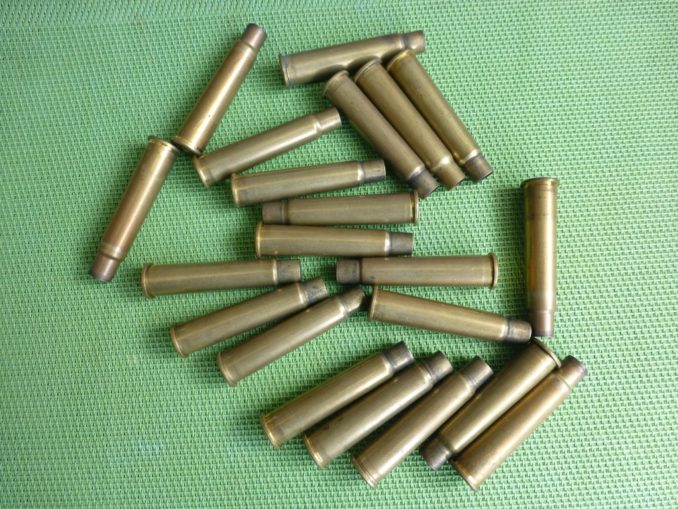
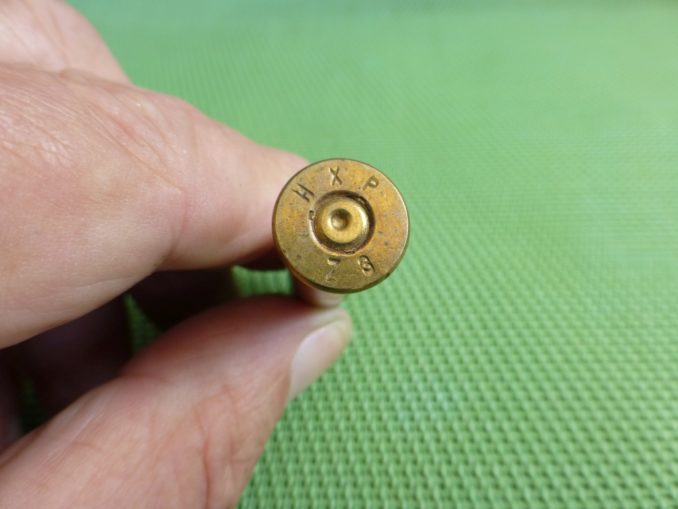
The cartridge cases that I use are high quality, ex Greek Government Issue HXP brass from the 1960s and 70s that I bought as ‘once-fired’ from the armoury at Bisley Camp in Surrey many years ago. These discarded cases which had been gathered from the firing points on the various ranges were then sorted according to the year of manufacture stamped on the base of each case (known as ‘the headstamp’).
When a standard specification cartridge is fired in a rifle it becomes ‘fire-formed’ to it taking on the dimensions and characteristics of that particular rifle’s chamber. As fans of forensic TV shows will be aware, no two firearms even of the same make and calibre are identical which is why spent cases are so important to investigators who can use microscopic markings left on them to identify from which weapon they originated. Some other changes in the fired brass can be seen even with the naked eye; if, for example, I were to reload a case that had been fire-formed in my 1900 Magazine Lee Enfield and then tried to chamber it into my 1916 P14 rifle it would not load into the breech due to the different shapes of the cartridge shoulders.
For this reason it is essential that I keep the ammunition for each rifle separate (as identified by the headstamp) unless I want to do a full-length re-size of each case which stresses the metal leading to more rapid failure. By contrast, the expanded mouth of a fire-formed case will not grip a new bullet but this is easily rectified by the use of a neck-sizing collet die that gently re-sizes only the neck of the case back to its original specification leaving the rest of the case body unaffected.
Step 1 – Cleaning the fired cases
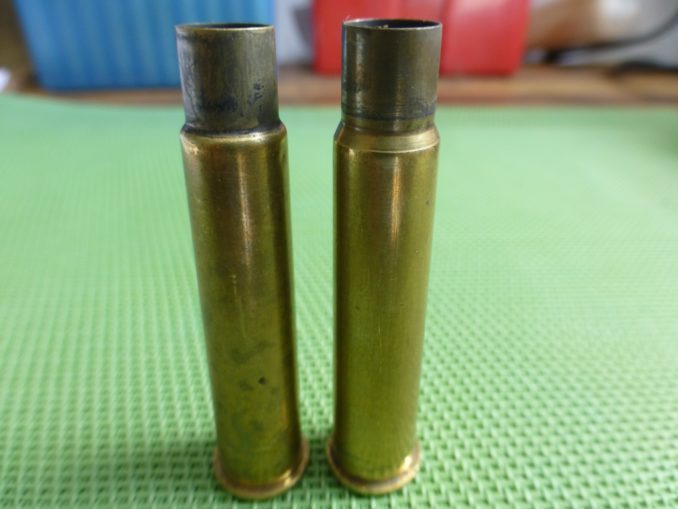
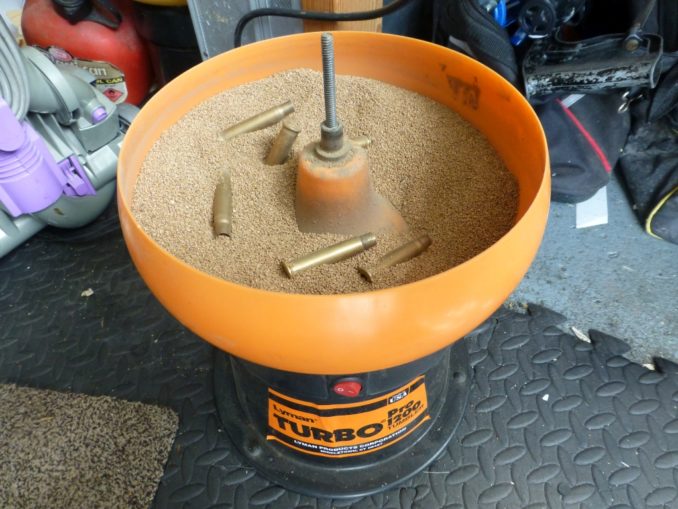
Fired cases are partially covered in sooty powder residues particularly around their necks when ejected and these deposits can hide case damage so, while not strictly essential, most shooters will clean their fired brass prior to processing using a case tumbler containing a mildly abrasive medium such as pulverised corn cob or crushed walnut shells. The cases are simply dumped into the tumbler which is then switched on and left to do its stuff for a few hours until the brass is once more bright and shiny.
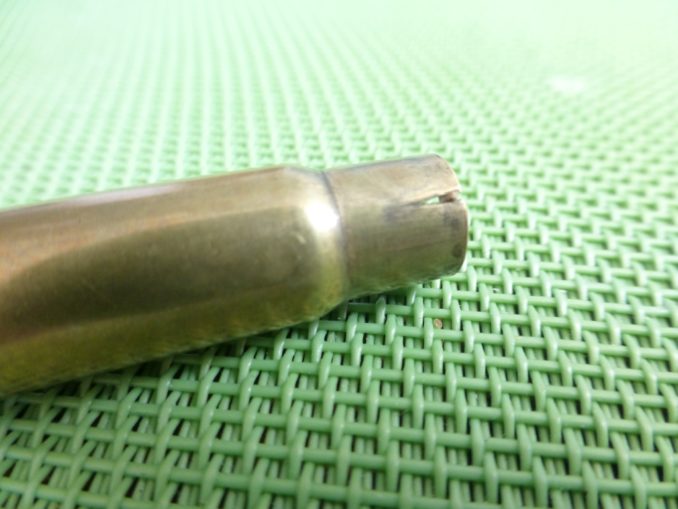
It is important before proceeding to check each cleaned case for signs of damage, the most common of which are splits in the neck into which the new bullet will be fitted. I’ve found that the best way to do this is to run a thumbnail around the neck and feel for any snagging. Damaged cases go straight into the bin.
Step 2 – De-priming, neck-sizing and checking case length
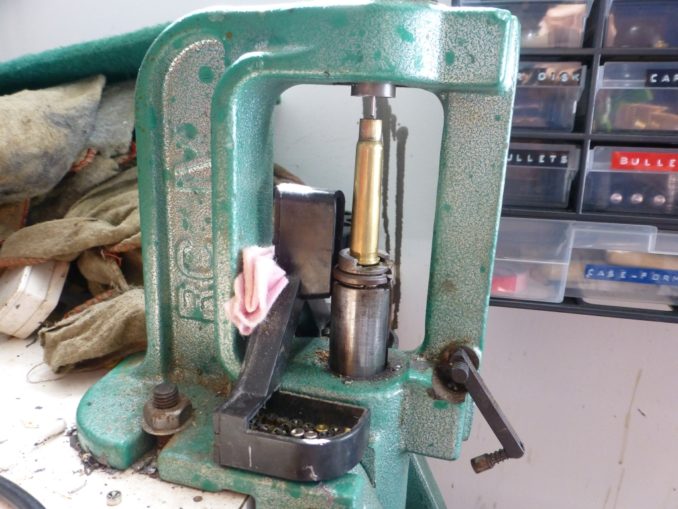
This is done with a number of simple, single-purpose tools. First the neck-sizing die is screwed into the reloading press and the correct shellholder is slotted into the rising ram. A cartridge case can then be inserted into the shellholder and when the handle of the press is pulled down, the case is forced up into the die which squeezes the case neck back to the correct dimension at the same time punching out the spent primer in its base with its hardened steel de-capping pin. It takes only a matter of minutes to do this for 50 cases which is my typical .303 batch size.
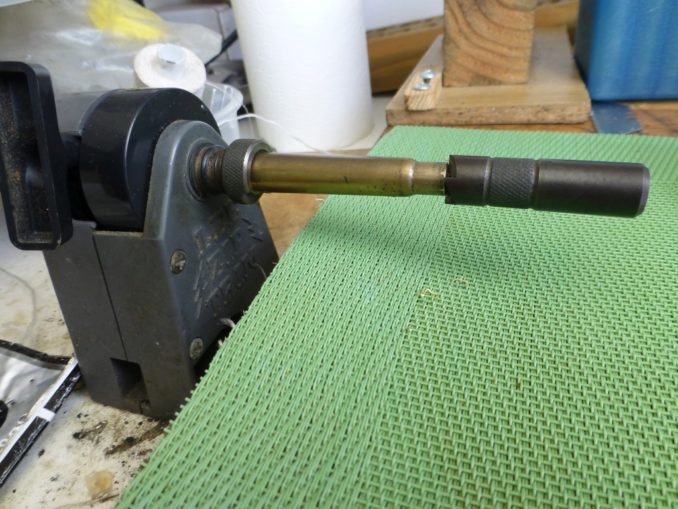
Brass stretches with continued use so it is important to ensure that the case length remains true to the original ammunition specification. To do this I use a simple device called a Lee ‘Zip Trim’ which uses a precision measuring gauge/cutter to remove any excess brass by simply pulling a string that rotates the case against it.
As often as not this proves not to be necessary but it is essential when using brass fire-formed in another rifle that has been full-length resized for the first time. Trimming the case neck produces burrs on both the inside and outside of the case so another special tool is used to remove the unevenness and leave the case neck smooth so that it will accept the new bullet without damaging it and also chamber easily into the rifle.
Step 3 – Re-priming the cases
A primer is a small explosive cap which is fitted into the base of a cartridge and when struck by the rifle’s firing pin explodes sending a jet of flame through a channel into the cartridge initiating the firing of the main powder charge.
Before re-priming the cases I clean out the primer pockets using a ‘primer pocket uniforming tool’ that removes any dirt and ensures that the new primer will fit to its correct depth in the recess. New primers can be inserted using an arm on the reloading press but for .303 ammo I use a simple hand primer to do the job. I count out the correct number of new primers into the drum which by being shaken gently from side to side flips them over so that their open ends are all correctly oriented facing upwards. It is then simply a matter of inserting a case into the shellholder and squeezing the handle of the tool firmly to press a primer into the pocket so that its base is just below the level of the surrounding brass. As large rifle primers and large pistol primers are the same diameter but marginally different in depth, it is essential to ensure that the correct primers are being used for the particular application.
Step 4 – Charging the empty cases with powder
Here it is crucial to adhere to the powder manufacturer’s guidance regarding minimum and maximum loads for each specific powder and bullet weight as it would be easy to overfill a case and thus create dangerous chamber pressure that could lead to the rifle exploding with perhaps fatal results to the shooter and or bystanders. It is just as important to ensure that powder is loaded into the cases as if the case is empty when fired or contains only a ‘squib load’ the bullet might leave the case but not exit the barrel. If another correctly loaded round is then chambered and fired the chances are that the obstructed barrel will bulge or possibly burst with potentially devastating results.
I use a Finnish nitro-cellulose powder Vihtavuori N140 whose burning characteristics I have found to be ideal for the .303 British round. Having developed loads over a number of years, I know which weight of powder will provide the greatest accuracy from each of my rifles using a particular weight and style of bullet. When developing a load for the first time the drill is to start with the manufacturer’s minimum load and make up batches of ammo with progressively 0.5 grain heavier charges (there are 7,000 grains to the pound) shooting groups of five rounds from a rest to determine which load gives the tightest groups at a particular range. The charges can then be fine-tuned in one grain or smaller increments until the shooter is satisfied that no further improvement in group size is possible.
As this stage is absolutely critical for safe shooting, I make sure that I have no interruptions while adding powder. To measure each charge, I use a volumetric powder measure that delivers reliably uniform amounts with each stroke of the handle but to be on the safe side, I always check-weigh each charge on my balance scales to ensure that it is exactly right. Minute amounts of powder can be added to the pan using a powder trickler. As I measure each charge I pour it into a case using a special funnel and then move the case to the ‘filled’ side of my loading block before charging the next one.
When the batch of cases has been filled I do a double check with a torch (flashlight) to make sure that each one contains powder and that they are all filled to the same level. Once satisfied that all is correct I can then move on to the final stage in the reloading procedure.
Step 5 – Seating the bullet
Here it is important to ensure that the bullet is inserted into the cartridge neck so that the ‘cartridge overall length’ is as specified in the reloading manual. To achieve this I fit the adjustable bullet seating die into my press and put a 174 grain full metal jacket bullet into the case mouth. I then fit the cartridge with its loose bullet into the shellholder and raise it into the die pressing the bullet to the correct and uniform depth in the case mouth.
And that’s all there is to it!
This may all seem very complicated but believe me, describing the various steps involved takes much longer than actually doing them and as usual it is the preparation that takes up most time. All of the processes described minus case cleaning of course are automated for the factory production of commercial ammunition but it is much more expensive to buy than home reloaded ammo and most shooters also prefer to be in control of the process themselves. At the time of writing (July 2023) 100 rounds of Czech .303 British ammunition cost £115 or £1.15 per shot.
All that now remains is to go to the range and have some fun shooting them.
In the next instalment I’ll do the same for the Chassepot cartridge and you’ll see what a difference there is between the new and old technologies and what a rod I’ve made for my own back by opting to shoot my old rifle in a period-authentic, Franco-Prussian War fashion.
© text and images; Tom Pudding 2023