We left this saga with some success and some frustrations.
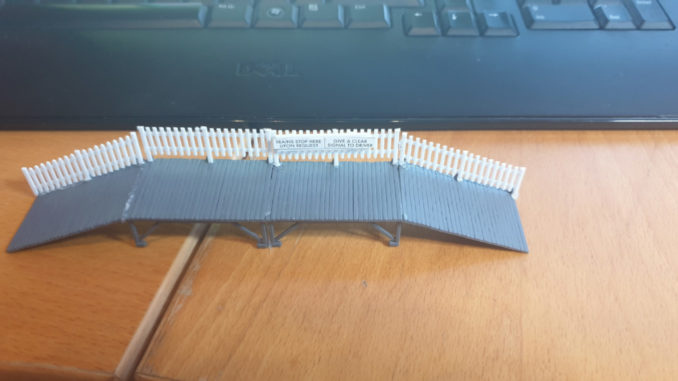
The track was mocked up in parts, with the track tester showing where more work was required (particularly around points). I’d made a ham fisted attempt at the scenery – one that definitely needs rework, had a rather nice engine shed constructed and a rather terrible wayside halt due to the use of a hot glue gun.
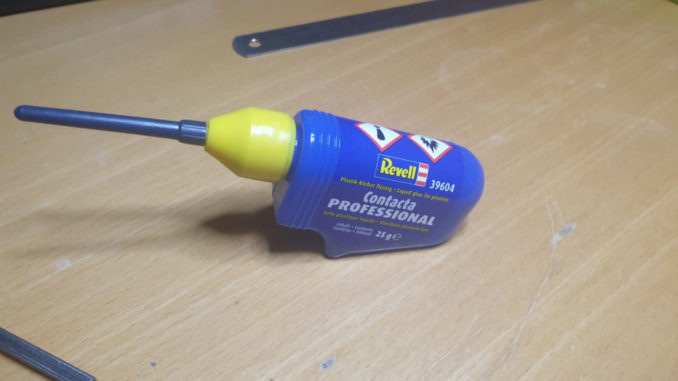
Over the course of the next few days, the postman finally delivered a range of items – this is not a cheap hobby – consisting of some inclines, a precision plastic glue dispenser and some new electronic gimmickry.
© Sweaty Dave, Going Postal 2021.
The glue first – it did mean I could tidy up the wayside halt, which upon closer inspection was a hurried mess – not just glue everywhere, but in the haste to get things in position before the stuff set, railings were back to front and one upside down! Fortunately, the hot glue had the consistency and strength of blu-tac so was easy enough to pick away and replace.
© Sweaty Dave, Going Postal 2021.
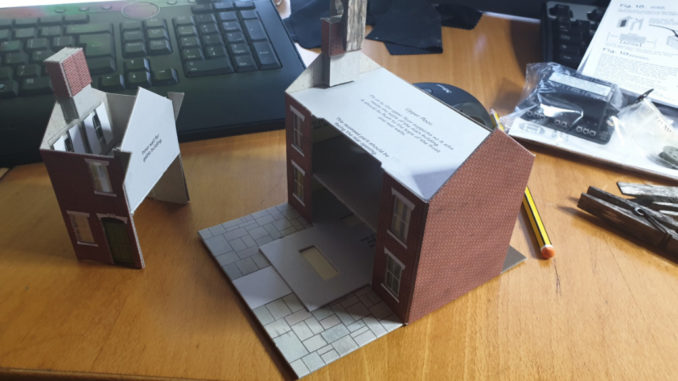
With a return to work pinning me to the desk for most of the week, that meant a return to a more peaceful existence, Mrs. SD having to head off to work, so time to build card models. This week it was the turn of a simple pair of terraced houses. This is a delightful kit, which I’d recommend for anyone even if not looking to build a model layout but as a creative challenge to make something attractive.
https://www.metcalfemodels.com/product/po261-00-h0-terraced-houses-in-red-brick/
The kit costs £10.50 and as with others involves cutting and building walls of card, adding plastic windows, adding curtains. The windows/curtains need that plastic glue, the rest simple PVA or Roket card glue.
The curtains are probably what takes the longest part – as you can see there are a lot to hang! So many that when I took this photo, my phone asked if it was a barcode with all the strips of paper.
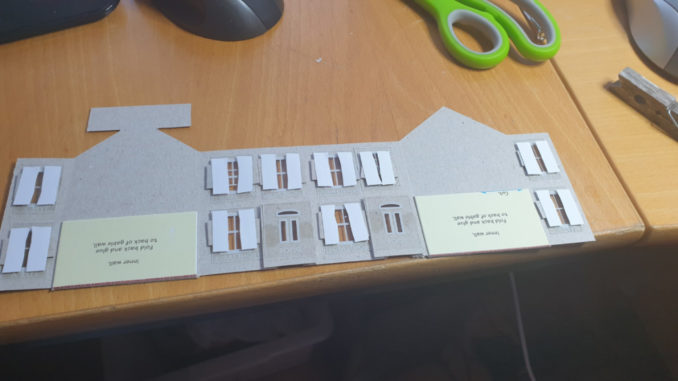
This particular building is not a relief one as before, but is freestanding, so includes both front and back, plus the back yard and shed.
© Sweaty Dave, Going Postal 2021.
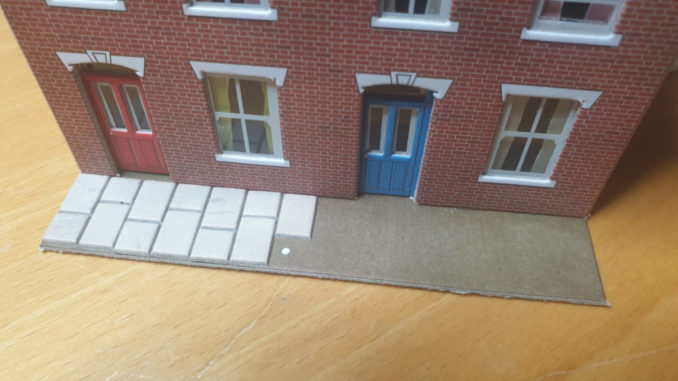
Also as before the paving stones and lintels are added separately – I’ve included a dab of glue for each of those to keep them in place.
© Sweaty Dave, Going Postal 2021.
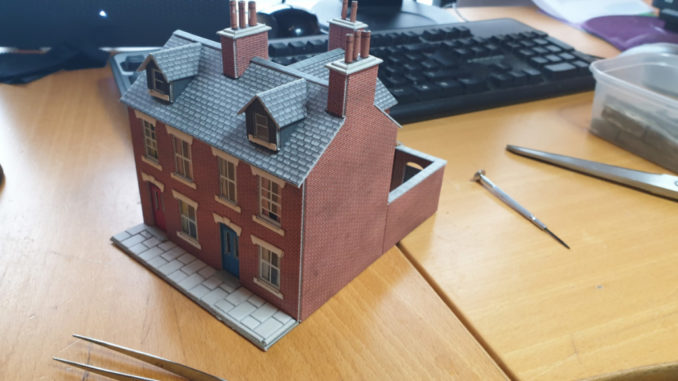
I think three or four of those kits will make a nice little terrace – the beginning of a mining hamlet.
© Sweaty Dave, Going Postal 2021.

© Sweaty Dave, Going Postal 2021.
Tech
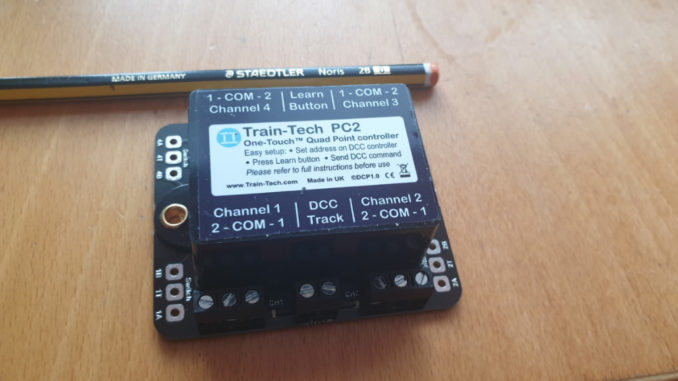
Did I say some tech arrived? Yes this particular item controls accessories – so things like point motors and signals that are on the board. Rather than run a wire for each point from a central control panel, under DCC, you have a local controller that takes messages from the track – this particular one can run four points/signals/ what have you. As each of the boards can be separated, I would pretty much need a controller for each board having those sort of things on there. At £44 a pop, that’s a bit pricey so I’ll look at limiting the need.
© Sweaty Dave, Going Postal 2021.
To that end and to simplify things, I had to consider where the track crosses between boards – looking carefully to ensure there are no complicated junctions or points straddling the joins between boards. This meant taking up the track once more and realigning it a little – I’ve not yet glued anything down so it isn’t a problem at this stage. The main crossover affected is a pair of points, so using a couple of offcuts about an inch long, just separate them a little, to give me space to have tracks that will go over the join.

© Sweaty Dave, Going Postal 2021.
Finally the inclines arrived. You’ll remember a ham fisted attempt at cutting something of an incline into some foam insulation, well that’s now set aside. I’ll use the foam to surround the track (heated knife on order) but the track itself needs something a lot more precise. To that end, Woodland Scenics produce some flexible polystyrene items that support the track, giving a 4 degrees incline or 1in in two feet. A pack actually contains four inclines (I assumed it’d be two), so I have spares in case of problems.
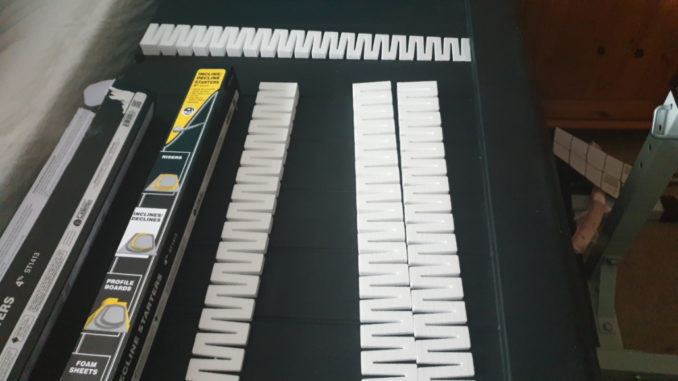
© Sweaty Dave, Going Postal 2021.
Sunday morning gave me the opportunity to try these out – Mrs. SD was in bed browsing through fitness videos (I told her that’s not how it works, but hey ho), too wet to cycle or go out, so some free time.
The inclines are, as I said, flexible. Putting two side by side means stretching the outer a little and compressing the inner, to try and match them up. Being expanded polystyrene, they are light but fragile, particularly at the thinner end. A few temporary pins help set it up. Originally I tried to start the incline at the beginning of the curve, but soon realised that wasn’t going to work, so worked backwards from the point it crosses the baseboard.
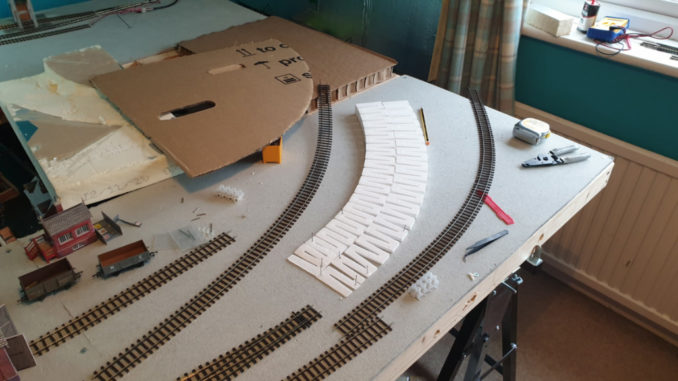
© Sweaty Dave, Going Postal 2021.
The incline is meant to climb the curve then the train will cross a viaduct on the open board at the end. For that board I needed something that’d support the track and was 1in thick. Rather than cutting more foam, I found a piece of packing cardboard, 1in. thick that could support the track at the higher level. That will be cut once all is well, and made into a viaduct. To get the track around the bend without ending up right on the back of the layout, I’ll have to make that viaduct a curved one, similar to Glenfinnian viaduct – that used on Harry Potter.
© Sweaty Dave, Going Postal 2021.
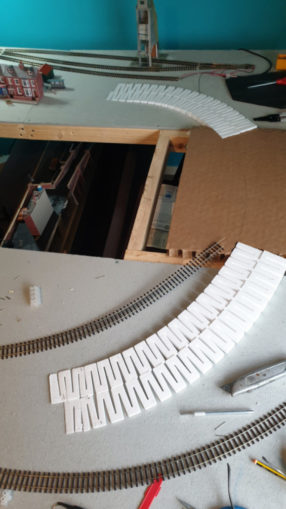
The idea here is to get the inclines mocked up on both sides, lay some track on it to test that the curves are ok for a loco, work out how it will all look then fix it in place. I think the inclines will pin into position, I’ll either then add a layer of cork as underlay to raise and support the track, or use plaster cloth to make the ground. The cork is more likely as it raises the ballast up that little to give drains at the side (‘the cess’ in railway parlance).
Surrounding the track will be the foam I discarded earlier, shaped to be slightly higher as if the track is climbing out into a cutting before crossing a viaduct.
The inclines are a really good idea, and very easy to use. The most difficult part if this was, once again, joining the track with those tiny fishplates! With it being flexitrack connect one joint and frequently the next one along will disconnect and on it goes…
In the end I did manage to get a successful test run. Next stage is to complete the two ovals so it can finally run around. Next building? Well I have a corner shop to tackle….
© Sweaty Dave 2021
The Goodnight Vienna Audio file