
© Sweaty Dave, Going Postal 2020
We last left the challenge with the track due to arrive. JandJmodels.co.uk was closed due to lockdown, so having spare time, delivered the track in person. Peco had finally managed to manufacture a new set of the bullhead flexitrack and it is a very delicate but intricate piece of kit.

© Sweaty Dave, Going Postal 2020
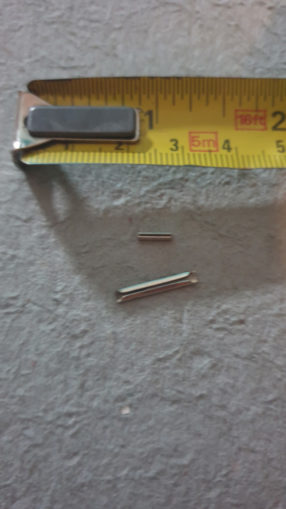
The fishplates – those pieces that connect the pieces of track are absolutely tiny – the normal ones are around 1cm in length, the scale fishplates, with attendant 4 bolts are the size of a grain of rice! I had to use a magnifying glass while fitting them.
© Sweaty Dave, Going Postal 2020
Flexitrack is well named – it is extremely flexible and rather fragile – nowhere near as robust as normal track. This means handling with great care. Any bends have to be created by hand, each fishplate added manually and as each piece is a yard long, the rails will need cutting once in final position. That applies not only to straight lengths, but any curves mean the inner rail pokes out further than the outer and will need to be trimmed. I did buy a Dremel type cutter years ago. A few minutes digging around the garage found it covered in cobwebs. A test and all is good. Making that cut is really confirming you have a final agreed spot for the track and that’s not yet the case – so I’m loathed to start cutting it up until happy with where it will go.
The other track pieces are huge – points being twice the length of traditional ones and a shallower angle too, so a lot more space is needed to create say a few sidings. With this in mind, one of the points I bought is a three way point – to give three sidings from one track in as short a space as possible.
As mentioned before with this being DCC all the tracks are powered by the same controller – there are no isolated or separate sections. With the steam engine limping around, I had no way of knowing if it was the engine or the controller that was at fault.
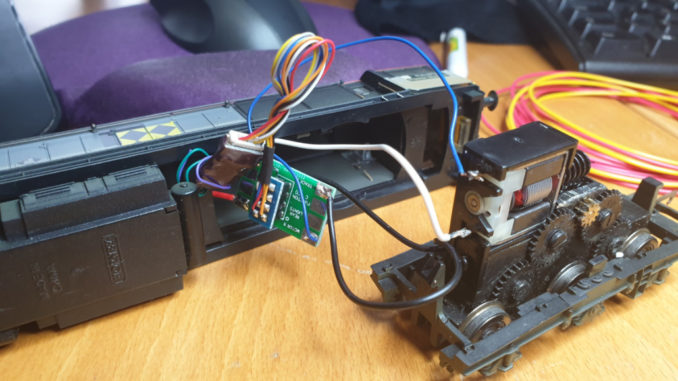
My eldest had been interested in toy railways during his ‘Thomas’ phase most boys go through at around 4-6 years old. His grandfather had bought him a Hornby loco – way too expensive/adult for him at the time but he looked after it and we never sold it. I dug that out of his cupboard and ordered a DCC socket for it.
A couple of days later the socket arrived – naturally in this endurance trial, it wasn’t what was needed – just something that plugged into a pre-prepared loco. I needed a different socket for this to plug into! Having had a go at the supplier, I ordered what was really needed, again from Illuminatedmodels.co.uk.
© Sweaty Dave, Going Postal 2020
This loco has plenty of space inside for all this gubbins, so wasn’t too difficult to prepare. Having found some instructions on the internet, it was a case of wiring the pickups from the wheels, then two more wires from the socket to the motor and stuffing it all carefully into the body. After a couple of checks it actually worked! This confirmed that the controller is ok, and the steam engine is duff.
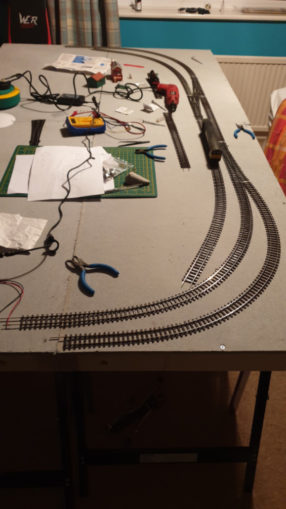
So all the elements are finally coming together. I have four baseboards in place without divorce, a working engine and controller and more than enough track to make a start.
The first setup was to try a dual mainline and branch off for the coalmine. As there wasn’t room on the curve to add one of these really long points, so I set the start of the branch on the other side of the board That will run all the way around and give plenty of space to branch into sidings. I have yet to set it up and see if there is room for a run around at the end (space to uncouple the loco, run over a point and back up the next line ready to haul the filled trucks away). The connections between pieces were strong once fitted. Avoiding letting the sleepers fall off the end of the track was key – like dropping a knitting loop – not easy to recover but a couple of tracks and the siding came into form.
© Sweaty Dave, Going Postal 2020
I ran the loco and noticed it wasn’t good with tight curves. With it being shallower track, you do not get to have the same tolerances and need to stick to the rules. To ensure we weren’t trying to make it do something it shouldn’t, I cut a piece of cardboard with a curve akin to ‘radius 2’ – 17 ¼ inches, meaning a full 180degree curve would need a minimum diameter of 34 ½ inches.

© Sweaty Dave, Going Postal 2020
That’d be the inner line, the outer would be 39¾ in and the coal branch 45in. That’s ok, after all the baseboard is 46 inches wide…. Oh.. Doh! I now realise to fit the track would in effect have to be right on the outer edge of the boards with lots of wasted room inside it. Time for a mull on that issue, in particular about the space restrictions around the layout.
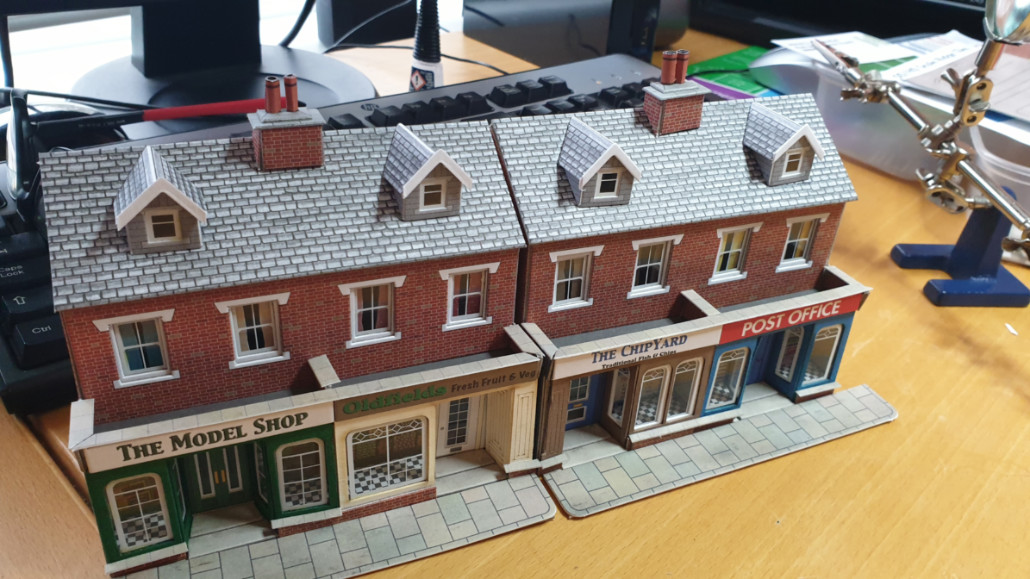
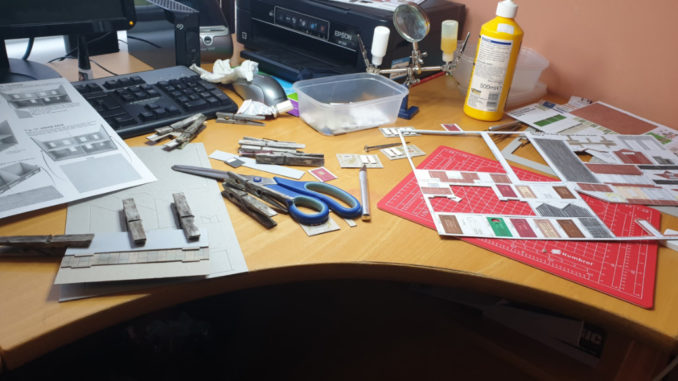
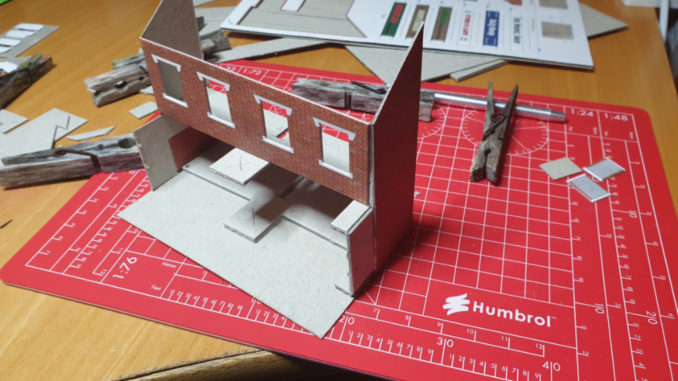
With the boards proving challenging, I moved on to something a lot more rewarding, constructing some buildings. The signal box and garage were already built, this time it was a row of shops. These particular kits are designed to be ‘relief’ models – not in the RP sense of the word – but ones that can stand against a background without taking up too much room as they are only half the depth of the building. In this case I want to use them in the middle of the scene, so will buy the associated ‘backs’ giving me the other half of the buildings. The card models by Metcalfe are a wonderful puzzle of precision cut card. They make the less busy working from home days pass with a sense of achievement as a building comes together.
© Sweaty Dave, Going Postal 2020
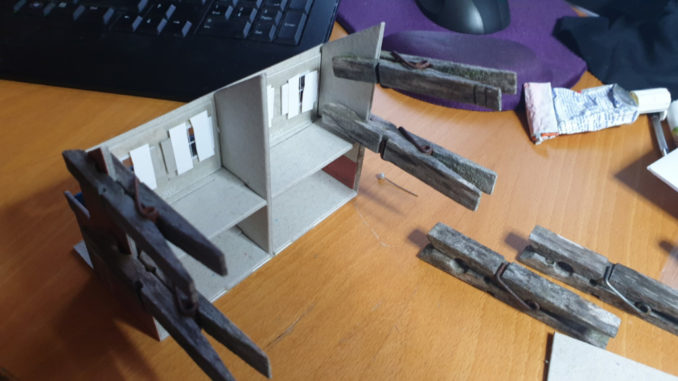
To build them requires a cutting board and scalpel type knife, to score the remaining lines to free the pieces from the sheet – all clearly marked and plenty of instructions to follow. A precision glue bottle (£3 or so from Metcalfe) for the wood glue and some wooden pegs to hold the pieces in place while they dry.
© Sweaty Dave, Going Postal 2020
© Sweaty Dave, Going Postal 2020
The shops are built up in a number of steps, a bare carcass is set up, then shop windows with a range of contents are made up as components and pushed into place. The plastic windows always require contact adhesive (UHU glue) rather than wood glue/roket glue or they tend to fall off. Curtains are stuck to spacers, on to the windows which are then added to the building.

© Sweaty Dave, Going Postal 2020
The final result is rewarding and I’m looking forward to building a row of houses. Doing the kits gets me into the rhythm of construction. Creating a mine from scratch will be a much bigger challenge.
© Sweaty Dave 2020
The Goodnight Vienna Audio file

