Evening Shunting fans. Latest updates for you…
With the weather being somewhat chilly, there has been little excuse to get on with tings…
The Shunting Dozen outlined some work on the 3 way point wiring, finishing those terrace backs and the bridge in place.
With the bridge in place and the trackbed given an undercoat of black, it was ready to receive track. I have made more of a concerted effort to finally fix the track on the front of the layout. Where to start is often the biggest hurdle. In the end sense suggests that the fixed places that cannot be flexed – the points – are where to begin. A quick undercoat is applied to the track bed, then PVA – 2 parts glue to 1 part water – brushed on and the track laid down. As usual getting the tiny fishplates in place is a real challenge, needing the use of a magnifying glass.

© Sweaty Dave, Going Postal 2021.
The track on each board needs power fishplates added for when the layout is divided for storage. The fishplates are larger ones with a wire soldered on. Unfortunately they really don’t fit well on the track and have to be eased open to work. Adding them to the bridge section was interesting, I’m glad I did them before any scenery, as they have to drop to lower ground level and below, not an easy feed for the wires.

© Sweaty Dave, Going Postal 2021.
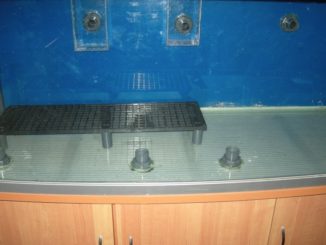
As well as power fishplates, points need additional care, and are really the starting reference point – the ‘straight’ flexitrack can be cut and shaped to fit between these fixed items. The points need a hole drilled for the small wire to power the ‘frog’ and must not be laid over a join between baseboards. Each set of pieces is weighed down for a few hours and allowed to set.

Weighing down the track to set the pva.
© Sweaty Dave, Going Postal 2021.
All this work gave me the two lines at the front and the branch around to the Y point, plus some track over the bridge before I ran out of power fishplates – more on order.

© Sweaty Dave, Going Postal 2021.
Doing the other side to complete the two mainline loops is the next challenge – I’ll have to move the layout somehow to get easier access to that side. Having said that, it will really let the layout come to life, by allowing trains to do more than just stop/start on small track sections – once I have some working engines!
I made a start wiring up the 3 way point – ok doing so with a slight hangover wasn’t the best idea when lying under the layout fully stretched to reach the underside, but got the solenoids just about lined up and the wires installed – what a rats nest! They both click on demand, but need fettling slightly as they’re not quite throwing fully and the switches powering the subsequent track not yet giving the right polarity – some combinations seem to kill the power around the track meaning as short – so will have to review all the wiring again. More work needed there – just looking at this shot will trigger OCD in many of you!

© Sweaty Dave, Going Postal 2021.

© Sweaty Dave, Going Postal 2021.
Having done that, I realised the two points at the front allowing crossover from one main track to the other were nicely glued down with the wire for the frog fed through but had no hole underneath for the point motor – disaster! One was glued fast, so either it has to be drilled from underneath (a risky option as I can confirm that they are very fragile) or have a surface motor – I’ll do that with that one I think in time. For now they can be changed manually. The second one has not been glued, so could be lifted a cm or so to allow me to drill from below and make the necessary hole. That does make a bit of a mess – the board kicks up quite a lot of fibres that get into engines and track, trying to cut the fibre swarf away to bring it back to level also meant I knocked the point, springing one of the switch rails out of its holder – I really hope it can be mended as they’re not cheap, it does not appear to be too keen to snap back into place. I do have a ‘spare’ that is meant for a siding, so now swapped it in, while the broken one is on the list of things to do.

© Sweaty Dave, Going Postal 2021.
A quick run around with the engine shows good power connectivity on all the areas, even with most of the power connectors not yet hooked up – they’re needed for when the rails are cut at each board join. The engine itself, a ‘modern’ diesel is totally unsuitable for the layout period and being 20 years old performs poorly as it was never designed for DCC. A clean up, soldering and a service should help, but it is not really suited for the period and is at the moment very reluctant to start moving. I’ve mulled over what to run on here and after a lot of prevarication finally ordered a new engine.

© Sweaty Dave, Going Postal 2021.
They’re not cheap these days, particularly when you add the £20 for the DCC chip, but this one is similar to those seen at Tanfield Railway. I fully expect the Spanish inquisition from Mrs. SD when it is spotted on the layout.
© Sweaty Dave, Going Postal 2021.
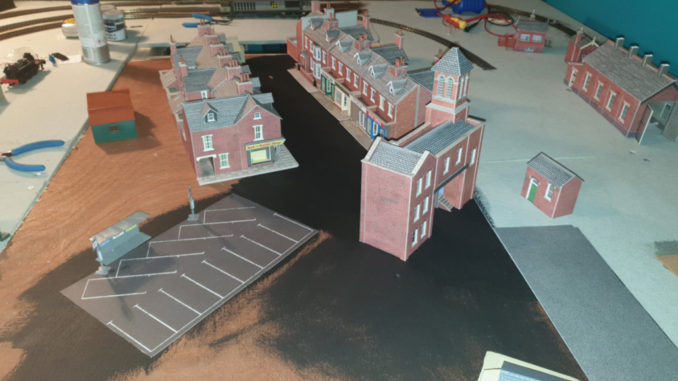
I mentioned last time that I’d run out of building kits. With most of the village now built, I searched for what was left – the mine – and came across a second hand kit for £20.

© Sweaty Dave, Going Postal 2021.
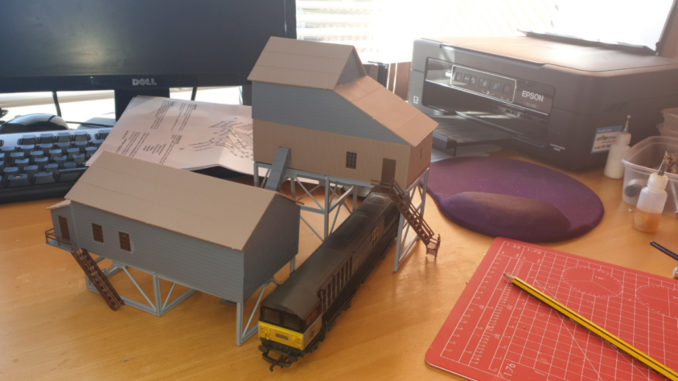
It is pretty comprehensive and will remind many of their days of airfix kits – one exploded diagram to explain what needs to be done and each part numbered, either itself or on the frame holding it.

© Sweaty Dave, Going Postal 2021.
This is a much larger kit that the previous plastic ones making up two buildings and a conveyor. I’ve had a rather good week putting it all together despite many parts being a bit warped – perhaps it had been stored badly, they do all go together ok, and it adds to the ramshackle appearance.

© Sweaty Dave, Going Postal 2021.
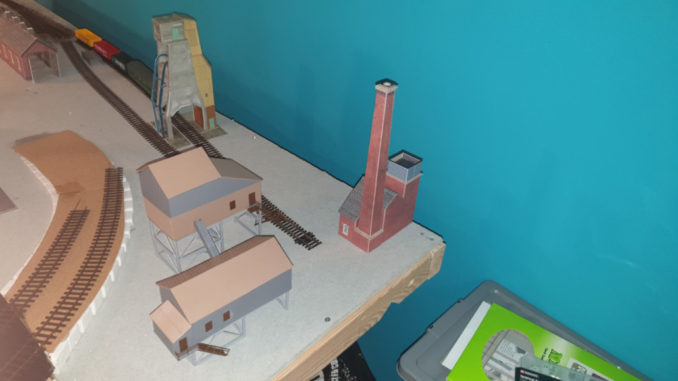
As with every other plastic building it will need painting/weathering once paint is available.
© Sweaty Dave, Going Postal 2021.
I do want to modify it by adding pit wheels onto the main building, so I’ve found some laser cut ones on ebay (£4) and ordered a pair of those. I already have some girders, so will make up a harness for the wheels that will sit on top of the lower roof, with cables looping over them, through the building into the ground below. They will in turn feed into the boiler house where a steam engine would have driven the lifts up and down. The set up is that the mineshaft is under the shorter building. Coal is brought up, then fed up the conveyor into the larger building where much of the waste is removed then it is dropped wagons below. I’ve not got the location right yet, maybe siting the lower building slightly higher will help remove the flat artificial view at the moment, the ladder may also need to be resited to allow a second line to run around alongside – we’ll see, that’s the beauty of this stuff – it is as flexible and free-form as you want.
© Sweaty Dave 2021
The Goodnight Vienna Audio file