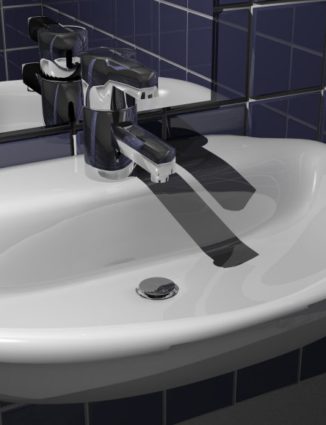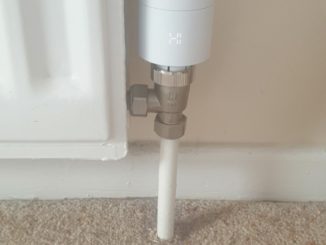
deux-chi – Licence CC BY 2.0
Ann had been telling me forever that the hot tap in the bathroom sink needed looking at. It didn’t turn on fully, apparently, so it was pot luck whether the flow was enough to tell the gas to switch on and actually heat the water. Every time I went to test this, it worked fine of course.
Eventually I got up my nerve to attempt an Actual Plumbing Job.
First, I found the DIY books a kind soul had given us when we got married. Surely tap design won’t have changed much in the last 28 years, I thought. Then, just in case tap science had moved on, I researched the subject on the internet. You would be surprised by just how much there is to read about taps.
Then, I went back and looked hard at the tap. It looked back at me. Impasse.
With the benefit of my internet research I worked out that the tap needed its insides replacing. More research followed on how to change a tap’s insides – the bit that does the turning on and off is called a gland.
Next up was a trip to B&Q for a new gland and a basin spanner.
All ready to go. Just needed to wait for a day when Ann was out of the house, so I could do the job as a surprise. Eventually, the day dawned when I was as ready as I’ll ever be to tackle DIY and Ann had gone out.
Rob, from two doors down, saw me collecting the tools from their hiding place and laughed when he heard what was happening. ‘Five minutes, that’s all it’ll take you’ he said. I suggested he call back in three hours.
First thing – turned off the water at the mains. All our taps are on the rising main, so no need to empty the hot water tank, we don’t have one. Turned on a tap just to check that the main stopcock had done its job. No water, good. Put plug in the plughole so that I couldn’t lose any essential bits that way.
Next task was to take off the tap head. Eventually worked out that the little button that said ‘hot’ was screwed on and wasn’t just going to pop off no matter how hard I tried. That hurdle overcome, I found a screw inside the head of the tap. Unscrewed it. Unscrewed it some more. Finally I was convinced that it was fully unscrewed and no longer holding the tap head in place, so I lifted the head off. Not budging. Resorted to traditional plumber’s tool and hit it with a hammer.
It turned out that the tap head had corroded onto the gland and that the hammer was the right tool for the job. Once the tap’s death-grip on the gland was broken, the head lifted off easily. So easily that it flew into the air and I had to catch it before it landed on the sink. The little metal shroud that covered the gland unscrewed next without putting up a fight.
Now I could see my objective. The gland was also corroded and generally looking mucky, so I couldn’t see where it ended and the tap body began. This was a problem as I wasn’t sure how much of the tap was coming off. Cleaned it up with some wire wool and compared with the new gland, and found the hexagonal bit where my spanner was to go.
The gland was corroded fast to the tap body, and even with a twelve-inch adjustable spanner I couldn’t get it to move without the whole tap turning too. I realised this might be a bad idea and had a panicky look under the sink in case I’d caused a leak.
Looked into my toolbox for inspiration and found instead a Mole wrench. Wrapping the tap spout in kitchen paper, I gripped it with the Mole wrench. The paper gave grip and also stopped the wrench from scratching the chrome. Turned the gland with the adjustable wrench and held the tap body still with t’other wrench and you know what – it gave!
I patted myself on the back and lifted off the gland. On the home straight now, I thought.
How wrong.
The new gland screwed in fine, then I went to screw on the shroud, and here I made my discovery: not all taps are the same. The tap shroud wanted to be screwed into something and the new gland didn’t have a thread.
I briefly considered leaving the shroud off, so that all could see the marvels of my DIY, but rejected the idea. Taking the old gland and leaving the water switched off, I went in search of a gland with a screw fitting on the top half.
I was condescended to in two plumbers’ merchants where the staff told me that I’d need to know the exact provenance of my old part in order for them to order me a matching replacement. Not helpful as I had a house with no water and a wife expected home later that day.
Eventually I went back to B&Q and bought a set of two tap heads containing everything – head, shroud, and gland that all fitted together. I took this home and fitted the gland, screwed on the shroud, settled in place the capstan head of the tap, fastened it with the screw, and finally screwed in the little ‘hot’ button. Checked that the tap turned OK and switched on the water.
Result – success, a hot water tap that did what it said on the tap.
Time elapsed, three hours.
Then I looked at the basin. There was something bothering me. The new hot tap design was different from the cold tap. Not a massive difference, but I felt sure Ann would spot it eventually. Say, within three milliseconds.
There was nothing for it – the cold tap had to be changed too. I had wondered why they were sold only in pairs…
So, I switched off the water again, unscrewed the ‘cold’ button, unscrewed the retaining screw, tapped the capstan head off the tap, unscrewed the shroud, got more kitchen paper and my two wrenches, and took out the cold tap gland. Screwed in the new one, put on the shroud, head, screw, and button and turned on the water. Working and matching taps, a good outcome.
Elapsed time now three hours and five minutes. I think I might have got the hang of this.
I just have one question – what was the basin spanner for?
© Jim Walshe 2017


