Thank you for all your kind comments upon this series of posts.
As you’ve probably noticed the cyclists aren’t as reliable as they need to be, and that has been bothering me. They’re meant to be able to run without constantly being picked up and reset, each crash risking damage. They move by magnets held in a chain under the road. The tolerances are pretty precise, and looking through the instructions (yes, yes, the last resort of any true bodger), it required a road surface being only 0.5mm thick. The one in place is a sandwich of the top black sheet of oven protector and a more rigid clear plastic base. Between the two that probably comes to 0.75 – 1.5mm thick. Time to rip up the road!
Luckily it all came up pretty well, in one piece, so it can be reused if further experiments fail.
With it out you can see the engineering behind the magic – avert your eyes if you want to retain the faith!

While the road was up I found a key issue that hopefully explains their errant behaviour – the chain is made up of a lot of plastic links. There are six or so different types and lengths allowing an exact placement of magnets. Unfortunately, different items have a different spacing between front and back magnet – if they were the same, then items – cars/cyclists would be much more interchangeable. I will feed that back to the supplier as a suggestion.
The key issue was that the instructions specified two particular types of link have to be used in sequence for cyclists to give a recommended gap. Looking carefully at them in situ, the magnets did not line up with the wheels of the bike – so one contact was only partial and the cycle unstable. Using a slightly longer link and ensuring the magnets are the correct way up, to give consistent polarity, will, I hope, give a much better grip. This also makes the polarity consistent with those for the cars.
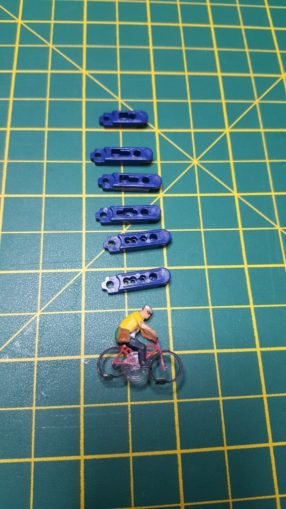
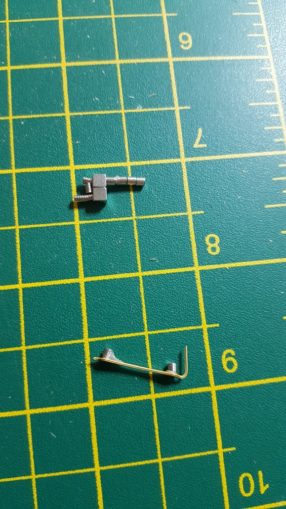
The cars use small sliders that skid along the surface with a tiny prong sticking up that fits into a 1mm hole just behind the front axle. The magnets on the sliders had to be superglued in place and are closer together than cyclists’ wheels (why?!), so cannot use the same points on the chain. I added more magnets at a different point on the chain, ensuring they match polarity and distance, so we can have the Sweeney setup in chase. This image shows a slider with the larger magnets glued on, with a consistent polarity – not easy to hold them down and glue! The bunch above is my stock of magnets, some as small as a full stop.
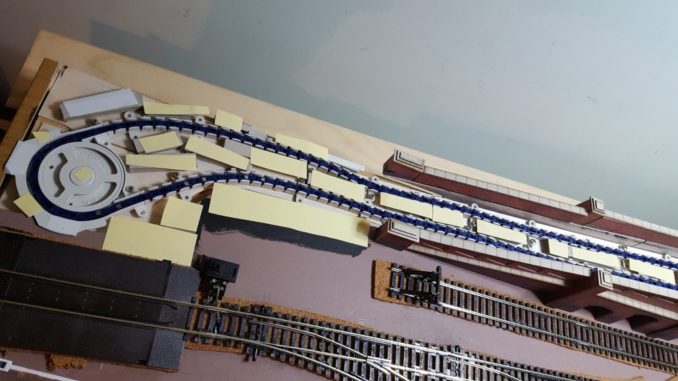
With the road up, I have fixed the chain trough more securely – it was only screwed down every so often, the flexing may have been taking some of the energy out of the motor, which did occasionally lose grip. It was also an opportunity to move the chain trough just a tiny amount to fix a couple of accident points at the top and bottom of the ramp. Next was the more laborious task of reattaching double-sided tape to fix down the road to raised cardboard that is flush with the top of the chain holder. You can see the bright yellow tape cover on each piece of raised cardboard. The tricky bit being separating the sticky tape from it’s protective layer, repeated for each piece.
This time I’ve only gone with one layer, the oven protector and added as much support below ground as possible to avoid flexing. Fingers crossed…
Road re-laid – as few pieces as possible to avoid the troublesome joints, each edge cut by knife rather than fat scissors, so straighter and cleaner.
In this one you can see a slider – the powering device for the cars ahead of the cyclists.
I found the reason for the disconnect at the top of the hill, that caused so many accidents. The single piece for top and half the ramp to avoid a join, was cut straight, but the ramp is one or two degrees out – so not quite parallel to the back of the board. Laying the piece without that twist gives the needed surface. It means a bit added at the back and trimming at the front but much better.
Success!
What next? Trim and neaten the edges and buy more stuff!
Billboards have arrived, so I’ll find some suitable era adverts for them.
I’m still putting off doing the scenery – It shouldn’t be attempted until I’ve done as much as possible that needs work under the board. One such item is installing streetlamps, there are many styles available. I will look for 50’s to cover the possible eras of the layout (50s – 70s).
I’m half inclined to take up the track and modify it. An article I found points out that the sleepers and gaps between them are not to scale, recommending a few are removed and a 6mm gap between each sleeper. Doing so and then filling the gap with a mix of ballast, dirt and greenery can achieve amazing levels of realism.
The only issue there is the track is glued down rather than nailed – and the PVA is pretty strong, probably more than the track itself! One to ponder. Next issue will have an update on options.
I’ll need to come up with a backdrop and fix a board up for that. Possibly a brewery to maintain the theme?
© Sweaty Dave 2018