
We return once more to the land of the lost and weary traveller that is Dingleberry, a curious place of indeterminate location, populated entirely by people who wish they were somewhere else but are unable to leave.
A bit like Slough.
This episode, in a change to the schedule, will not be an overview of the Digital Command Control system, that will come later, but instead considers the initial planning and early construction stages of Dingleberry itself as this is both a bit more visual and maybe slightly more interesting.
First Concept
As previously noted this is all Sweaty Dave’s fault, his articles on both of his layouts left an itch that needed scratching. My first thought was a small “plank” but such bore me, my second was a mahoosive loft layout.. Practicality is not a strong point at Leopard Towers as you may have guessed hence this was scaled back.
This started out as an idea for a 3’x2′ layout, which is small but will be in “N” gauge so smaller than Sweaty Dave’s stuff which is 1:76.2, with N being 1:148 – so roughly half the size in terms of lengths and a quarter in terms of area required – well, mostly.
For “reasons” which are too complicated (“OO” is a bastard gauge that’s really a 4mm to the foot scale running on 3.5mm to the foot scale track) to go into “OO” trains will go around a 15” radius curve typically called 1st Radius. This, in theory, translates to a 7.5” curve in “N”, however in practice 9” in “N” is 1st Radius.
From this the desire for a basic loop, suitable for experimenting with computer-controlled trains will fit, the first iteration of Dingleberry looked like this:
This is a basic loop of track, with an alternative route called a passing loop where one train can pass another, off which there are a pair of small sidings to the left and some more in the middle. Idea was that four or five locomotives could be used to pull two or three small trains around. The diagram shows roughly where colour light signals would go and how the electrical blocks are set out.
While basic, this is actually quite a viable little layout..
but then things grew, in the first instance I realised I could easily expand to 4′ in length, through a few iterations list lead to “Dingleberry Mk4” which looked thus:

Now using the extra length the 4′ board permits the passing loop is more along the rear edge of the board, and the storage sidings have expanded and gained a headshunt, which means a locomotive can shunt the coaches here without blocking a train on the mainline. Likewise the small siding in the middle (intended to be a small locomotive servicing area) have similar for the same reason.
It very obviously became clear the outer headshunt could be extended and combined with the passing loop to have two complete loops so “Mk5” followed a few minutes later, its final version was thus:
These plans were created using “XtrkCad” which is a free download and if you want toy trains well worth getting, it makes it a bit like lego with pre-set bits of track you can use, it made this process very fast.
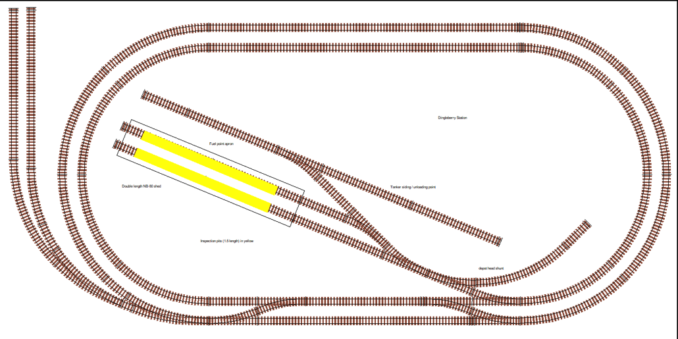
Here we have the ability to run two trains at once, though we have lost the siding headshunt but we can still use the inner track while shunting the sidings. The little depot has gained a kickback siding, intended to provide somewhere for a few fuel tank wagons to sit, everything else being passenger coaches in “the Plan”.
This could work, and I nearly pulled the trigger to start it but I wasn’t happy, indeed I was disgruntled (the 8th dwarf, thrown out during rehearsals). With the 4′ length the sidings to the left are really too short to be useful, but there isn’t anywhere else to put them. I started to wonder, could this be made slightly wider?
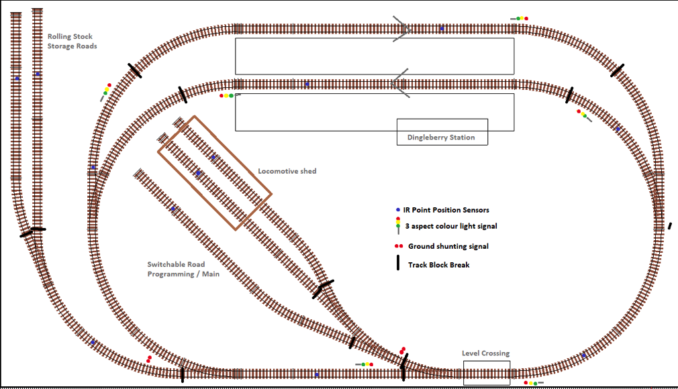
The layout won’t have legs, it will be sitting on a 2′ deep desk, however it could overhang at the front, not too far as I need to be able to get to the back, but I decided to try adding 6” on width, which it turned out added a lot of potential, and resulted in “Dingleberry Mk6”, here shown with a bit of the non-railway stuff added.
The pale yellow cross was a thought towards how to actually build the thing as I wanted to keep sets of points away from this as far as possible.
Now the station has grown, twin track and a passing loop, and a pair of sidings for parcels coaches, of which by this time I owned several. The storage sidings can now accommodate a full train in each and the depot has gained an extra road, specifically to use as a DCC programming track.
Now this isn’t perfect, it still uses the tight 1st radius curves, so some newer models will be unable to run over the inner loop, or indeed over the curved route through the points, but I can run such around the outer loop if desired – so such can be tested which was a design consideration I wanted.
However this fitted, and as such I left it a fortnight, the point being if you come back two weeks later and still like it, well it’s worth a try…
time passes
Ok, I pulled the trigger, ordering most of the required track, and while ordering some other bits from Wickes ordered the wood for the board itself. No. Turning. Back. Now.
As you may remember from Sweaty Dave’s excellent series he used soft stripwood to make a frame and then added Sundela insulation board to the top. This produces a good baseboard, however it’s somewhat heavy, reasonably expensive and there can be issues with the surface not being overly strong – good for what Sweaty Dave wanted, less so for me as Dingleberry shares a desk with other projects so has to be easy to remove – it will be stored standing on its end against a wall.
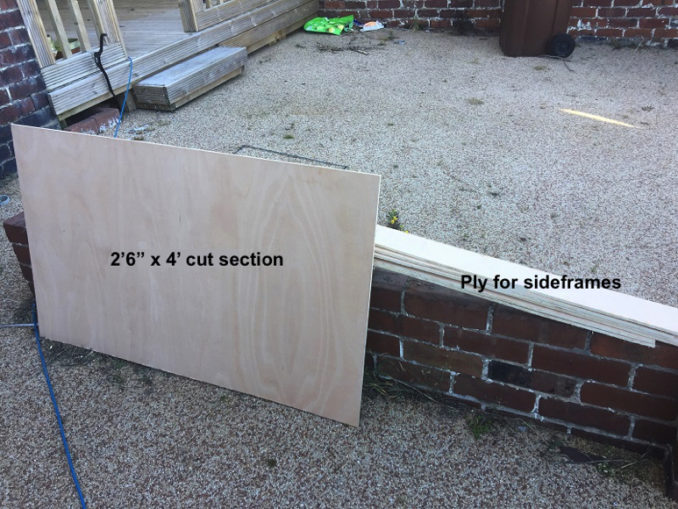
So I needed something lighter, I selected 9mm plywood, I could probably have used 6mm but 9mm seems a good choice initially – I ordered an 8’x4′ sheet of it (well in metric but who uses that?). The plan was to make the deck from a solid section of this, then make a box frame for under it from the same, with some 1” square stripwood to brace corners and screw & glue the lot…
The stuff arrived and one sunny Saturday afternoon I made a start.

The back garden was the place to work, 8’x4′ sheets of wood are a pain, nothing in the garage suitable to hold such and work on it so a low wall was pressed into service, the result was a 4’x2’6” sheet and the 4” deep side framing and 3.5” deep cross bracing for below it.
I do love power tools, a circular saw did this in less time than it took to mark out.
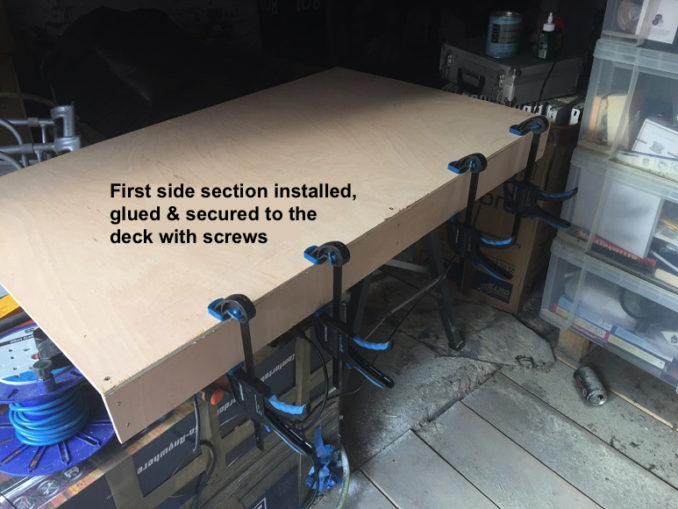
Then it was back to the garage to make a start, firstly two side members were prepared, this meant cutting some 4” lengths of stripwood, three of which were fixed to each side – two screws through, PVA glue and clamped then left to dry for a bit.
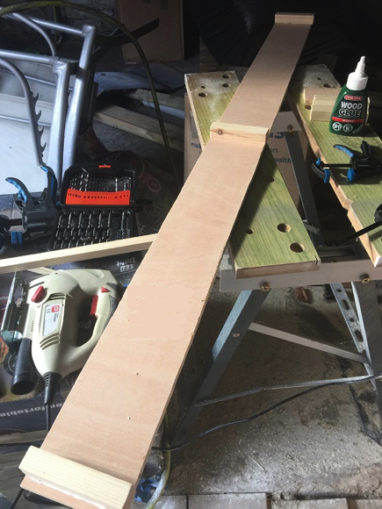
As you can see a small lip is left at the end for the end length to fit into, these cut slightly shorter to fit.
Once built these two were fitting to the base by the light of the setting sun.
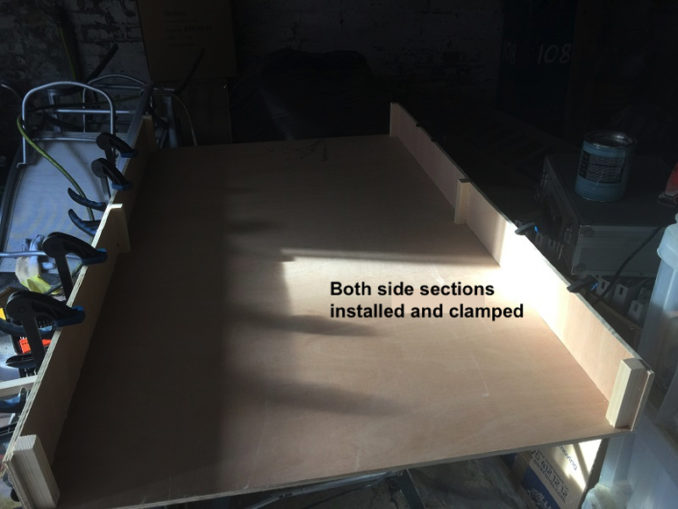
This was then left overnight for the glue to cure and for the sun to come back up (the garage at Leopard Towers lacks both power and lighting, largely why the railway isn’t being built in there in the first place, well that and the roof leaks.
Sunday afternoon saw the ends fitted, again screws and glue, plus some clamps holding it all for a while, left to dry while some of the excellent Ironstone was consumed.
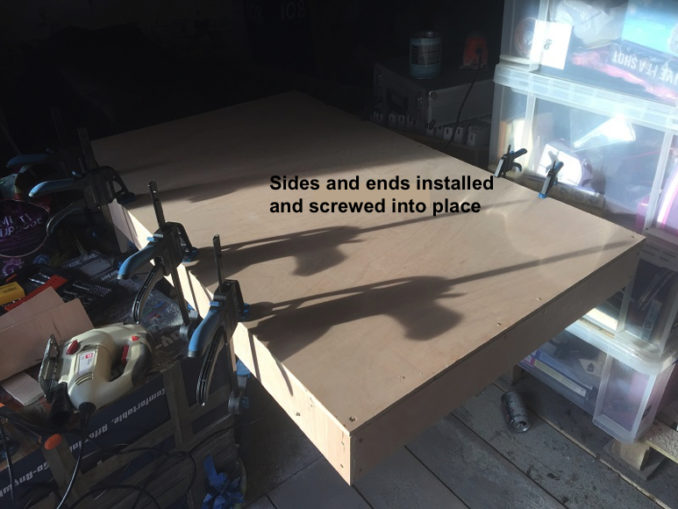
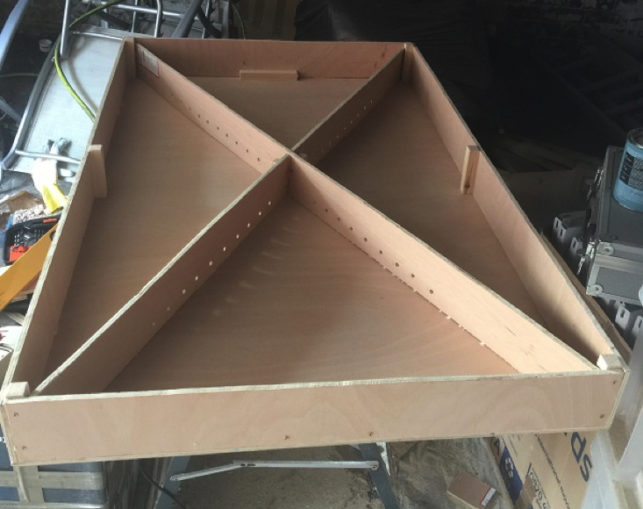
Now this worked, I had a framed deck as a box structure, and it’s quite strong except when twisted it’s very unstable against a diagonal twist, actually made the assembly awkward. I had planned for this and as a result two cross braces were added (the pale yellow lines from the plan, see planning helps sometimes).
End result was this from below
and from the top, in its eventual resting place
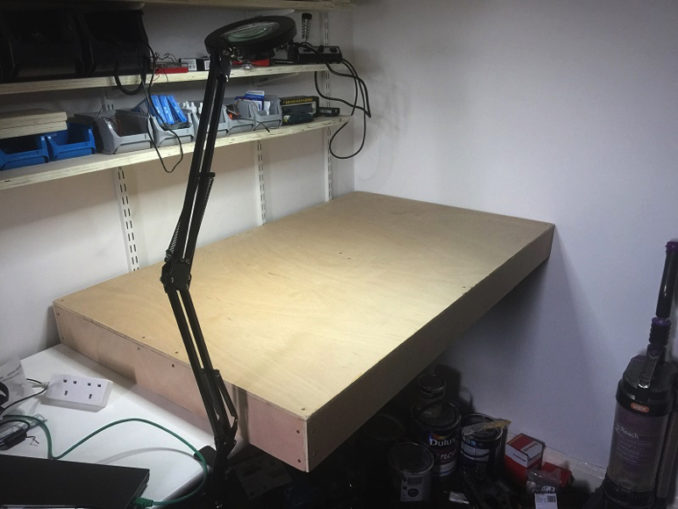
So far so good… not quite, you see while Sweaty Dave had used a form of insulation board, which is good at deadening sound, I’ve used plywood, which is good at amplifying it. I was aware of and had planned for this, the main result of this was to have also ordered some XPS foam sheet, about 5mm thick, which can be glued to the surface, the track plan will be glued to that and the track glued to the top – so no nails through to the wood which will hopefully mitigate the sound somewhat.
This stuff is a lilac colour.. just what’s needed..
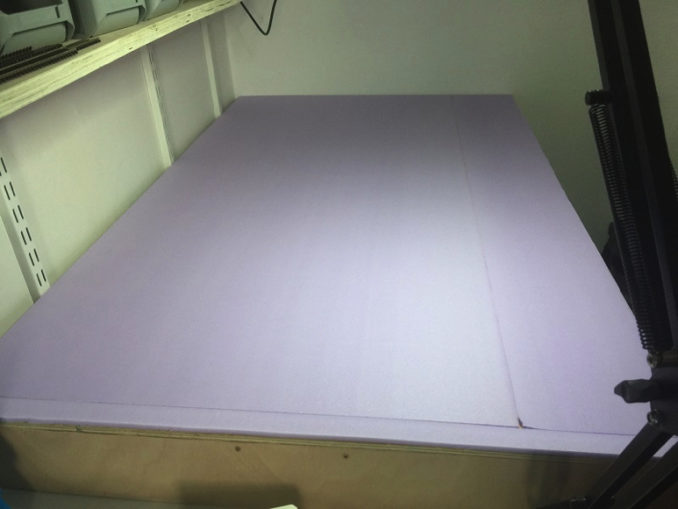
This was in 2′ wide sheets and not quite 4′ long (metric again) hence a few strips were needed but it’s glued down nicely with Copydex latex-based adhesive (again to help with soundproofing as this doesn’t set rock solid).
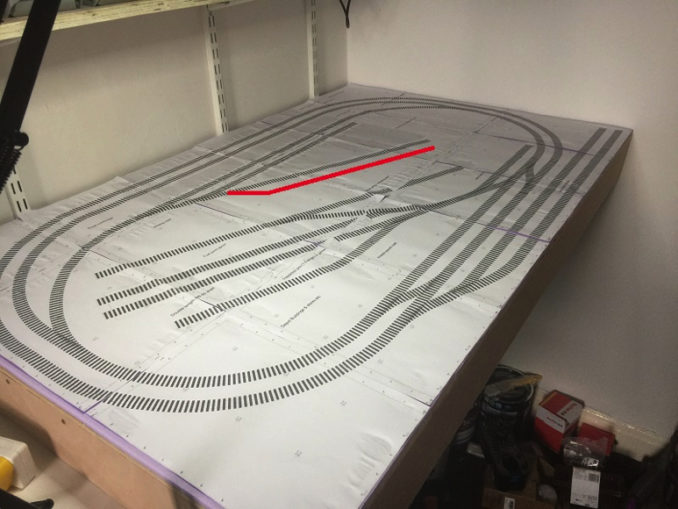
Finally, for this episode the track plan was printed full size (XtrkCad makes this very easy), the plans suitably trimmed and stuck down, if you ignore the red line which was a thought at an addition that’s not going in (probably), this is where Dingleberry got to.
Next time we will look at the first bits of track that has been laid, and how it’s wired up and the points motorised.
WoooooWooooooo!
© Copyright text & photography Leopard 2021
The Goodnight Vienna Audio file

